Trek Grade
Easy - Moderate
Highest Altitude
12,500 ft
Base Camp
Sankri
Best Time
Oct to April
Trek Distance
23 Km
Not sure which trek is right for you? Trekup India’s Mountain Experts have you covered.
Not sure which trek is right for you? Trekup India’s Mountain Experts have you covered. From figuring out if a trek matches your fitness level to knowing who you’ll be trekking with, we’re here to answer all your questions. Reach out to our Mountain Experts and plan your trek with confidence.
Kedarkantha Trek

The Kedarkantha Trek stands out as India’s premier summit experience designed specifically for beginners and first-time Himalayan adventurers. Located in Uttarakhand at 12,500 feet, this six-day journey offers you the perfect combination of manageable challenge and spectacular rewards, making it an ideal introduction to high-altitude trekking.
You’ll discover why this trek has earned its reputation as the “queen of winter treks” through our comprehensive guide covering essential information about difficulty levels, best seasons to visit, and what to expect on each day of your adventure. We’ll also explore what makes Kedarkantha the perfect stepping stone for beginners, from its well-marked trails and moderate difficulty rating to the incredible sense of accomplishment you’ll feel reaching your first Himalayan summit.
Finally, you’ll learn about the trek’s most memorable highlights, including the frozen beauty of Juda ka Talab, 360-degree panoramic views of iconic peaks like Swargarohini and Bandarpunch from the summit, and unique experiences like stargazing through telescopes at high altitude camps.
Trek Specifications: 5-Day Journey Covering 20km at 12,500 Feet Altitude
Your Kedarkantha adventure unfolds over a carefully planned 5-day itinerary, though the actual trekking typically spans 4 to 5 days depending on your chosen route. You’ll cover approximately 20 kilometers of diverse terrain, making it an ideal distance for both beginners and experienced trekkers. The trek reaches its pinnacle at Kedarkantha summit, standing majestically at 12,500 feet above sea level.
This moderate trek distance allows you to gradually acclimatize to the increasing altitude while experiencing the full spectrum of Himalayan landscapes. You’ll traverse through dense deodar and rhododendron forests, cross alpine meadows, and navigate the challenging final ascent to the summit where panoramic views of Mount Swargarohini, Black Peak, Mount Bandarpunch, Ranglana, Gangotri, and Yamunotri ranges await you.
Best Seasons and Months for Trekking Experience
Your timing for the Kedarkantha Trek can dramatically transform your experience. The trek remains accessible year-round except during the monsoon season, but the winter and spring months offer the most spectacular conditions.
December and January, Feb & March stand out as the premier months for your trek, when the entire landscape transforms into a pristine winter wonderland. During these months, you’ll encounter snow-covered trails, frozen alpine lakes, and crystalline mountain views that create an almost magical trekking environment. The snow adds an extra challenge to your ascent, making the summit achievement even more rewarding.
Spring months also provide excellent trekking conditions with clearer weather patterns and moderate temperatures, though you’ll miss the enchanting snow-covered scenery that makes winter treks so memorable.
Why Kedarkantha is the Perfect Beginner Summit Trek
Reputation as the Queen of Winter Treks with Manageable Challenges
Kedarkantha has earned its prestigious title as the “queen of winter treks” for compelling reasons. Unlike many challenging Himalayan peaks, this trek strikes the perfect balance between adventure and accessibility. You’ll find that the trail offers manageable challenges that push you just enough without overwhelming your abilities.
The trek presents what trekkers describe as “thrilling rather than daunting” – a challenge that draws you in rather than holds you back. Many first-time trekkers have successfully completed this journey, with testimonials highlighting how even those with health concerns managed to reach the summit with proper support. The steep sections, particularly on summit day, are challenging but remain within reach for beginners who maintain their pace and stay determined.
Unique Summit Climbing Experience for First-Time Peak Trekkers
Your Kedarkantha journey offers something truly special – the authentic experience of climbing to an actual mountain peak. This isn’t just about reaching a viewpoint; you’re conquering a genuine summit at altitude. The trek provides what few other beginner routes can match: the raw, wild feeling of true mountain climbing.
You’ll catch your first glimpse of the Kedarkantha peak right at the start, creating anticipation that builds throughout your journey. As the trail leads you through beautiful forests before the summit emerges again, you’ll experience the psychological progression that defines real mountaineering. The final push from Bhoja Dadi campsite to the summit involves a tough ascent through winter snow, giving you an authentic taste of what serious peak climbing entails.
360-Degree Panoramic Views of Major Himalayan Peaks
Your reward for reaching the summit is nothing short of spectacular. The 360-degree panoramic views from Kedarkantha’s peak showcase some of the most iconic mountains in the Indian Himalayas. You’ll witness Mt. Swargarohini, the impressive Bandarpoonch massif, Mount Kalanag, and the magnificent Gangotri massif lining the horizon.
These aren’t distant glimpses – you’ll be surrounded by these towering giants, creating a truly immersive Himalayan experience. The summit views provide the perfect culmination to your trek, offering that deeply rewarding moment that makes every challenging step worthwhile.
Perfect Blend of Adventure and Accessibility for Newcomers
What sets Kedarkantha apart is how it introduces you to serious trekking without requiring extensive mountaineering experience. You can tackle this trek even if you’ve never done any trekking before, though some physical preparation 4-5 weeks in advance is recommended if you lead a sedentary lifestyle.
The accessibility extends beyond just the physical demands. Everything you need – from trekking shoes to jackets, headlamps to snowshoe spikes – can be rented locally in Sankri village. This means you can experience a genuine Himalayan adventure without massive upfront equipment investments.
The trek structure itself supports beginners beautifully. Starting around 2:30-3:00 AM on summit day, you’ll have proper gear provided including essential items like gaiters for the snow-covered, slippery sections. While some trekkers do turn back at challenging points like the Tea Point halfway up the summit trail, the route is designed to give you multiple opportunities to assess your comfort level and make informed decisions about continuing.
Trek Cost
-
From Dehradun to Dehradun
-
Pickup time 6.30 A.M from Prince Chowk, Near Dehradun Railway Station
Fix Departure Dates!
Trek Cost Inclusions and Exclusions!
Trek Cost Inclusions
Stay:
3 nights of comfortable tented accommodation at Trekup India’s designated campsites on a triple-sharing basis.
1 night stay at Trekup India’s Luxury Hotel in Sankri sharing basis, offering a cozy and traditional mountain experience.
Meals:
Freshly prepared, nutritious, and vegetarian meals provided by Trekup India — starting with evening snacks and dinner on Day 1 and ending with breakfast on Day 5.
All meals are simple yet wholesome, designed to keep trekkers energized throughout the journey.
Transport:
Dehradun to Sankri and return to Dehradun transportation is inclusive in the trek cost.
Trek Insurance ( Highly Recommended):
Trekup India strongly advises trekkers to opt for Trek Insurance to cover unforeseen circumstances during the trek.
Plans start at ₹190 and provide essential coverage for emergencies.
Please read more about what is included in the policy and why trek insurance is highly recommended.
Trek Equipment:
High-quality sleeping bags, sleeping tents, kitchen tents, dining tents, and toilet tents provided by Trekup India.
Amenities:
All essential camping gear and utilities, including utensils, sleeping mattresses (black foam mats), crampons, and gaiters for snow treks.
Health & Safety:
Comprehensive safety measures with first aid kits, oxygen cylinders, stretchers, oximeters, BP monitors, and a dedicated health support team.
Permits:
All forest permits and camping permission fees are included in the trek cost.
Trek Crew:
A professional and experienced team including a Trek Leader, Guides, High-Altitude Chef, Helpers, and Support Staff to ensure a smooth and safe trekking experience.
Porters & Mules:
Porters and mules are provided to carry common trekking equipment, rations, and other supplies.
Trek Cost Exclusions
GST (5%)
Mandatory and applicable on the total trek cost.
Meals and Accommodation:
Any meals or accommodation not mentioned in the itinerary or outside the scheduled program.
Travel to/from Base Point:
Bus, train, or airfare to and from the trek start or end point (Dehradun/Sankri) is not included.
Personal Medical Expenses:
Any personal medical expenses. Trekkers are advised to carry their prescribed medications and personal first-aid items.
Personal Services:
Laundry, phone calls, beverages, bottled/mineral water, or any other personal expenses.
Camera Fees:
Still or video camera charges at monuments, monasteries, museums, or temples to be paid directly on the spot.
Entrance Fees:
Any entry fees for monuments, monasteries, museums, or temples are not included and must be paid by the participant directly.
Backpack Offloading (Optional):
Offload Charges: ₹1,680 per bag for the full trek if paid online in advance.
On-spot Payment: Charges may increase by up to 30% if paid at the base camp.
Weight Limit: Each bag must not exceed 10 kg.
Note: Offloading is optional and recommended for those who prefer trekking with a lighter daypack.
Emergency Evacuation:
Any costs incurred due to emergency evacuation, rescue operations, or medical assistance.
Other Exclusions:
Any services or expenses not mentioned in the “Trek Cost Inclusions” section.
Kedarkantha Trek Videos
Videos by experts watch these videos to prepare well for a Successful Trek

Want To Trek Like Pro?
Basically, watch these videos if you want to trek the same way professional trekkers do and make your skills better. These videos contain useful tips and techniques to further improve your trekking skills itself. These videos actually help both new and experienced trekkers improve their trekking skills. These videos definitely provide useful tips that make your trek better. We are seeing that these videos by Trekup India experts will only help you make your trekking skills better.


Know Everything About Acute Mountain Sickness
Acute Mountain Sickness occurs when people trek to high altitudes above 8,000 feet. This condition itself develops further due to reduced oxygen levels at such heights. Basically, as you go higher up, the air pressure and oxygen levels decrease, which causes the same problem. Acute Mountain Sickness surely causes headache, nausea, vomiting, and dizziness in affected persons. Moreover, peoples also experience difficulty in sleeping during this condition. To avoid mountain sickness, you should actually trek up slowly to higher altitudes. To learn further about this condition itself, watch the videos by Trekup India.


Day Wise Detailed Itinerary of Kedarkantha Trek
Day 1: Pickup From Dehradun and Drive to Sankri
- Drive Distance: 220 km | Duration: 10 hrs
- Pickup from Prince Chowk, Dehradun Railway Station at 6:30 AM (Bolero/Innova/Tempo Traveller/Bus).
- Arrive at Sankri (6,400 ft) by 5:00 PM.
- Network: Jio & BSNL available.
- Stay: Guesthouse or hotel.
Your trek begins from Dehradun, the gateway to the Garhwal Himalayas. All trekkers are required to arrive in Dehradun before 6:00 AM, as our journey to Sankri — the base camp for the Kedarkantha Trek — departs promptly at 6:30 AM.
The drive from Dehradun to Sankri covers a distance of approximately 220 kilometers and takes around 8 to 10 hours, depending on road and weather conditions. The entire route runs along National Highway 123 and is one of the most scenic drives in Uttarakhand.
As you leave the bustling city behind, the landscape gradually transforms into lush greenery, winding mountain roads, and charming hill villages. The journey takes you through picturesque valleys, terraced farms, and dense forests of pine and oak — offering glimpses of the tranquil mountain life that awaits you.
About 22 kilometers before reaching Sankri, the scenery becomes even more captivating as you enter the region surrounding the Govind Pashu Vihar National Park. This protected area is renowned for its rich biodiversity and rare Himalayan flora, some of which are found only in this region.
The final stretch to Sankri is particularly beautiful — a serene drive through towering deodar forests, sparkling streams, and majestic mountain backdrops that give you your first real taste of the Himalayas.
By the time you reach Sankri (altitude: 1,920 m / 6,400 ft), you’ll be surrounded by the charm of a quaint Himalayan village, setting the perfect tone for your upcoming adventure into the mountains.
Day 2: Sankri to Juda Ka Talab (Altitude: 9,100 ft)
- Altitude Gain: 2,700 ft
- Trek Distance: 4 km
- Trek Duration: 2.5–3 hours
Your trekking adventure truly begins today as you leave behind the village of Sankri (6,400 ft) and set out toward Juda Ka Talab (9,100 ft). The total trek distance is approximately 5 km, which takes around 4–5 hours to complete, depending on your pace and fitness level.
The trail to Juda Ka Talab is one of the most scenic and rewarding parts of the Kedarkantha trek. It offers a diverse blend of landscapes — from dense forests to open clearings, and from rustic wooden huts to stunning Himalayan views.
The Trail Experience
The trek starts with a gentle ascent through a forest of pine and maple trees, where sunlight filters softly through the leaves. As you move higher, the forest deepens, and the trail winds through dense oak and deodar woods, alive with the sounds of mountain birds and rustling leaves.
You’ll come across a few beautiful wooden huts and grazing pastures along the way — reminders of the simple mountain life that thrives in these remote areas. Depending on the season, you may also encounter patches of ice or slush on the trail, but your Trekup India guides will be there to assist you every step of the way.
Arrival at Juda Ka Talab
As you near your destination, you’ll witness a breathtaking sight — Juda Ka Talab, a stunning high-altitude lake surrounded by thick pine and oak forests. On one side, the water reflects the towering trees like a mirror, and on the other, snow glistens gently under the sunlight.
During summer, you’ll find lukewarm water near the edges of the lake, while the center remains cold and crystal clear. In winter, the entire lake transforms into a solid sheet of ice, creating a surreal and mesmerizing landscape — one of the highlights of the Kedarkantha trek.
Interestingly, the lake also has a natural water outlet that supplies fresh water to nearby villages — a wonderful example of nature’s harmony with local life.
Wildlife Encounters
Keep your eyes open as you trek — this region is home to Himalayan langurs, wild boars, hares, and pine martens. Spotting them in their natural habitat is a rare and delightful experience. The langurs, in particular, are shy and often seen leaping gracefully between tall trees.
Evening at the Campsite
Upon reaching Juda Ka Talab campsite, you’ll be greeted by the tranquil setting of the lake and the surrounding forests. As the sun sets behind the mountains, enjoy a hot, nutritious dinner prepared by our team while you relax beside a cozy campfire (weather permitting).
The night stay will be in comfortable alpine tents, where you can fall asleep under a sky full of stars and the soothing silence of the Himalayas — a perfect end to your first day on the trail.
Day 3: Juda Ka Talab to Kedarkantha Base Camp (Altitude: 11,250 ft)
- Altitude Gain: 2,150 ft
- Trek Distance: 4 km
- Trek Duration: 2.5–3 hours
Wake up early to witness one of the most mesmerizing sights of your trek — the sunrise over Juda Ka Talab. The first rays of sunlight reflecting off the frozen or glistening lake, surrounded by tall pine trees, create a scene so stunning it will stay etched in your memory forever.
After breakfast, we begin our trek toward the Kedarkantha Base Camp (11,250 ft). The trail from Juda Ka Talab to the base camp (Lohasu) covers a distance of around 4 km and takes approximately 2.5 to 3 hours to complete at a moderate pace.
The Trail and Terrain
The journey starts once again through the dense pine and oak forest, with the path gradually becoming steeper as you ascend. Along the way, your Trekup India trek leader will demonstrate important techniques for walking safely on snowy slopes, including how to place your feet, maintain balance, and use your trekking pole effectively.
As you continue upward, you’ll cross steep ridges and open forest clearings that offer glimpses of snow-dusted trees and valleys far below. Around 10,400 feet, you’ll begin to notice patches of snow along the trail — a magical sign that you’re entering the higher Himalayan zone.
Scenic Highlights
As you approach the base camp, the landscape opens up to panoramic views of the snow-capped Himalayan ranges. The sight from here is nothing short of breathtaking — a vast amphitheater of towering peaks standing tall in all their glory.
From the Kedarkantha Base Camp, you can see the Bandarpoonch, Swargarohini, Kala Nag, and Ranglana ranges, their arc-shaped snow ridges gleaming under the sunlight. These majestic mountains seem to rise endlessly into the sky, offering a humbling reminder of nature’s grandeur.
The Kedarkantha Base Camp itself sits in a wide meadow surrounded by snowfields during winter. It’s an ideal spot to relax, acclimatize, and take in the magnificent mountain views that await before the final summit climb.
Evening at the Campsite
By evening, you’ll reach the campsite and settle into your tents. As the temperature drops, enjoy a hot, freshly cooked dinner served under a starlit Himalayan sky. The stillness of the mountains and the crisp air make this night at Kedarkantha Base Camp one of the most peaceful moments of the trek.
Get a good night’s rest — tomorrow is the most awaited part of your journey: the Kedarkantha Summit Day.
Day 4: Kedarkantha Base Camp to Summit (12,500 ft) and Descend to Hargaon
- Altitude: 12,500 ft
- Trek Distance: 6 km
- Trek Duration: 6–7 hours
Today is the most awaited and rewarding day of your entire trek — the Kedarkantha Summit Day. It’s also one of the longest and most demanding days, as you’ll be trekking from 11,250 ft to 12,500 ft, covering approximately 6 km in about 7 hours. The trail becomes steeper as you approach the peak, so be mentally and physically prepared for the challenge.
The Ascent to Kedarkantha Summit
The trek begins early in the morning, usually before sunrise, to ensure you reach the summit in time to witness the magnificent Himalayan sunrise. As you ascend through the snow-covered slopes, the surrounding landscape transforms dramatically — the soft morning light painting the snow in hues of gold, pink, and orange.
The trail winds through a mix of pine forests and open snowfields, gradually revealing panoramic views of majestic Himalayan peaks. Every step brings you closer to a horizon that feels endless and divine.
Along the way, your Trekup India guides will assist you in navigating the steep stretches and ensure everyone reaches the summit safely and comfortably.
The Legend of Kedarkantha
According to local legend, the name Kedarkantha holds deep spiritual meaning. It is believed that the villagers once began constructing the Kedarnath Temple atop this very peak. However, as they worked, they heard the cry of an animal — considered an omen signifying divine intervention.
Believing it to be Lord Shiva’s will, they stopped construction immediately. By that time, the idol of Lord Shiva had been completed only up to the neck — and in Hindi, “kanth” means neck, while “Kedar” is another name for Lord Shiva. Hence, the mountain came to be known as Kedarkantha – the Throat of Lord Shiva.
At the Summit
Reaching the Kedarkantha summit (12,500 ft) is an unforgettable experience. From here, the 360-degree view of the Himalayas is truly awe-inspiring. You can see Bandarpoonch, Swargarohini, Kala Nag, Gangotri, and Yamunotri ranges standing tall and majestic, their snow-clad peaks glistening under the sunlight.
At the summit, you’ll also find a small temple dedicated to Lord Shiva and Goddess Parvati, along with a shrine of Lord Ganesha. Many trekkers spend a few peaceful moments here, soaking in the silence, beauty, and spiritual energy of the mountains.
The sense of accomplishment, combined with the breathtaking scenery, makes this moment one of the most emotional and memorable highlights of the trek.
Descent to Hargaon
After spending some time at the summit and capturing memories, you’ll begin your descent back toward Hargaon Campsite (8,900 ft). The journey downhill takes around 3–4 hours and offers new perspectives of the landscape you climbed earlier.
Upon reaching Hargaon, you’ll settle into your campsite surrounded by serene pine forests and open meadows. Enjoy a warm, delicious dinner and share your summit-day stories with fellow trekkers under a starlit Himalayan sky.
This night at Hargaon will feel peaceful and deeply satisfying — the perfect way to conclude a day of achievement, adventure, and connection with nature.
Day 5: Hargaon to Sankri (6,400 ft) and Drive Back to Dehradun
- Altitude Loss: 2,500 ft
- Trek Distance: 6 km
- Trek Duration: 3–4 hours
- Drive Distance To Dehradun: 220 km
- Drive Duration: 8–10 hours
Your final day on the Kedarkantha Trek begins with a serene morning at Hargaon Campsite (8,900 ft). Wake up early to witness the sunrise streaming through the pine trees, casting golden light over the forest — a perfect farewell from the Himalayas.
After breakfast, you’ll begin your descent from Hargaon to Sankri (6,400 ft). The trail covers approximately 6 km and usually takes 2 to 4 hours, depending on your pace and the trail conditions.
The Descent
The trek back to Sankri is relatively easy and enjoyable, allowing you to truly appreciate the beauty of the surroundings without the effort of climbing. As you descend, you’ll pass through dense pine and oak forests, with glimpses of distant snow-capped peaks peeking through the trees.
It’s the perfect time to pause occasionally, take photos, and soak in the peace of the mountains one last time. Every turn and every trail seems to echo the experiences of the past few days — the laughter, challenges, and moments of awe shared with your fellow trekkers.
By late morning or early afternoon, you’ll arrive back in Sankri, the quaint mountain village where your journey began. Sankri is also the starting point for other famous treks such as Bali Pass, Borasu Pass, and Har Ki Dun, making it a well-known hub for adventure lovers.
Drive Back to Dehradun
After reaching Sankri, it’s time to pack your bags and begin your drive back to Dehradun. The journey covers around 220 km and takes approximately 8 to 10 hours, winding through the scenic valleys, pine forests, and small mountain towns you passed on your way up.
We’ll aim to leave Sankri by early afternoon so that you reach Dehradun between 8:00 PM and 9:00 PM.
Important Travel Note
If you plan to travel onward from Dehradun to your hometown on the same night, please keep a buffer of at least 1 to 3 hours when booking your bus, train, or flight tickets. Mountain roads can sometimes have traffic delays or weather-related holdups, and it’s best to plan ahead for a stress-free journey home.
A Heartfelt Farewell
As you drive back to Dehradun, take a moment to reflect on your incredible adventure — the snowy trails, the serene forests, and the panoramic Himalayan views. You’re not just returning home with memories, but with stories, friendships, and experiences that will stay with you for a lifetime.
The Kedarkantha Trek may end here, but its magic will continue to inspire you long after the mountains fade from view.
We’ve prepared a comprehensive Trek Route Map for your upcoming adventure to Kedarkantha, designed to give you a clear understanding of the entire journey — from the starting point to the summit and back.
This map highlights all major stops, trails, elevation points, and landmarks along the route. It also includes detailed information about the terrain, distance between campsites, and estimated travel times, helping you plan your trek efficiently and stay well-prepared throughout.
Each detail has been carefully curated to ensure you have all the essential information at your fingertips for a smooth and safe trekking experience.
We recommend reviewing the route map thoroughly before your trek. If you have any questions or need further clarification, feel free to reach out to our Trekup India support team — we’re always here to help you prepare for your journey with confidence.

The Kedarkantha Trek Altitude Chart is a valuable reference for trekkers to track altitude changes throughout the journey. It helps you understand the elevation gain at each stage of the trek, plan your pace effectively, and monitor your body’s response to higher altitudes.
This chart is especially useful for both first-time trekkers and experienced adventurers, as it allows you to prepare better, manage acclimatization, and make the most of your Himalayan experience. By referring to the altitude chart, trekkers can visualize the gradual ascent and descent of the trail, ensuring a safe and well-paced trekking journey.

What should you pack for the Kedarkantha Trek?
The Kedarkantha Trek is a high-altitude Himalayan trek, and the gear you carry plays a vital role in ensuring your comfort, safety, and overall trekking experience. The equipment required for this trek is slightly different from what you might need for a regular or low-altitude trek, so it’s important to be well-prepared.
One of the most common questions trekkers ask is:
“What should I pack for the Kedarkantha Trek?”
To make it simple and easy to remember, we’ve organized this gear checklist from head to foot — covering everything you’ll need for a smooth and enjoyable journey.
Read this section carefully to ensure you have all the essential clothing, gear, and accessories required for a safe and comfortable trek in the mountains.


Head Gears
When trekking it's important to carry headgear to protect your head and face.
Heading out for a trek? Don’t forget to pack the right headgear — it’s one of the most important parts of your trekking gear. Proper head protection shields you from the sun, wind, cold, and dust, keeping you safe and comfortable throughout your adventure.
Below are the essential headgear items you should carry for your Kedarkantha Trek and other high-altitude journeys:
1. Headlamp
A headlamp is an absolute must-have, especially for early morning hikes or nighttime walks around the campsite. It allows you to illuminate your path while keeping your hands free — essential for navigating uneven terrain or setting up camp in the dark.
Headlamps come in various brightness levels (lumens) and designs. Choose one that’s lightweight, has a comfortable head strap, and offers sufficient brightness (around 200–300 lumens is ideal for trekking). Always carry extra batteries or a fully charged power source.
2. Hat or Cap
A cap or hat is vital for protection against changing mountain weather conditions.
During the day, a wide-brimmed hat helps shield your face and neck from direct sunlight and UV exposure.
At night or in cold conditions, a warm woollen or fleece cap protects your head and ears from freezing winds.
Choose a hat with an adjustable strap so it doesn’t get blown away by strong mountain winds.
3. Sunglasses
Your sunglasses are more than just a style accessory — they are essential for eye protection at high altitudes. Snow, ice, and bright sunlight can cause snow blindness or severe glare discomfort.
Opt for UV-protected, wraparound sunglasses that stay secure on your face while you climb or move through rugged terrain. For snow treks, category 3 or 4 lenses are highly recommended as they provide the best protection against intense sunlight and glare.
4. Buff or Balaclava
A buff or balaclava is one of the most versatile and useful accessories you can carry. It helps protect your face, neck, and ears from cold winds, dust, and harsh sunlight.
Depending on the weather, you can wear it as a neck warmer, face mask, or headband. Choose one made of quick-dry, breathable material for warmer weather and fleece-lined for colder conditions.
Final Tip
The weather in the Himalayas can change quickly — from bright sunshine to icy winds within minutes. Carrying the right headgear ensures that you stay comfortable, protected, and prepared for every condition you encounter on the trail.
With these essential items, you can trek confidently and safely, no matter the weather or time of day.
Clothes
When trekking in high altitudes, prepare for cold weather by wearing layers. Layering traps heat, keeps you warm, and allows you to easily adjust your clothing as temperatures fluctuate.
When trekking in the Himalayas, layering is one of the most effective ways to stay warm, dry, and comfortable. Mountain weather can change within minutes — bright sunshine in the morning can turn into cold winds or snowfall by afternoon. Wearing multiple layers not only provides better insulation but also gives you flexibility to adjust according to temperature changes.
Layering helps trap heat close to your body while allowing moisture to escape, keeping you warm without overheating. With the right combination of layers, you can trek comfortably and safely, no matter the season.
Recommended Layering for Different Seasons
Spring, Summer & Monsoon Treks:
Wear three layers – a woollen sweater, a fleece, and a padded jacket.
Autumn Treks:
Add one extra layer to make it four layers – woollen sweater, two fleeces, and a padded jacket.
Winter Treks:
Go for five layers – thermal base layer, woollen sweater, two fleeces, and a padded/down jacket.
This combination keeps you comfortably warm even in sub-zero temperatures.
Essential Clothing Items
1. T-Shirts / Long-Sleeve Shirts
Carry three quick-dry T-shirts and two pairs of trek pants.
Wear one set and keep the rest as backup.
Long-sleeve synthetic shirts protect your skin from sunburn and UV rays.
Synthetic or dry-fit materials are highly recommended since they dry faster and wick away sweat efficiently.
2. Trekking Jacket
Carry a warm, insulated jacket that can withstand temperatures between -5°C to -10°C.
A down jacket or a two- to three-layer waterproof jacket works best.
It should be lightweight, windproof, and comfortable to pack.
3. Thermals (Base Layer)
Bring at least two pairs of thermal wear — one for trekking and one for sleeping.
Thermals act as the base layer, trapping body heat and keeping you warm in cold conditions.
Choose moisture-wicking thermals for comfort during long hours of trekking.
4. Undergarments
Carry undergarments according to your personal comfort and hygiene preferences.
Opt for breathable, quick-dry materials instead of cotton, which can retain moisture.
5. Gloves
A good pair of warm, insulated gloves is essential to protect your hands from cold winds and frost.
Choose gloves with grip-friendly palms for ease while handling trekking poles or zippers.
6. Trek Pants
Bring 2–3 pairs of comfortable trekking pants.
Quick-dry, stretchable, synthetic materials are ideal as they dry quickly if wet and allow freedom of movement.
Avoid jeans or heavy cotton trousers — they restrict movement and take a long time to dry.
7. Rainwear
Mountain weather is unpredictable, and sudden rain or snowfall is common. Always carry rain protection such as:
A raincoat with a waterproof hood, or
A poncho, which covers both you and your backpack.
Tip:
If you choose a raincoat, carry a small waterproof backpack cover to protect your belongings. If you carry a poncho, it usually offers complete protection for both you and your gear.
Final Advice
Layering smartly ensures you can adapt to any weather condition — removing layers as you heat up and adding them back when temperatures drop. Investing in good-quality, quick-dry, and breathable trekking clothes makes a huge difference in your comfort and overall experience on the trail.
With the right layers, you’ll stay warm, dry, and ready to enjoy every moment of your Himalayan adventure.
Foot Gears
When it comes to planning a trek, one of the most important aspects is to ensure that you have the right kind of foot gear.
Choosing the right footwear is one of the most important parts of trek preparation. The right pair of shoes and socks will keep your feet comfortable, supported, and blister-free throughout the journey. Here’s what you should carry for your Kedarkantha Trek or any high-altitude Himalayan adventure:
1. Trekking Shoes
A pair of waterproof trekking shoes with good ankle support is essential. These shoes protect your feet from cold, moisture, and uneven terrain while providing stability during ascents and descents.
When selecting trekking shoes:
Ensure they are water-resistant and have deep traction soles for grip on snow or rocky trails.
Choose ankle-length shoes for better protection and support.
Break them in before the trek to avoid discomfort or blisters.
2. Walking / Hiking Sandals
Carry a pair of lightweight hiking sandals to use around the campsite — especially in the morning or evening after a long day of trekking. They allow your feet to relax and breathe after wearing heavy boots all day.
These sandals are also useful for river or stream crossings, offering better safety and comfort than going barefoot or wetting your trekking shoes.
3. Sneakers (Optional)
A pair of comfortable sneakers can be useful for casual wear during travel days, short walks, or time spent at the base camp. They are not meant for trekking but can give your feet a break when you’re off the trail.
4. Socks
Carry at least 3 to 4 pairs of trekking socks.
Use woollen or synthetic socks for warmth and moisture control.
Avoid cotton socks, as they retain sweat and can cause blisters.
Keep one pair exclusively for sleeping at night to stay warm and dry.
5. Microspikes & Gaiters
You do not need to carry microspikes or gaiters yourself.
Trekup India will provide both items when required — especially on snowy or slippery sections of the trail. These ensure better traction and help prevent snow or debris from entering your shoes.
Pro Tip:
Before packing, make sure your shoes are well-fitted, waterproofed, and tested for comfort. Proper footwear can make the difference between an enjoyable trek and a painful one.
Personal First Aid Kit
Don't forget to pack your personal first aid kit! It's always better to be safe. So, make sure you're prepared for any unforeseen circumstances.
Your health and safety are Trekup India’s top priorities. While we always carry a comprehensive first-aid kit on every trek, we recommend that each trekker carry a personal medical kit with basic essentials. This ensures you’re prepared to handle minor health issues that may arise during your journey.
Below is a list of commonly used medicines and first-aid items. However, please consult your doctor before purchasing or taking any medication, especially if you have existing medical conditions or allergies.
Recommended Medical & First-Aid Items
Antiseptic Wipes or Water Syringe: For cleaning cuts and wounds.
Butterfly Bandages: For treating small cuts or skin tears.
Cotton, Elastic Bandages, and Sterile Gauze Pads: For dressing larger wounds or blisters.
Latex Gloves: Useful when handling wounds that are bleeding.
Medication for Diarrhea / Upset Stomach: To manage mild food-related stomach issues.
Cold, Flu, and Fever Medicine: For treating common cold symptoms or mild fever.
Painkillers / Analgesics: For headaches, joint pain, or body aches.
ORS (Oral Rehydration Salts): To prevent dehydration caused by high altitude or physical exertion.
Pain Relief Spray (External Use): For quick relief from muscle or joint pain.
Personal Prescription Medicines: Any specific medications prescribed by your doctor.
Diamox (Acetazolamide) or Similar: To prevent or manage high-altitude sickness — only after doctor consultation.
Insect / Bug Repellent: To protect against insect bites during camping or evening hours.
Energy / Nutrition Bars and Hydration Drinks (Non-Alcoholic): To maintain energy levels during long trekking hours.
Important Note:
Always consult your doctor before taking any medication or starting altitude-related preventive treatments such as Diamox. Inform your trek leader about any existing medical conditions or allergies before starting the trek.
Gadgets and Other Items
You might also consider bringing a camera, binoculars, portable charger, and snacks. Be well-prepared and tackle any trail with confidence.
In addition to clothing and footwear, carrying the right set of accessories and essentials can make your trekking experience smoother, safer, and more enjoyable. These small yet important items add convenience and ensure you’re well-prepared for all situations in the mountains.
Here’s a list of must-have accessories for your Kedarkantha Trek:
1. Trekking Poles
A trekking pole (or a pair) provides excellent balance and stability, especially on steep ascents and descents. It reduces the strain on your knees and improves endurance on long trails. Adjustable, lightweight aluminum poles are ideal for high-altitude treks.
2. Mobile Phone & Camera
Carry your mobile phone and camera to capture the breathtaking landscapes along the way.
Keep them protected in a waterproof pouch or zip-lock bag to prevent moisture damage.
A lightweight, compact camera works best for mountain conditions.
3. Spare Batteries & Power Bank
Cold temperatures can drain batteries quickly.
Carry extra batteries for your camera and a fully charged power bank for your phone.
It’s advisable to switch off electronic devices when not in use to conserve power.
4. Headlamp or Flashlight
A lightweight headlamp or flashlight is essential for moving around the campsite after dark or during early morning treks.
A headlamp is preferable as it keeps your hands free.
Always carry extra batteries or a rechargeable option.
5. Waterproof Bags / Plastic Covers
Pack your camera and electronic devices in waterproof bags or dry pouches to keep them safe from rain, snow, and moisture.
Use small plastic bags to organize clothes and accessories inside your backpack.
6. Plug / Power Adapter
Carry a universal plug converter or adapter for charging your electronic items, as plug points may vary across hotels or lodges en route.
7. Water Bottle
Carry at least a 1-litre reusable water bottle or a hydration bladder. Staying hydrated is crucial during high-altitude treks.
You can also bring water purification tablets or a small filter if you prefer to refill from natural sources.
8. Journal & Pen
Keeping a travel journal is a wonderful way to record your daily experiences, reflections, and memories during the trek. It also helps track your progress and route details.
9. Reading Material / Book
A small book of your interest is perfect for quiet evenings at the campsite or rest days. It helps you unwind and enjoy peaceful moments amidst nature.
10. Map & Guidebook
Get into the habit of carrying and maintaining a physical map or guidebook of the trekking region. Even if you have digital navigation, a printed map can be invaluable in areas with no network connectivity.
Pro Tip:
Keep all important accessories in waterproof pouches or zippered compartments inside your backpack. Labeling and organizing them neatly will make it easier to access what you need quickly on the trail.
Hygiene & Personal toiletry
Remember to pack hygiene and personal toiletry items such as soap, shampoo, toothbrush, toothpaste, deodorant, and toilet paper.
Maintaining personal hygiene during a trek is just as important as carrying the right gear. Good hygiene helps you stay healthy, comfortable, and refreshed, even in remote mountain conditions where facilities may be limited.
Here’s a list of essential personal care and toiletry items to pack for your Kedarkantha Trek:
1. Sunscreen Lotion
Carry a high-SPF sunscreen (30 or above) with UV protection to shield your skin from harmful sun rays. The sunlight at high altitudes can be intense, even on cloudy days.
2. Quick-Dry Towels
Pack 1–2 small, lightweight, quick-dry towels. They dry faster than regular towels and are useful after washing up, rain exposure, or sweating during the trek.
3. Tissues, Wet Wipes, and Toilet Paper
Keep a supply of toilet paper, tissues, or wet wipes to maintain personal hygiene on the trail. These are essential, especially when washroom facilities are limited.
(Tip: Always dispose of them responsibly or carry biodegradable options.)
4. Oral Hygiene Essentials
Bring your toothbrush, toothpaste, and a small mouth freshener to maintain oral hygiene and keep your breath fresh throughout the journey.
5. Deodorant / Talcum Powder
A small deodorant spray or talcum powder helps you stay fresh and odor-free, particularly during warm or humid days. Choose travel-size, non-aerosol options for easy packing.
6. Shampoo & Soap
Carry a small bottle of shampoo and a biodegradable soap to stay clean without harming the environment. These are perfect for quick washes or campsite showers if available.
7. Sanitary Products (for Female Trekkers)
Female trekkers should carry enough sanitary pads or tampons to manage their menstrual cycle comfortably. Always pack extra in case of delays and carry them in discreet, zip-lock bags for proper disposal.
8. Lip Balm / Salve
Cold winds and high-altitude air can cause dry or chapped lips. A moisturizing lip balm or petroleum jelly helps keep your lips soft and hydrated.
9. Nail Clipper & Personal Items
A nail clipper and a few basic personal grooming tools ensure you stay neat and comfortable throughout the trek.
Pro Tip:
Keep all toiletry items in a small waterproof pouch to prevent spills inside your backpack.
Use biodegradable and eco-friendly products to minimize your environmental impact in the mountains.
Final Note
By packing these personal hygiene essentials, you can ensure a comfortable, clean, and refreshing trekking experience — no matter how remote the trail. Staying hygienic not only enhances comfort but also helps prevent infections and fatigue during your journey.
Compulsory Documents to Carry
There are certain documents that you should always carry with you. These documents are not only necessary for your safety and security, but they may also be required by local authorities.
Before starting your trek, certain documents must be submitted to the Forest Department for verification and trekking permission. Without these documents, you will not be allowed to proceed with the trek.
Please ensure you carry the following:
Original Government Photo ID Proof – (Aadhaar Card, Voter ID, Driving License, or Passport)
One Photocopy of the Same ID – to be submitted to the forest authorities before the trek begins
These documents are mandatory for every trekker as part of the official registration and forest entry process.
Important Note:
Keep your ID safely packed in a waterproof pouch or zip-lock bag to protect it from rain or snow. You’ll need to show it during verification at the base camp before the trek starts.
How To Plan Your Trek & Reach Dehradun?
Reaching Dehradun is the first step in beginning your journey to Sankri, the base camp for the Kedarkantha Trek. Below are the most convenient travel options to help you plan your arrival smoothly.
By Air
The Jolly Grant Airport (DED) is the nearest airport to Dehradun, located approximately 25 km from the city center. There are regular direct flights from Delhi and other major cities to Dehradun.
If you are planning to arrive by air, Trekup India strongly recommends reaching Dehradun one day in advance of your trek start date to account for possible flight delays and ensure a relaxed start to your journey.
By Train
Traveling by train is one of the most convenient and comfortable ways to reach Dehradun. Two popular overnight trains from Delhi are:
Nanda Devi Express (Train No. 12205)
Departure: 11:50 PM from New Delhi Railway Station
Arrival: 5:40 AM at Dehradun
Dehradun Express (Train No. 12687)
Departure: 9:10 PM from Hazrat Nizamuddin Railway Station
Arrival: 5:00 AM at Dehradun
Both trains reach early in the morning, making them ideal for trekkers joining the early pickup for the drive to Sankri.
By Bus
Regular AC and non-AC bus services operate between Delhi and Dehradun, departing from ISBT Kashmere Gate. The overnight journey takes around 8–10 hours.
We recommend taking government-operated buses (UTC or UPSRTC) for reliability and safety. The bus will drop you at Dehradun ISBT, from where you can easily take an auto or cab to the Dehradun Railway Station — the designated pickup point for trekkers.
Pickup Details
Pickup Point: Dehradun Railway Station
Pickup Time: 6:30 AM
Drop Location: Sankri (Base Camp)
Expected Arrival at Sankri: Around 5:00 PM
You’ll be driven in a Tempo Traveller, Bolero, or similar vehicle depending on group size. The scenic 220 km drive from Dehradun to Sankri takes about 10 hours, passing through beautiful hill towns and forested valleys.
Important Travel Tips
Arrive a day before your trek to avoid last-minute travel delays.
Keep your ID proof handy for check-ins and travel verifications.
Carry some snacks and water for the long drive to Sankri.
If arriving by bus or train, ensure you reach Dehradun Railway Station before 6:30 AM for the pickup.
Fitness Required & Preparation Guide For Kedarkantha Trek
If you’re preparing for the Kedarkantha Trek, building your fitness level is one of the most important steps toward ensuring a safe and enjoyable experience. Trekup India strongly recommends including jogging as a key part of your fitness routine.
Jogging helps strengthen the same muscle groups used during trekking — particularly the legs, glutes, and core — while also improving cardiovascular endurance. The best part is, you don’t need any special equipment to begin; just a good pair of running shoes and commitment to consistency.

Fitness Target
Trekup India has put the Kedarkantha Trek into an easy to moderate grade level trek.
The Kedarkantha Trek is categorized as an Easy to Moderate Grade trek. This means it is suitable for beginners as well as regular trekkers, but a basic level of fitness and stamina is essential to enjoy the journey comfortably.
How to Achieve This Fitness Target?
For all Easy to Moderate Himalayan Treks, Trekup India recommends the following fitness target:
Be able to cover 4.5 kilometers in under 45 minutes through brisk jogging or running.
Achieving this benchmark will help you build the necessary stamina, endurance, and leg strength required for trekking at higher altitudes.
Strength Training exercises that benefit Trekking
Trekking is an activity that demands a good level of strength.

Trekking is a physically demanding adventure that requires strong cardiovascular endurance, muscular strength, and overall fitness. To prepare your body for the challenges of the trail, it’s essential to follow a focused fitness routine that builds strength, stability, and stamina.
Bodyweight exercises are one of the most effective and accessible ways to train for trekking. They help enhance your strength, improve mobility, and boost endurance — all without needing gym equipment.
Below is a detailed breakdown of bodyweight exercises, categorized by body part, along with their benefits for trekking and step-by-step instructions.
1. Lower Body Exercises
The lower body is the powerhouse for trekking. Strong legs help you climb uphill, control descents, and maintain balance on uneven terrain.
a. Squats
Targets: Quadriceps, Hamstrings, Glutes, and Calves
Benefits for Trekking:
Squats develop strength and endurance in the major leg muscles that power you uphill. Strong glutes and quadriceps help you ascend efficiently, while the hamstrings support stability and control during descents.
How to Perform:
Stand with your feet shoulder-width apart, toes slightly outward.
Lower your body by bending your knees and hips while keeping your back straight.
Go down until your thighs are parallel to the ground or as low as comfortable.
Push through your heels to return to the starting position.
b. Lunges
Targets: Quadriceps, Hamstrings, Glutes, and Calves
Benefits for Trekking:
Lunges improve balance, flexibility, and stability, helping you stay steady on rocky and uneven trails. They also strengthen the lower body muscles used for both uphill and downhill movement.
How to Perform:
Stand upright with feet hip-width apart, hands on hips or by your sides.
Step forward with one foot, lowering your body until both knees form 90-degree angles.
Push through your front heel to return to the starting position.
Repeat on the other leg, alternating sides.
2. Upper Body Exercises
Your upper body strength plays a vital role in carrying a backpack, maintaining posture, and supporting balance during the trek.
a. Push-Ups
Targets: Chest, Shoulders, Triceps, and Core
Benefits for Trekking:
Push-ups strengthen the muscles that help you carry your backpack comfortably and maintain good posture while trekking long hours.
How to Perform:
Start in a plank position with hands shoulder-width apart.
Lower your body until your chest nearly touches the ground.
Push back up to the starting position while keeping your core tight.
Avoid sagging your hips or arching your back.
b. Pull-Ups / Bodyweight Rows
Targets: Back, Biceps, and Shoulders
Benefits for Trekking:
Strong back and shoulder muscles reduce fatigue and strain from carrying a heavy backpack. Pull-ups also improve posture and upper body endurance — both essential for long treks.
How to Perform:
Grip a bar with hands slightly wider than shoulder-width apart.
Pull your body upward until your chin passes the bar.
Lower slowly and repeat.
(If unavailable, substitute with inverted bodyweight rows using a sturdy surface.)
3. Core Exercises
A strong core enhances stability, balance, and posture — especially on steep or uneven trails.
a. Planks
Targets: Abdominals, Obliques, and Lower Back
Benefits for Trekking:
Planks strengthen your entire core, improving balance and posture while reducing lower back fatigue during long treks.
How to Perform:
Start on your elbows and toes, body in a straight line from head to heels.
Engage your core and hold the position.
Keep breathing steadily without arching or sagging your back.
b. Russian Twists
Targets: Obliques, Abdominals, and Lower Back
Benefits for Trekking:
Russian Twists improve rotational stability and core endurance, which are vital for maintaining balance when walking on uneven ground or carrying a loaded backpack.
How to Perform:
Sit on the ground with knees bent and feet flat.
Lean back slightly to engage your core.
Clasp your hands together and twist your torso to one side, then the other.
Continue alternating sides for the desired repetitions.
4. Full-Body and Cardiovascular Exercises
These exercises help build stamina, endurance, and agility, mimicking the intensity of trekking.
a. Burpees
Targets: Full body — Legs, Core, Chest, and Arms
Benefits for Trekking:
Burpees boost cardiovascular endurance and full-body strength, improving your ability to handle long trekking days and steep climbs.
How to Perform:
Stand upright, then squat down and place your hands on the ground.
Jump your feet back into a plank position.
Perform a push-up.
Jump your feet forward, then explosively jump up with your arms overhead.
Land softly and repeat.
b. Mountain Climbers
Targets: Core, Shoulders, Chest, and Legs
Benefits for Trekking:
Mountain climbers improve endurance, agility, and coordination while building core strength. They also simulate the continuous effort of trekking uphill.
How to Perform:
Begin in a plank position.
Drive one knee toward your chest, then quickly switch legs in a running motion.
Maintain a stable core and steady rhythm.
Additional Strength and Recovery Tips
Maintain proper form and posture to avoid injuries.
Start with moderate intensity and gradually increase reps and duration.
Focus on compound movements like squats, lunges, and pull-ups that train multiple muscle groups.
Include jogging or stair climbing to improve endurance and simulate trekking conditions.
Stretch before and after workouts to prevent injury and improve flexibility.
Allow rest and recovery days to let muscles rebuild and strengthen.
Conclusion
Incorporating bodyweight exercises into your pre-trek training will significantly enhance your strength, stamina, and balance, helping you tackle steep climbs, long trails, and challenging terrains with confidence.
Consistency is key — train regularly, focus on your form, and gradually build endurance. With proper preparation, you’ll be ready to enjoy every step of your trekking adventure to the fullest.
Our Trekkers Reviews And Expreinces


At Trekup India, we believe that good food fuels great adventures. That’s why we serve only Indian vegetarian meals, thoughtfully planned and freshly prepared to meet your nutritional needs during high-altitude treks.
Your meals will primarily include Indian bread (roti/paratha), seasonal vegetables, lentils, rice, and a delicious dessert. Throughout your trek, we provide three wholesome meals a day — breakfast, lunch, and dinner — along with tea, snacks, and hot soup in the evenings. On longer trekking days, you’ll also receive a packed snack or lunch to keep your energy up on the trail.
Thoughtfully Planned, Nutritionally Balanced
Our trek menu is designed after extensive research on the nutritional requirements of trekkers. We carefully consider altitude, weather conditions, and physical exertion levels while planning each meal.
Every dish we serve is balanced with the right proportion of calories, carbohydrates, protein, fibre, vitamins, and minerals — ensuring you stay energized and healthy throughout the trek.
Start Your Day with Warmth and Flavor
Your mornings in the mountains begin with a refreshing cup of lemon tea, served right at your tent to help you wake up to the crisp mountain air.
A hearty hot breakfast follows before the day’s trek — options may include:
Upma
Aloo Paratha
Besan Chilla
Poha
Daliya
Cornflakes with milk
Maggi noodles
Along with tea or coffee to kickstart your day.
Midday Energy Boost
If it’s a long trek day, we provide fresh fruits like apples and energizing drinks such as Frooti or Maaza to keep you hydrated and refreshed.
At lunchtime, you’ll enjoy a simple, wholesome Indian meal — light yet satisfying, perfect for sustaining energy during the day’s climb.
Evenings Full of Warmth and Taste
By around 4:00 PM, we serve tea and light snacks — perfect for unwinding and chatting with fellow trekkers as the sun begins to set.
When you reach the campsite at night, you’ll be greeted with a hot, freshly prepared dinner, complete with soup, main course, and dessert — the perfect way to end your day under the stars.
A Culinary Experience You’ll Remember
You’ll be glad to know that all our trek cooks are professionally trained and experienced in preparing delicious meals in the wilderness. Their expertise and creativity ensure that every dish — whether simple dal-rice or hot paratha — tastes like home, even miles away from civilization.
Many trekkers return to Trekup India again and again — and they often say our food is one of the highlights of their journey.
So, leave your worries behind and bring your appetite — because with Trekup India, every meal on the mountain becomes a memorable part of your adventure.

Your safety is our highest priority. At Trekup India, trekking with us for the Kedarkantha Trek is entirely safe and well-organized. Our team of qualified trek leaders is trained in Wilderness First Aid and well-versed in managing high-altitude conditions. We always carry a comprehensive first-aid kit with all essential medicines and safety gear.
Before you join any trek, we request you to ensure your medical fitness — because for us, your well-being comes before everything else.
Our Commitment to Safety
Since our establishment, Trekup India has continuously set new benchmarks in trekking safety across India. We’ve been pioneers in introducing advanced safety protocols to make trekking a more secure experience for everyone.
Some of the key safety innovations introduced by Trekup India include:
Microspikes for safe movement on snow and ice.
Emergency bottled oxygen made mandatory on all treks.
Pulse oximeter readings taken daily to monitor oxygen and heart rate.
Radio walkie-talkies for real-time communication and coordination.
Many other organizations have now started following these safety systems — setting a new standard across the Indian trekking community.
How We Ensure Your Safety on the Mountains
We take technical safety very seriously. Trekup India has a team of over 100 certified guides and trek leaders working across Himalayan trails.
Our team members are trained by reputed institutes like:
Nehru Institute of Mountaineering (NIM)
Indian Mountaineering Foundation (IMF), Delhi
Hanifl Centre for Outdoor Education, Mussoorie
This training ensures that every trek you undertake with us is supported by professionals who are not just skilled — but also safety-conscious, responsible, and compassionate.
Our New Safety Protocols
To make your trek even more secure and enjoyable, Trekup India has introduced enhanced On-Trek Safety Checks, which include:
Daily oxygen saturation and pulse readings for every trekker
Dedicated stretcher teams on all treks
Radio communication systems for every group
Trained mountain staff ensuring full-time safety support
Additional oxygen cylinders on high-altitude treks
A specialized medical kit for altitude-related conditions
Microspikes provided for all snow treks
Technical safety team deployed on all snowy slopes
Your safety is — and will always be — our top priority.
Experienced and Trained Trek Leaders
Our trek leaders are not only mountain experts but also excellent communicators, fluent in English and Hindi, ensuring smooth guidance and local understanding throughout your journey.
Each of them undergoes multiple certifications and advanced training, including:
First Aid & CPR
Portable Altitude Chamber (PAC) use
Wilderness Emergency Medicine
Environmental and Rescue Training
In addition, every trek carries a complete first-aid kit, medical oxygen, and portable altitude chamber (if required) to ensure preparedness for all situations.
Why Choose Trekup India
Whether you are a solo traveler, family, school, college, or corporate group, Trekup India has the experience and flexibility to customize your adventure according to your fitness level and travel style.
No matter the group size, we offer personal attention to every trekker — ensuring your safety, comfort, and satisfaction throughout the journey.
Who We Are
Trekup India has been a trusted name in the Adventure Tourism Industry for over 30 years. Since our inception, we’ve been dedicated to providing exceptional treks, expeditions, and outdoor programs across the Himalayas.
We currently operate in Uttarakhand, Himachal Pradesh, Kashmir, and Sikkim, with over 75 documented Himalayan treks. Our legacy is built on professionalism, safety, and an unending passion for the mountains.
We also specialize in custom adventure programs for schools, colleges, families, and friend groups — ensuring that everyone, regardless of experience, can safely explore the Himalayas.
At Trekup India, quality and safety define every step of your journey.
Must Read These Information Of Kedarkantha Trek
Why You Should Do Kedarkantha Trek
Frozen Juda ka Talab Lake with Mythological Significance
As you make your way through the Kedarkantha Trek, you’ll encounter the stunning alpine lake of Juda ka Talab, a jewel nestled within the dense forests. During winter months, this beautiful lake transforms into a completely frozen wonderland, creating picture-perfect reflections against the snow-covered pine trees that surround it. The frozen surface of Juda ka Talab becomes one of the most photographed spots on your journey, offering you a serene moment of tranquility amidst the challenging trek.
The spiritual significance of this region adds depth to your trekking experience. On the summit of Kedarkantha, you’ll discover a small temporary temple dedicated to Lord Shiva, known as “Shiva Ka Kanth,” with local beliefs suggesting that an ancient Kedarnath temple once stood at this very location. This mythological connection enhances the spiritual atmosphere of your trek, making each step feel more meaningful.
Stargazing Sessions with Professional Telescopes
The high altitude of Kedarkantha, reaching 12,500 feet above sea level, provides you with exceptional stargazing opportunities. Away from urban light pollution, you’ll witness crystal-clear night skies that reveal countless stars and celestial bodies. The pristine mountain environment creates perfect conditions for astronomical observations, allowing you to connect with the cosmos in ways that urban environments simply cannot offer.
Diverse Terrain Through Pine, Cedar, Oak, and Maple Forests
Your journey through the Kedarkantha Trek takes you across remarkably diverse terrain, showcasing the rich biodiversity of the Himalayas. The trail winds through beautiful dense forests of deodar and rhododendron, along with pine, cedar, oak, and maple trees that create a natural canopy above your path. This varied forest ecosystem provides habitat for diverse wildlife species you might encounter, including Himalayan Woodpecker, Himalayan Monal, Himalayan Partridge, Musk Deer, Himalayan Black Bear, Himalayan Tahr, Himalayan Langurs, Leopards, and Squirrels.
The trek route features an exciting mix of forest tracks, meadows, alpine terrains, snow-covered paths, and steep ascents. You’ll navigate through water crossings, muddy patches, and rocky sections, each presenting unique challenges that keep your adventure engaging. The vast landscapes of alpine meadows provide breathing space between forested sections, offering panoramic views of the surrounding mountain ranges.
Local Village Life Immersion and Cultural Experiences
Your cultural exploration begins right from the starting point, as the trek commences from the quaint village of Sankri. Throughout your journey, you’ll pass through authentic Garhwali villages such as Saur, Sidri, Osla, Gangad, and Netwar, each offering unique insights into local mountain life. These encounters provide you with genuine opportunities to learn about traditional culture, customs, and lifestyle practices that have been preserved for generations.
You’ll have the chance to savor authentic Garhwali cuisine, experiencing flavors that reflect the region’s agricultural heritage and cooking traditions. The warm hospitality of local villagers adds a human dimension to your trekking adventure, creating meaningful connections that extend beyond the physical challenge of reaching the summit. These cultural interactions offer you a deeper understanding of how mountain communities have adapted to life in the harsh yet beautiful Himalayan environment.
How Difficult is the Kedarkantha Trek
Thinking about taking on the Kedarkantha Trek but wondering how tough it really is? You’re not alone. The Kedarkantha Trek sits at an Easy-Moderate difficulty level, making it perfect for first-time trekkers and seasoned hikers looking for a manageable Himalayan adventure.
This guide is for anyone planning their first high-altitude trek, experienced trekkers wanting to know what to expect, and adventure seekers debating whether Kedarkantha matches their fitness level. We’ll break down the trek’s difficulty honestly – no sugar-coating the challenges, but also showing you why thousands of beginners successfully complete it every year.
You’ll discover the specific factors that make this trek challenging, from the 5,500-foot altitude gain over three days to the demanding summit push through snow and ice. We’ll also cover the major obstacles you’ll face, including sub-zero temperatures, slippery verglas sections, and steep winter ascents that test even confident hikers. By the end, you’ll know exactly what you’re signing up for and how to prepare properly for this stunning Uttarakhand trek.
Easy-Moderate Level Trek Rating
The Kedarkantha trek carries an Easy-Moderate Level 2 difficulty rating, making it an accessible yet engaging mountain adventure. This classification indicates that while the trek presents certain challenges, it remains manageable for trekkers with basic fitness levels. The rating reflects the trek’s balanced nature – it’s not a casual walk, but it doesn’t require extreme mountaineering skills either.
The 20-kilometer trek typically spans 5 to 6 days, allowing for a relaxed pace that accommodates gradual acclimatization. This extended duration is actually a key factor in keeping the difficulty moderate, as attempting to compress the trek into fewer days significantly increases the challenge level.
Beginner-Friendly Summit Trek
What makes Kedarkantha particularly appealing is its status as one of the few beginner-friendly summit treks in the Himalayas. The trek offers an adventurous summit climb experience that can be attempted even without extensive high-altitude trekking background. This accessibility stems from the gradual altitude progression and well-defined trail structure.
The trek starts at approximately 6,500 feet from Sankri and gradually ascends to the summit at 12,500 feet (3,810 meters). This steady progression allows trekkers to adapt to increasing altitude over several days, reducing the risk of severe altitude-related issues while still providing the thrill of a genuine summit experience.
No Prior Trekking Experience Required
First-time trekkers frequently choose Kedarkantha as their introduction to high-altitude trekking, and for good reason. The trek doesn’t demand prior mountaineering experience or advanced technical skills. The trail is generally well-marked, and most sections don’t involve extremely steep ascents, making it suitable for those new to mountain trekking.
However, this accessibility shouldn’t be mistaken for ease. The trek still requires adequate physical preparation and mental readiness. Most sections of the trail are manageable, but certain portions, particularly the final summit push, present steeper terrain that demands sustained effort and determination.
Don’t Underestimate High-Altitude Challenges
Despite its beginner-friendly reputation, Kedarkantha remains a high-altitude summit climb that demands respect and proper preparation. The trek involves gaining significant altitude – approximately 6,000 feet over three days – which presents real physiological challenges that shouldn’t be taken lightly.
The summit push represents the trek’s most demanding section, featuring consistent ascent on steep slopes. During winter months, this challenge intensifies as the steep terrain becomes snow-covered, requiring microspikes for adequate grip. Additionally, winter trekkers may encounter verglas – extremely hard and slippery ice formations that appear from December to mid-April, adding technical difficulty to the ascent.
Temperature variations present another significant challenge, particularly in winter when conditions drop to sub-zero levels. Proper layering becomes essential, with a minimum of five layers required to maintain core body temperature and prevent hypothermia-related complications.
Rapid Altitude Gain from 6,500 to 12,000 Feet
The Kedarkantha Trek presents a significant altitude challenge with its substantial elevation gain from Sankri at 6,400 feet to the summit at 12,500 feet. This rapid ascent of over 6,000 feet creates a considerable physiological demand on trekkers, particularly as they approach higher camps. The gradual gain initially allows the body to adapt to thinner air, reducing the risk of altitude sickness during the early stages of the trek.
However, the steepest altitude increase occurs from Kedarkantha Base Camp at 11,200 feet to the summit, where trekkers experience the most dramatic change in elevation. This section poses the greatest risk for Acute Mountain Sickness (AMS), with some trekkers experiencing mild symptoms like headaches or fatigue. The body’s struggle to adapt to reduced oxygen levels becomes more pronounced as climbers push toward the higher elevations, making proper acclimatization essential for a safe ascent.
Steep Summit Push with Consistent Ascent
The final summit climb represents the most technically demanding portion of the trek, involving a steep ascent of nearly 2,000 feet from the base camp. This exposed ridge climb requires sustained endurance and determination, particularly challenging for first-time trekkers. The consistent upward trajectory without significant rest points tests both physical stamina and mental resolve.
Unlike the gentler forest trails and meadow sections encountered earlier, the summit push demands continuous effort over difficult terrain. The steep gradient, combined with the high altitude, creates a compounding effect that significantly increases the trek’s difficulty level. This section requires proper pacing and frequent hydration breaks to maintain energy levels throughout the challenging ascent.
Treacherous Winter Conditions and Verglas Ice
Winter trekking conditions transform the Kedarkantha trail into a significantly more hazardous environment. Snow-covered trails and icy slopes create slippery surfaces that increase the risk of falls and injuries. The presence of verglas ice, particularly on exposed ridge sections, makes footing treacherous and requires specialized equipment like microspikes or crampons for safe navigation.
The snow adds an extra layer of complexity to route finding and increases the physical effort required for each step. Trekkers must navigate through deep snow while maintaining balance on potentially unstable surfaces. The combination of snow and ice creates conditions where even experienced hikers can find themselves challenged, making winter ascents considerably more demanding than dry-season climbs.
Extreme Sub-Zero Temperatures
The temperature extremes encountered on Kedarkantha Trek pose serious challenges for trekkers’ comfort and safety. During winter months, daytime temperatures range from 5°C to -5°C, while nighttime conditions can plummet to -10°C or lower. These sub-zero temperatures create harsh camping conditions and increase the risk of hypothermia and frostbite.
Strong summit winds compound the temperature challenge, creating dangerous wind-chill effects that can rapidly lead to exposure-related injuries. The extreme cold affects equipment performance, battery life, and water supplies, which can freeze solid overnight. Trekkers must carry specialized gear including warm layers, waterproof gloves, and insulated sleeping systems to survive these harsh conditions safely.
Conclusion
The Kedarkantha trek strikes the perfect balance between challenge and accessibility, making it an ideal choice for beginners ready to experience their first Himalayan summit. While rated as Easy-Moderate, the trek demands respect for its high-altitude environment, steep summit push, and winter conditions that can drop temperatures to -20°C. The key challenges – altitude gain from 6,500 ft to 12,000 ft, navigating verglas sections, and the demanding summit day starting at 3 AM – are all manageable with proper preparation and the right mindset.
Don’t let the challenges discourage you from attempting this incredible trek. With 30-45 days of physical preparation, proper gear (especially quality trekking shoes), and realistic expectations, Kedarkantha offers an unforgettable introduction to high-altitude trekking. Many first-time trekkers successfully complete this journey, often describing it as a life-changing experience. Take your time, stay hydrated, and remember – reaching the summit before sunrise is a moment that will bring tears to your eyes and memories to last a lifetime.
Mythological Stories About Kedarkantha Trek
The Kedarkantha Trek in Uttarakhand holds deep sacred significance through ancient stories that have shaped its spiritual identity for centuries. Whether you’re a trekking enthusiast drawn to mythological tales or simply curious about the cultural heritage behind one of India’s most beloved winter treks, these legendary narratives offer fascinating insights into why this 12,500-foot peak remains so revered.
You’ll discover how Kedarkantha’s mythological stories connect this Himalayan summit to Hindu deities, epic tales, and sacred beliefs that continue to attract both pilgrims and adventurers today. From Lord Shiva’s meditation retreat to the Pandavas’ spiritual quest, these timeless legends add profound meaning to every step of your trek.
This guide explores the legendary tales that define Kedarkantha’s sacred origins, tracing stories of divine presence and celestial connections. You’ll also learn about the historical milestones that shaped modern Kedarkantha trekking, from early British expeditions to its emergence as a premier trekking destination. Finally, we’ll cover the essential geographical features and trek specifications that make this journey both accessible and awe-inspiring for trekkers of all experience levels.
Lord Shiva’s Divine Connection and Relocation to Kedarnath
When you explore the mystical legends surrounding Kedarkantha, you’ll discover that the most prominent tale centers around Lord Shiva, the supreme deity of Hindu mythology. According to local folklore, Lord Shiva initially chose the summit of Kedarkantha as his sacred abode for deep meditation and spiritual contemplation. The peaceful and serene environment of this Himalayan peak provided the perfect sanctuary for his divine practices.
However, as the legend unfolds, you’ll learn that Lord Shiva’s tranquil meditation was unexpectedly disrupted by a bull that galloped past, disturbing his peaceful state. This interruption frustrated the deity, prompting him to make a significant decision that would forever change the spiritual landscape of the region. Unable to continue his meditation in peace, Lord Shiva decided to relocate to Kedarnath, a more secluded and undisturbed location where he could pursue his spiritual practices without any interruptions.
This divine relocation explains why you’ll find a stone temple dedicated to Lord Shiva at Kedarkantha’s summit today, complete with a Trishul (trident) marking his former presence. Additionally, there’s an underground shrine housing an idol of Lord Ganesha, which locals believe helps invoke rain during the summer months.
The Pandavas’ Spiritual Quest and Shiva’s Five Sacred Body Parts
As you delve deeper into Kedarkantha’s mythological heritage, you’ll encounter the fascinating legend connecting this peak to the Pandavas, the five legendary heroes from the Hindu epic Mahabharata. After their victory in the devastating Kurukshetra war, the Pandavas embarked on a spiritual quest to seek Lord Shiva’s blessings and atone for their sins of killing their kin during the battle.
Your understanding of this legend will reveal that Lord Shiva, still resentful of their actions in the war, attempted to evade the pursuing Pandavas by transforming himself into a bull and fleeing into the Himalayas. However, Bheem, one of the Pandavas, recognized Lord Shiva despite his disguise and gave chase. During this divine pursuit through the mountainous terrain, a struggle ensued that resulted in Lord Shiva’s body being divided into five sacred parts, each falling at different locations across the region.
According to this powerful legend, you’ll learn that Lord Shiva’s throat (Kedar) fell specifically at Kedarkantha, which is how the peak derives its name and solidifies its deep association with the deity. This mythological event mirrors the legend of Garhwal’s renowned Panch Kedar shrines, which include Kedarnath, Tungnath, Rudranath, Madhyamaheshwar, and Kalpeshwar, where different parts of Lord Shiva’s divine form are believed to have landed.
Juda-ka-Talab as Heaven’s Mirror and Source of Spiritual Cleansing
When you reach the pristine alpine lake known as Juda-ka-Talab, positioned at 9,000 feet elevation and surrounded by lush greenery, you’ll encounter one of the most enchanting legends of your Kedarkantha journey. This sacred lake, located at the base of Kedarkantha peak, holds profound spiritual significance that you’ll find deeply moving.
According to the mesmerizing legend you’ll hear from locals, Juda-ka-Talab was created through a divine act by Lord Shiva himself. The story tells you that when Lord Shiva untangled a strand of his knotted hair (Juda), water began dripping from it, eventually forming this beautiful alpine creation. Legend has it that this pristine lake serves as a reflection of the heavens—a celestial mirror that captures the divine realm above.
You’ll discover that the spiritual significance of Juda-ka-Talab extends far beyond its visual beauty. Local beliefs hold that bathing in the holy waters of this sacred lake has the power to wash away your sins and bring spiritual enlightenment to your soul. The name “Juda” itself represents connection and union, possibly symbolizing the merging of two separate water bodies into this magnificent alpine sanctuary.
Adding to the mystical nature of this place, you’ll encounter fascinating local folktales, including one about a shepherd who lost his flute in the lake, only to later discover it at a woman’s table in the village below. This story illustrates the lake’s supernatural connection through hidden underground channels that link it to nearby rivers and streams.
British Colonial Era Expeditions and First Recorded Ascent in 1883
The historical significance of Kedarkantha begins with the pioneering spirit of British mountaineers who ventured into the uncharted territories of the Garhwal region during the early 19th century. These intrepid explorers were captivated by the stunning beauty and challenging terrain that the region offered, setting the foundation for what would eventually become one of India’s most beloved trekking destinations.
The watershed moment in Kedarkantha’s documented history came in 1883 when British mountaineer William Martin Conway achieved the first recorded ascent of the peak. This milestone marked the beginning of systematic exploration in the region, as Conway’s successful climb demonstrated that the summit was not only accessible but also offered extraordinary rewards to those willing to undertake the challenge.
During the late 19th and early 20th centuries, you’ll find that Kedarkantha continued to attract adventurous mountaineers from the colonial era who were eager to conquer its summit and explore the surrounding valleys. These early explorations were crucial in mapping the terrain and establishing the routes that would later form the backbone of modern trekking infrastructure in the area.
Evolution from Mountaineering Challenge to Popular Recreational Trek
Now that we have covered the colonial origins, the transformation of Kedarkantha from an elite mountaineering challenge to an accessible recreational trek represents one of the most significant shifts in Indian trekking history. This evolution didn’t happen overnight but was the result of changing perceptions about high-altitude trekking and the pioneering efforts of modern trek organizers.
In the mid-20th century, you would have found that trekking began emerging as a popular recreational activity, moving away from its exclusive association with serious mountaineering expeditions. Kedarkantha quickly positioned itself as one of the most sought-after treks in the Himalayas due to its unique combination of accessibility, stunning scenery, and cultural richness. What made it particularly appealing was that it offered both experienced trekkers and novice adventurers the opportunity to experience a true Himalayan summit.
A revolutionary moment came in 2010 when Indiahikes founders Arjun Majumdar and Sandhya UC recognized Kedarkantha’s potential as India’s first true winter trek. This vision emerged from casual conversations with local staff members, particularly Rajmohan ji, who mentioned the hill behind their homes in the Sankri area. Initially dismissed as impossible due to neck-deep snow conditions, the idea of a winter trek gradually gained traction as the founders realized they needed to create entirely new camping spots and trail systems specifically designed for winter conditions.
The breakthrough came when they organized an exploratory winter trek in late December 2010 with 18 brave trekkers who signed up based solely on summer photographs. This expedition successfully established camping spots at Juda Ka Talab, KK Base, and Hargaon, proving that winter trekking in India was not only possible but could offer magical experiences with fresh snow in wilderness settings.
Development of Modern Trekking Infrastructure and Tourism Industry
With this foundation established, the development of modern trekking infrastructure around Kedarkantha represents a remarkable transformation story. The success of the winter exploration in 2010 catalyzed a complete economic revolution in the Sankri region, fundamentally changing how you would experience trekking in this area today.
The popularity of Kedarkantha brought about a dramatic shift in the perception of high-altitude trekking. Previously, you would have associated serious trekking with altitudes above 14,000-15,000 feet, but Kedarkantha demonstrated that you could have a complete, wholesome experience at 11,000-12,000 feet. This change meant you could enjoy fewer days away from work with less physical effort while still experiencing the same beauty that higher altitudes offered.
The trek’s success expanded the trekking season significantly. What was once a sport restricted to 3-4 months per year (summer and autumn) suddenly expanded to 6-7 months, including the winter season. This expansion meant more regular income opportunities for local communities, who could now earn during three seasons instead of two.
The economic transformation of Sankri village exemplifies the infrastructure development that followed. If you visit Sankri today, you’ll find it almost unrecognizable from its appearance a decade ago. The village has expanded beyond its original borders, with homestays, hotels, and lodges sprouting up to accommodate the influx of trekkers. Small business enterprises have flourished, including trek rental stores, transport businesses, cafes, and local trekking agencies.
During peak winter weeks like Christmas, you’ll encounter more than 2,000 trekkers attempting the route, leading to the development of alternative approaches. This popularity necessitated the creation of new routes, including the western ridge approach from Gaichwan Gaon, which offers the same beauty as the traditional Sankri trail but with fewer crowds. The infrastructure development has been so extensive that multiple routes now exist to approach Kedarkantha’s standalone summit, including paths from Kotgaon and Gaichwan Gaon.
Strategic Location in Govind Wildlife Sanctuary and National Park
Now that we have covered the legendary tales and historical significance, let’s examine the unique geographical positioning that makes Kedarkantha truly exceptional. Your trek unfolds within the pristine boundaries of the Govind Wildlife Sanctuary and National Park, a protected ecosystem that enhances both the adventure and conservation value of your journey. This strategic location ensures you’ll experience untouched natural beauty while contributing to the preservation of Himalayan flora and fauna.
The sanctuary setting provides you with an opportunity to witness diverse wildlife and vegetation patterns that remain largely undisturbed by commercial development. Your trekking experience benefits from well-maintained trails and regulated access, which the park authorities carefully monitor to maintain ecological balance. This protected status means you’ll encounter pristine landscapes that showcase the raw beauty of the Garhwal Himalayas in their most authentic form.
Complete Trek Distance Coverage of 20-22 Kilometers from Sankri Base
With this protected environment as your backdrop, you’ll embark on a comprehensive trekking journey spanning 20-22 kilometers from the Sankri base camp. Your adventure begins at Sankri village, positioned at 6,400 feet, which serves as the gateway to this magnificent trek. The total distance is strategically divided across multiple days to ensure proper acclimatization and maximum enjoyment of the scenic landscapes.
Your daily distances are thoughtfully planned: you’ll cover approximately 4 kilometers from Sankri to Juda ka Talab on day one, followed by another 4 kilometers to Kedarkantha Base Camp. The summit push involves roughly 6 kilometers of challenging terrain, while your descent to Hargaon and final return to Sankri complete the remaining distance. This distribution allows you to pace yourself effectively while absorbing the changing terrain and elevations throughout your journey.
Summit Elevation Benefits at 12,500 Feet with Panoramic Himalayan Views
Previously, I’ve mentioned the trek’s manageable distances, but the true reward awaits you at the summit elevation of 12,500 feet. Your ascent to this height provides you with spectacular panoramic views that justify every step of the challenging climb. From this vantage point, you’ll witness breathtaking 360-degree vistas encompassing Mount Swargarohini, the Bandarpoonch massif, Mount Kalanag, and the entire Gangotri range stretching across the horizon.
The elevation gain from your starting point at Sankri (6,400 feet) to the summit represents a total ascent of over 6,000 feet, carefully distributed across multiple days to minimize altitude-related challenges. Your gradual elevation progression through Juda ka Talab (9,100 feet) and Kedarkantha Base Camp (11,250 feet) ensures proper acclimatization while maximizing your chances of successfully reaching the peak.
At 12,500 feet, you’ll experience the thrill of standing on one of the most accessible summit peaks for beginner trekkers, offering you a genuine mountain climbing achievement without requiring advanced technical skills. The summit’s positioning provides you with unobstructed views in all directions, making it an ideal location for photography and personal reflection on your trekking accomplishment.
Actual Mountain Summit Experience Unlike Most Himalayan Pass Treks
Unlike most Himalayan treks that take you to mountain passes or ridges, Kedarkantha offers you the extraordinary opportunity to reach an actual mountain summit. When you embark on this trek, you’ll experience true mountaineering as you ascend to the peak at 3,800 meters altitude. The summit climb begins in the early morning hours when weather conditions are most favorable, and you’ll find yourself trekking through the pre-dawn darkness with your headlamp illuminating the path ahead.
As you make your way up the spiraling trail through dense oak forests, you’ll emerge into an incredible clearing that reveals the rust-hued landscape surrounding the summit. This authentic mountaineering experience provides you with breathtaking panoramic views of snow-capped peaks including Gangotri, Yamunotri, Bandarpoonch, Swargarohini, and Har Ki Dun stretching toward the horizon.
Sacred Stone Shrine Dedicated to Lord Shiva at the Peak
At Kedarkantha’s summit, you’ll discover a small stone-sheeted shrine dedicated to Lord Shiva, making your trek not just an adventure but a spiritual pilgrimage. This rectangular stone formation features a Trishul (trident) pointing skyward, serving as a temple honoring Lord Shiva and Goddess Parvati. The shrine adds profound spiritual significance to your trekking experience, connecting you to the rich mythological heritage of the region.
According to legend, Lord Shiva originally chose this summit as his meditation spot but was disturbed by a bull in the valley below, prompting him to relocate to Kedarnath. This sacred shrine transforms your summit achievement into a deeply meaningful encounter with Hindu spirituality and ancient traditions.
Premium Stargazing Opportunities with Clear Night Sky Views
Your Kedarkantha trek offers exceptional stargazing experiences thanks to the region’s clear skies and remote location. When night falls at your camping sites, particularly at Juda-ka-Talab, you’ll witness the night sky transform into a spectacular celestial display. The absence of light pollution allows you to enjoy breathtaking views of the Milky Way and countless stars stretching across the vast expanse above.
The high altitude and pristine mountain air create perfect conditions for astronomical observations, making your evenings as memorable as your daytime trekking experiences. You’ll find yourself mesmerized by the ethereal glow that illuminates the landscape under the starlit sky, creating an unforgettable backdrop for your mountain adventure.
Rich Biodiversity with Over 200 Bird Species for Wildlife Enthusiasts
Your trek through Kedarkantha reveals incredible biodiversity, with over 200 bird species recorded in the area, making it a paradise for wildlife enthusiasts and birdwatchers. As you traverse the diverse ecosystems within Govind Wildlife Sanctuary and National Park, you’ll have opportunities to spot Himalayan snowcocks, whistling thrushes, and the magnificent Himalayan monals among other colorful and melodious birds.
The trek takes you through various habitats, from dense oak and pine forests to high-altitude meadows, each supporting different wildlife communities. You’ll witness striking contrasts in flora and fauna as you ascend through different elevation zones, encountering vibrant displays of pink and red Rhododendron flowers and experiencing the rich plant and animal life that makes this region a biodiversity hotspot in the Himalayas.
Conclusion
The Kedarkantha Trek stands as a remarkable testament to the interweaving of ancient mythology and natural grandeur. From the sacred legends of Lord Shiva’s meditation abode to the epic tales of the Pandavas, every step of your journey carries the weight of centuries-old stories that have shaped this region’s spiritual significance. The pristine Juda-ka-Talab lake, believed to be a celestial mirror created by Lord Shiva himself, and the stone shrine at the summit continue to draw pilgrims and trekkers seeking both adventure and spiritual enlightenment.
Your trek through Kedarkantha offers more than just breathtaking Himalayan vistas – it provides you with an opportunity to walk through living history. The trek’s unique distinction as one of the few Himalayan adventures that leads to an actual mountain summit, combined with its rich biodiversity housing over 200 bird species and spectacular stargazing opportunities, makes it an unparalleled experience. Whether you’re drawn by the mythological significance, the historical importance dating back to British explorations in the 1880s, or simply the promise of standing atop a 12,500-feet peak surrounded by snow-capped giants, Kedarkantha delivers an adventure that seamlessly blends legend, history, and natural wonder into an unforgettable journey.
Frequently Asked Questions About Kedarkantha Trek
Where is Kedarkantha Trek Located?
It is situated in the quaint Himalayan village of Sankri, nestled in the Uttarkashi district of Uttarakhand, India.
How to reach the main pickup location of Kedarkantha Trek i.e. Dehradun?
Accessibility:
Nearest Airport: Jolly Grant Airport, Dehradun
Nearest Railway Station: Dehradun Railway Station
Nearest Bus Stand: ISBT (Inter-State Bus Terminal), Dehradun
How to reach start point of the trek i.e. Sankri?
Transportation from Dehradun to Sankri:
Trekup India usually offers reliable transportation services between Dehradun and Sankri, both for arrival and return. However, if you prefer to travel by public transport, Uttarakhand Roadways operates 2–3 buses daily from Dehradun to Sankri. These buses typically depart in the early morning hours, between 05:30 AM and 07:30 AM. It is strongly recommended to check and confirm the latest bus timings with official sources prior to your journey.
How many days is Kedarkantha Trek?
Duration:
The recommended duration for the trek is 5 nights and 6 days, allowing for a comfortable pace and proper acclimatization throughout the journey.
How difficult is Kedarkantha Trek?
Trek Difficulty & Preparation:
This is an easy to moderate trek, making it accessible to most beginners with a reasonable level of fitness. With the right preparation, anyone can attempt and successfully reach the summit. However, it’s important to note that the trek involves a rapid gain in altitude, so maintaining good physical fitness is essential. It is strongly recommended to begin a basic fitness routine, including cardio and strength training, at least a few weeks before the trek.
How Long is Kedarkantha Trek?
Trek Distance & Scenic Highlights:
The total trek covers approximately 20–22 kilometers, offering an incredible Himalayan trail filled with mesmerizing landscapes, breathtaking sunrises, and stunning 360-degree views of the surrounding Himalayan peaks. It’s a visual treat for nature lovers and photography enthusiasts alike.
Is Kedarkantha good for beginners?
Suitability for Beginners:
Yes, the Kedarkantha Trek is considered an easy to moderate trek, making it an excellent choice for beginners. However, it’s important to maintain good physical fitness. Preparing with a daily walk or jog of 4–5 kilometers along with basic exercises will help you complete the trek comfortably and enjoyably.
What is Best time for do Kedarkantha Trek?
Best Time to Visit:
The best time to undertake the Kedarkantha Trek is from October to April. However, if you’re a snow lover, the ideal window is from mid-November to February—with December offering abundant snowfall, creating a magical winter wonderland along the trail.
What Kedarkantha Trek is Famous for?
Unique Highlights of the Kedarkantha Trek:
The Kedarkantha Trek stands out for several reasons, making it a favorite among trekkers of all levels. Some of its key highlights include:
One of the best and safest snow treks in India, ideal for beginners and experienced trekkers alike
Stunning 360-degree views of snow-capped Himalayan peaks from the summit
A rare night trekking experience, adding adventure and uniqueness to the journey
A breathtaking sunrise from the summit that’s truly unforgettable
A place of spiritual significance—locals believe Lord Shiva once meditated here, and the original Kedarnath temple was initially meant to be built at this site
The charming Himalayan village of Sankri, known for preserving its traditional Garhwali culture and hospitality
Which are the Himalayan peaks visible from Kedarkantha Summit?
Panoramic Views from the Summit:
One of the most rewarding aspects of the Kedarkantha summit is its 360-degree panoramic view of the majestic Himalayas. On a clear day, trekkers are treated to stunning vistas of several prominent peaks and ranges, including:
Swargarohini Peak
Kala Nag (Black Peak)
Bandarpunch Mountains
Yamunotri Ranges
Draupadi ka Danda
Nanda Ghunti
Rupin Valley
Har Ki Dun Valley
…and many more snow-clad giants stretching across the horizon.
Where do we keep our extra luggage, when on trek?
Luggage Storage Facility:
Trekup India offers a luggage storage room in Sankri, allowing trekkers to leave behind any extra luggage before embarking on the trek. However, it is important to note that valuable items and electronic gadgets should not be stored, as safety and security cannot be guaranteed for such belongings.
How Much Does Kedarkantha Trek Cost?
Choosing the Right Operator:
To be completely honest, there are numerous operators offering the Kedarkantha trek, and as a result, prices can vary significantly, ranging from ₹4,000 to ₹10,000 per person. It’s important to remember that the price you choose often reflects the quality of services provided. If you’re looking for reliable and trusted services, a price range of ₹6,000–₹6,500 per person is a reasonable expectation, which should also include transportation from Dehradun to Dehradun.
When selecting your travel agent, be sure to choose wisely and avoid falling victim to online frauds. Always prioritize trustworthy, well-reviewed operators to ensure a safe and enjoyable experience.
How to choose right Trek operator for Kedarkantha Trek?
Avoiding Online Frauds & Ensuring Safety:
We strongly advise against falling prey to online frauds. To ensure a safe and reliable trekking experience, always verify that the trek operator is at least registered with the State Tourism Board. Additionally, you can inquire whether the operator holds affiliations with reputable organizations such as:
Adventure Tour Operators Association of India (ATOAI)
Indian Mountaineering Foundation (IMF)
Ministry of Tourism, Government of India (MOI)
These affiliations are indicators of professionalism, expertise, and adherence to safety standards, providing you with greater peace of mind during your trek.
How much luggage should be we carry for Kedarkantha Trek?
Packing Tips:
It’s essential to carry only the items you truly need to avoid overburdening yourself. A 60-70 liter backpack should be more than sufficient for the trek. Ideally, your backpack should not exceed 9-10 kg in weight, ensuring a comfortable and manageable journey.
What is luggage off loading charges on Kedarkantha Trek?
Offloading Facility:
Trekup India offers offloading services for your convenience, allowing you to send some of your luggage ahead to the next campsite. The cost for this service is approximately ₹450–₹500 per bag per day, with a weight limit of 9 kg per bag. You can easily book this service upon arrival in Sankri, after meeting our Base Camp Manager or Trek Leaders.
Is there Extra luggage Store room available in Kedarkantha Trek?
Luggage Storage Facility:
Trekup India provides luggage storage facilities at their accommodation in Sankri. However, please ensure that valuable items and electronic gadgets are not left in your stored luggage. Additionally, make sure your luggage is secured with a proper locking system for added safety.
Is there any network in Kedarkantha Trek? Which sim Card works better?
Network Connectivity:
Currently, the Jio network works quite well in Sankri. However, please note that no network will be available once you move beyond Sankri, so it’s a good idea to inform your loved ones in advance and prepare for limited connectivity during the trek.
What should we pack for Kedarkantha Trek?
Packing List:
For a complete list of essential items to pack, please follow this link: [Things to Pack].
How should we prepare for Kedarkantha Trek?
Pre-Trek Fitness Tips:
Begin a daily walk or run of 4-5 kilometers, along with regular exercise routines to build endurance. Make breathing exercises a part of your routine to improve oxygen intake at higher altitudes. Additionally, it’s crucial to quit smoking and alcohol immediately to ensure optimal health and fitness for the trek.
What temperature we can expect on Kedarkantha Trek?
Weather Conditions:
December and January are the coldest months, with daytime temperatures ranging from 10°C to 15°C. At night, temperatures can drop to as low as -4°C, so be prepared for chilly conditions, especially after sunset.
Is Kedarnath and Kedarkantha Same trek?
Kedarnath vs. Kedarkantha:
Kedarnath and Kedarkantha are two completely different destinations, located in separate areas. Kedarnath is part of a Yatra (pilgrimage) trip and is situated in the Rudraprayag district, while Kedarkantha is a trekking destination located in the Uttarkashi district. Both fall within the state of Uttarakhand, but their experiences and purposes are distinct—one is a spiritual journey, and the other is an adventurous trek.
Read More Articles About Kedarkantha Trek


")


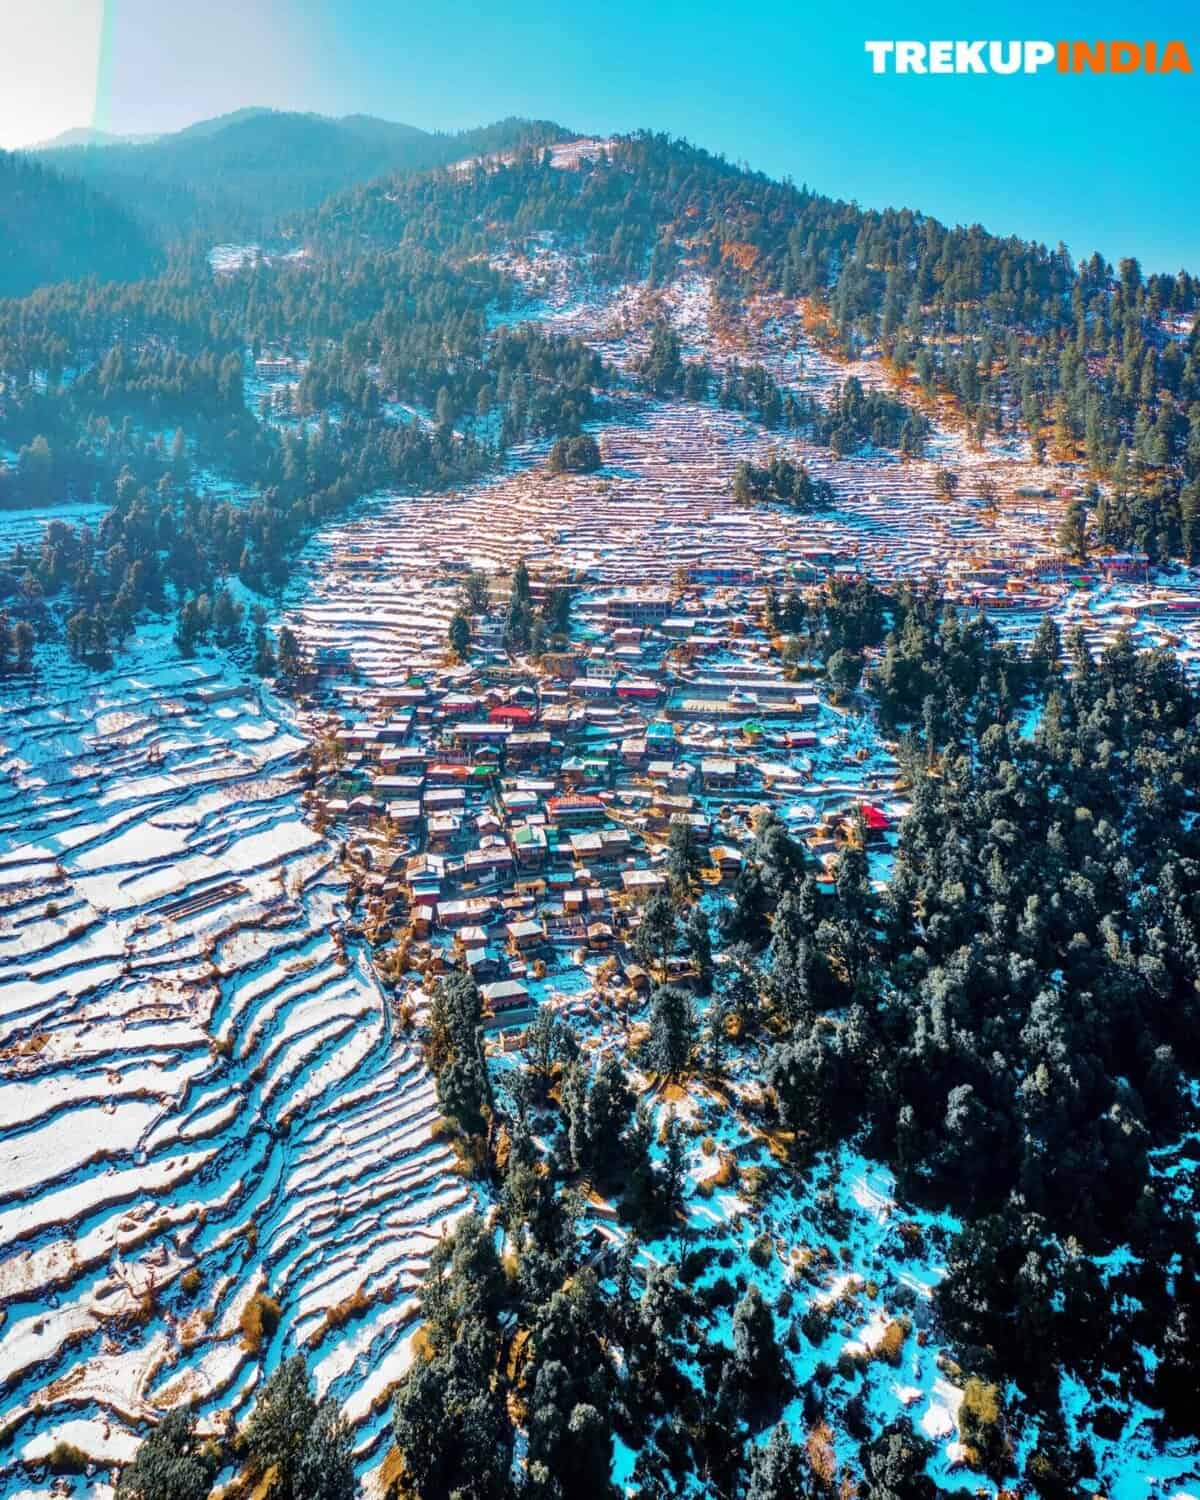
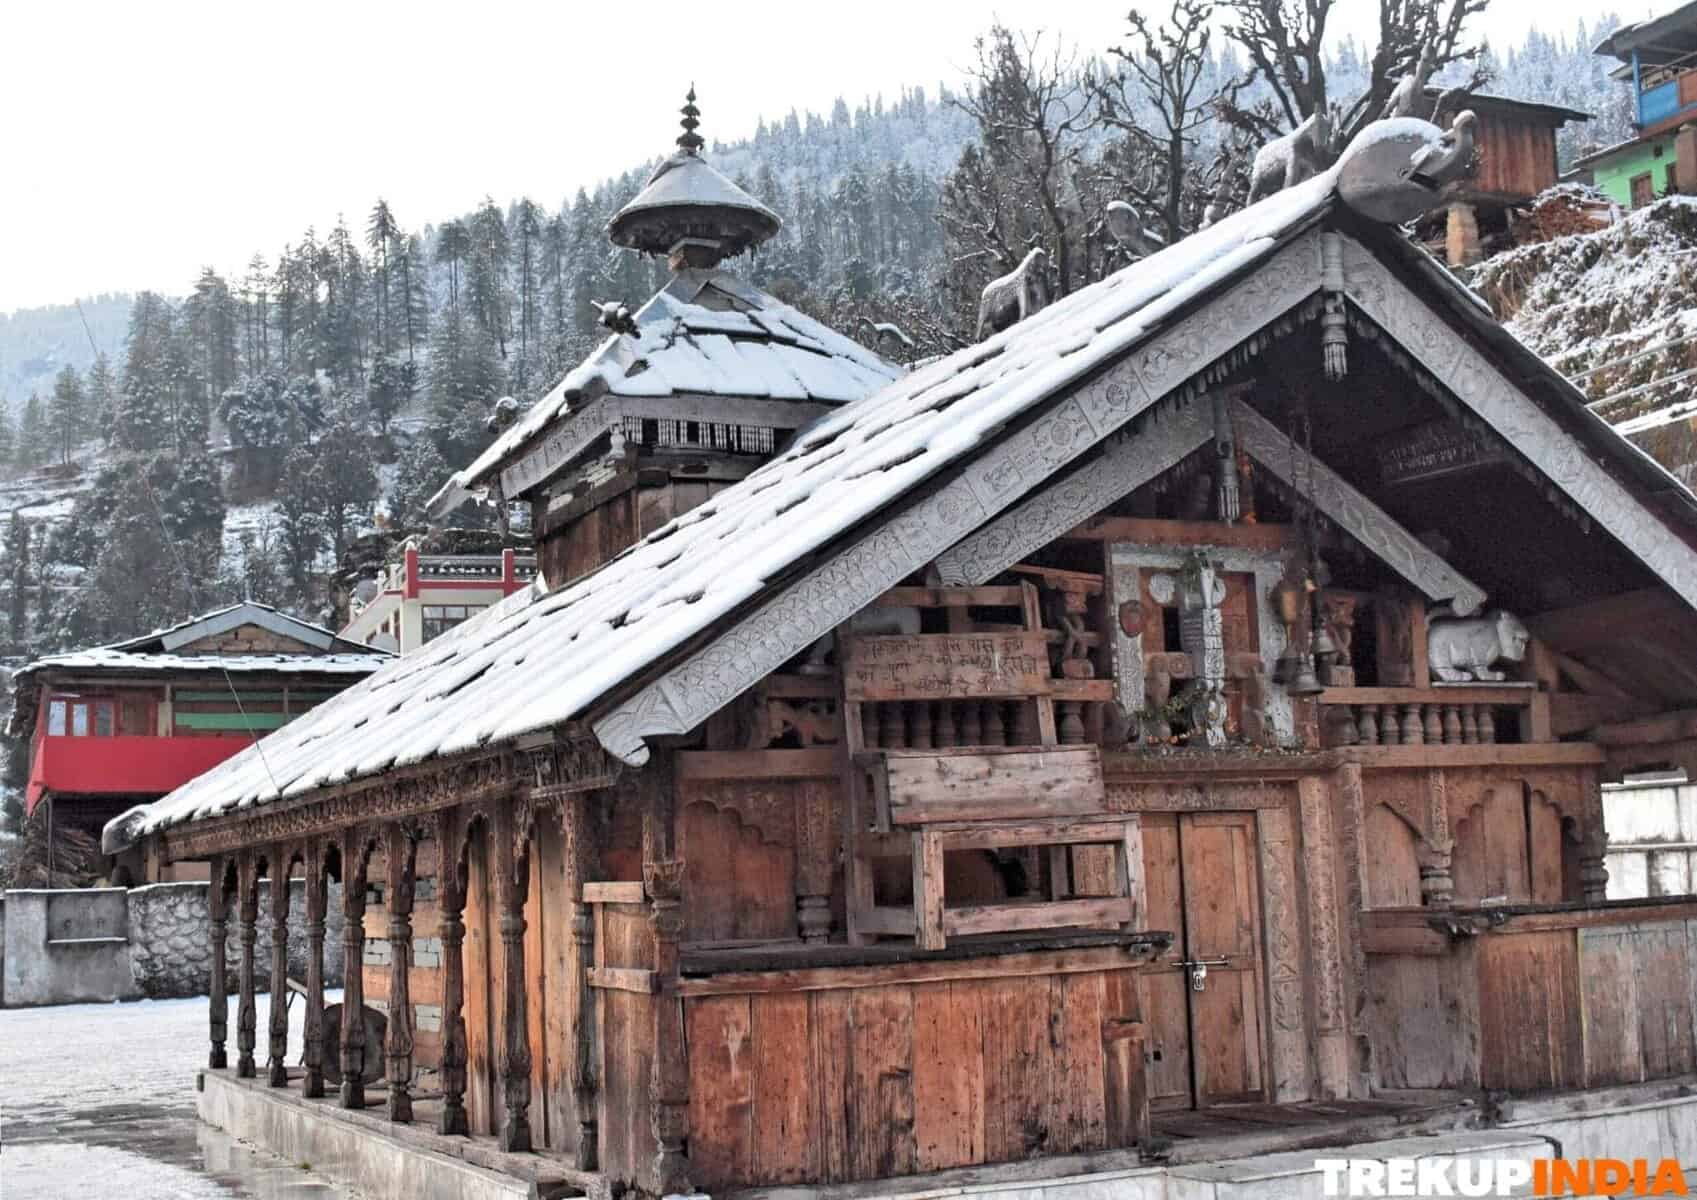
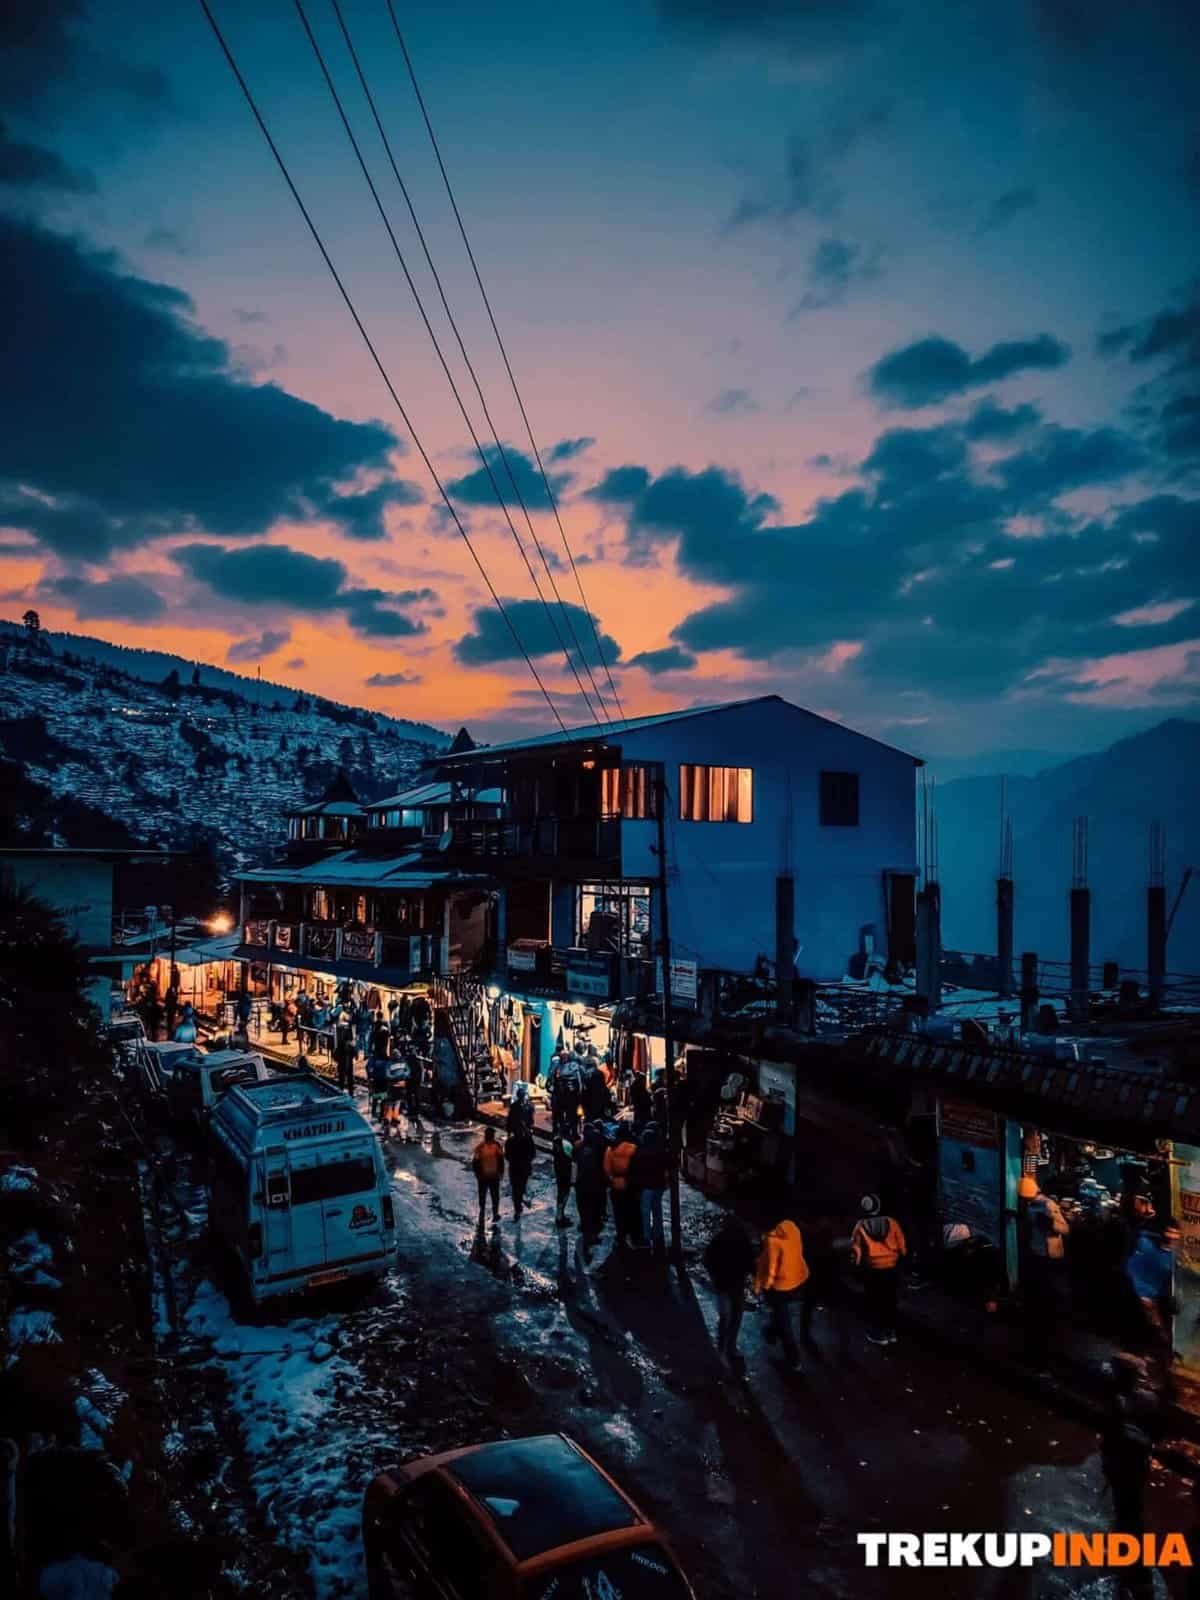
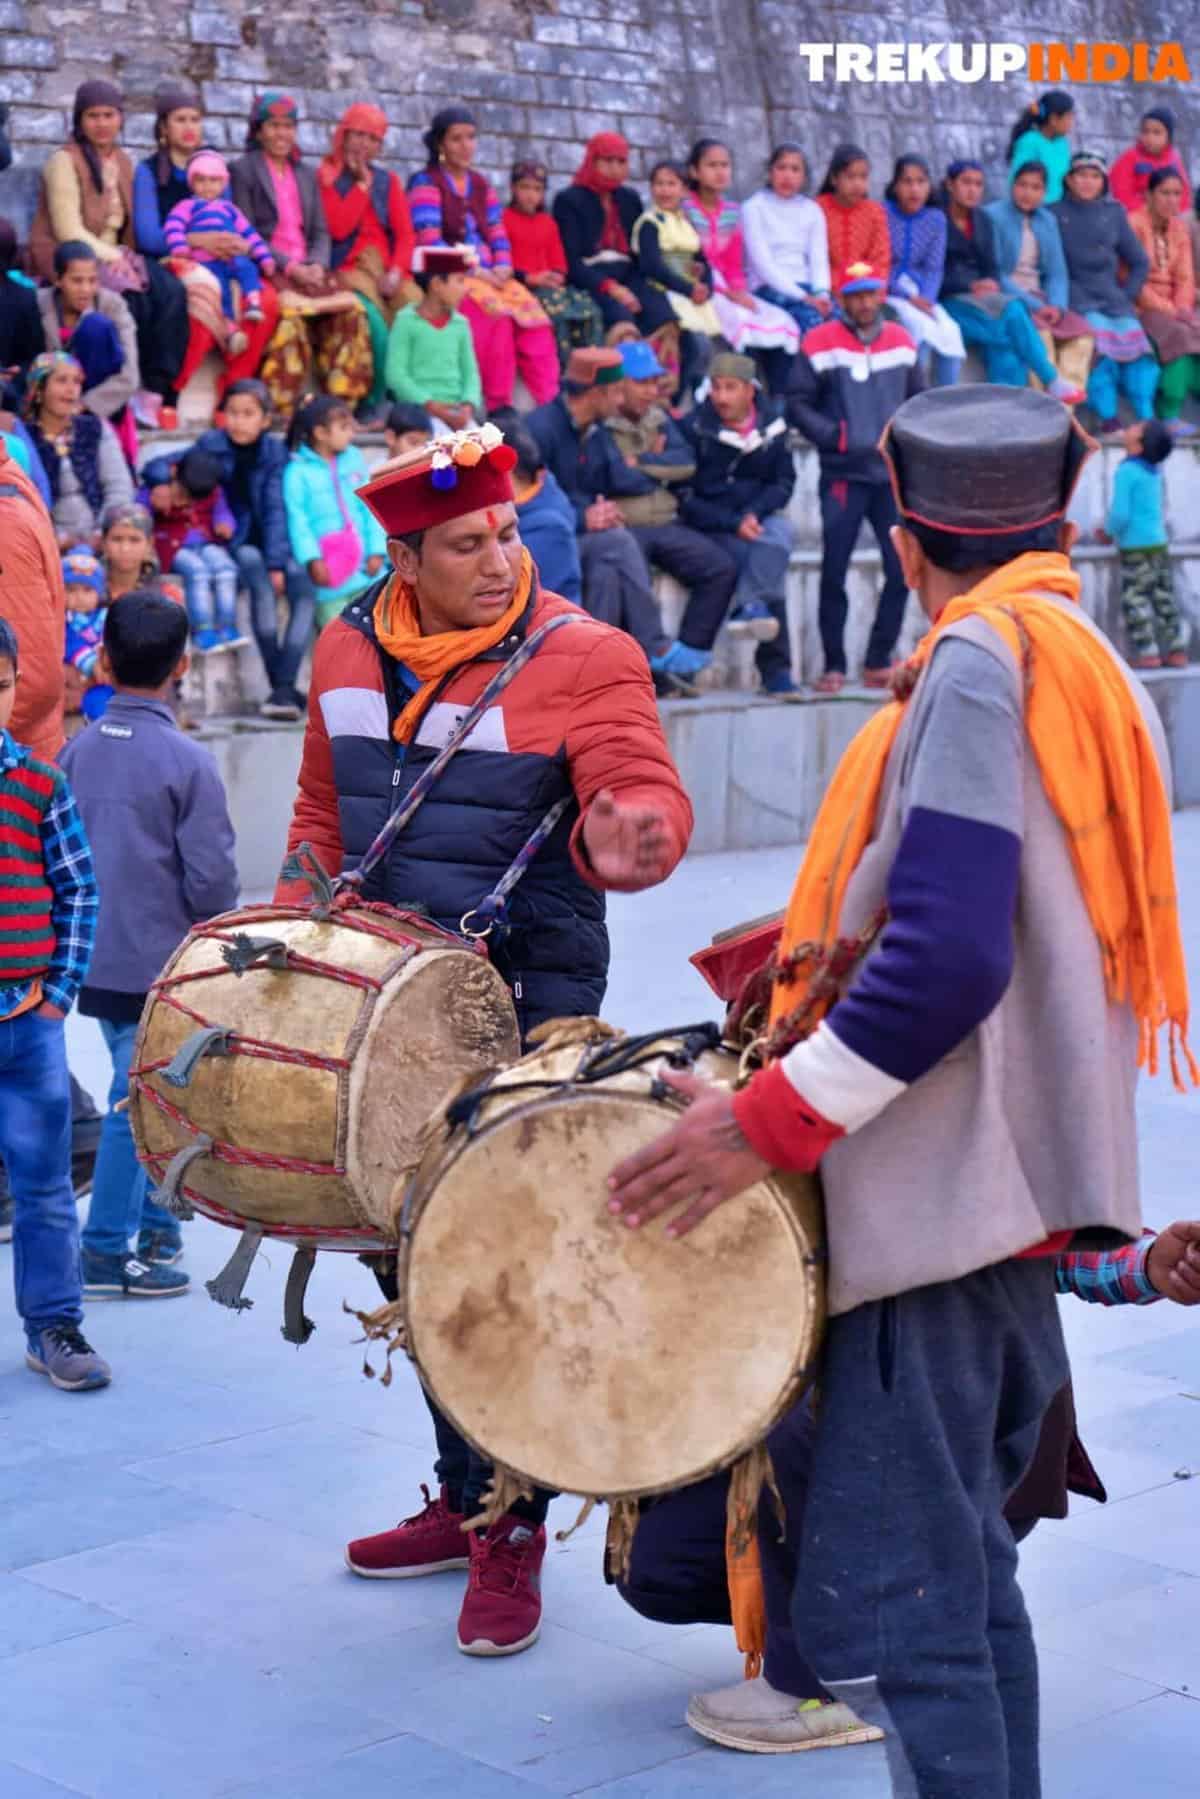
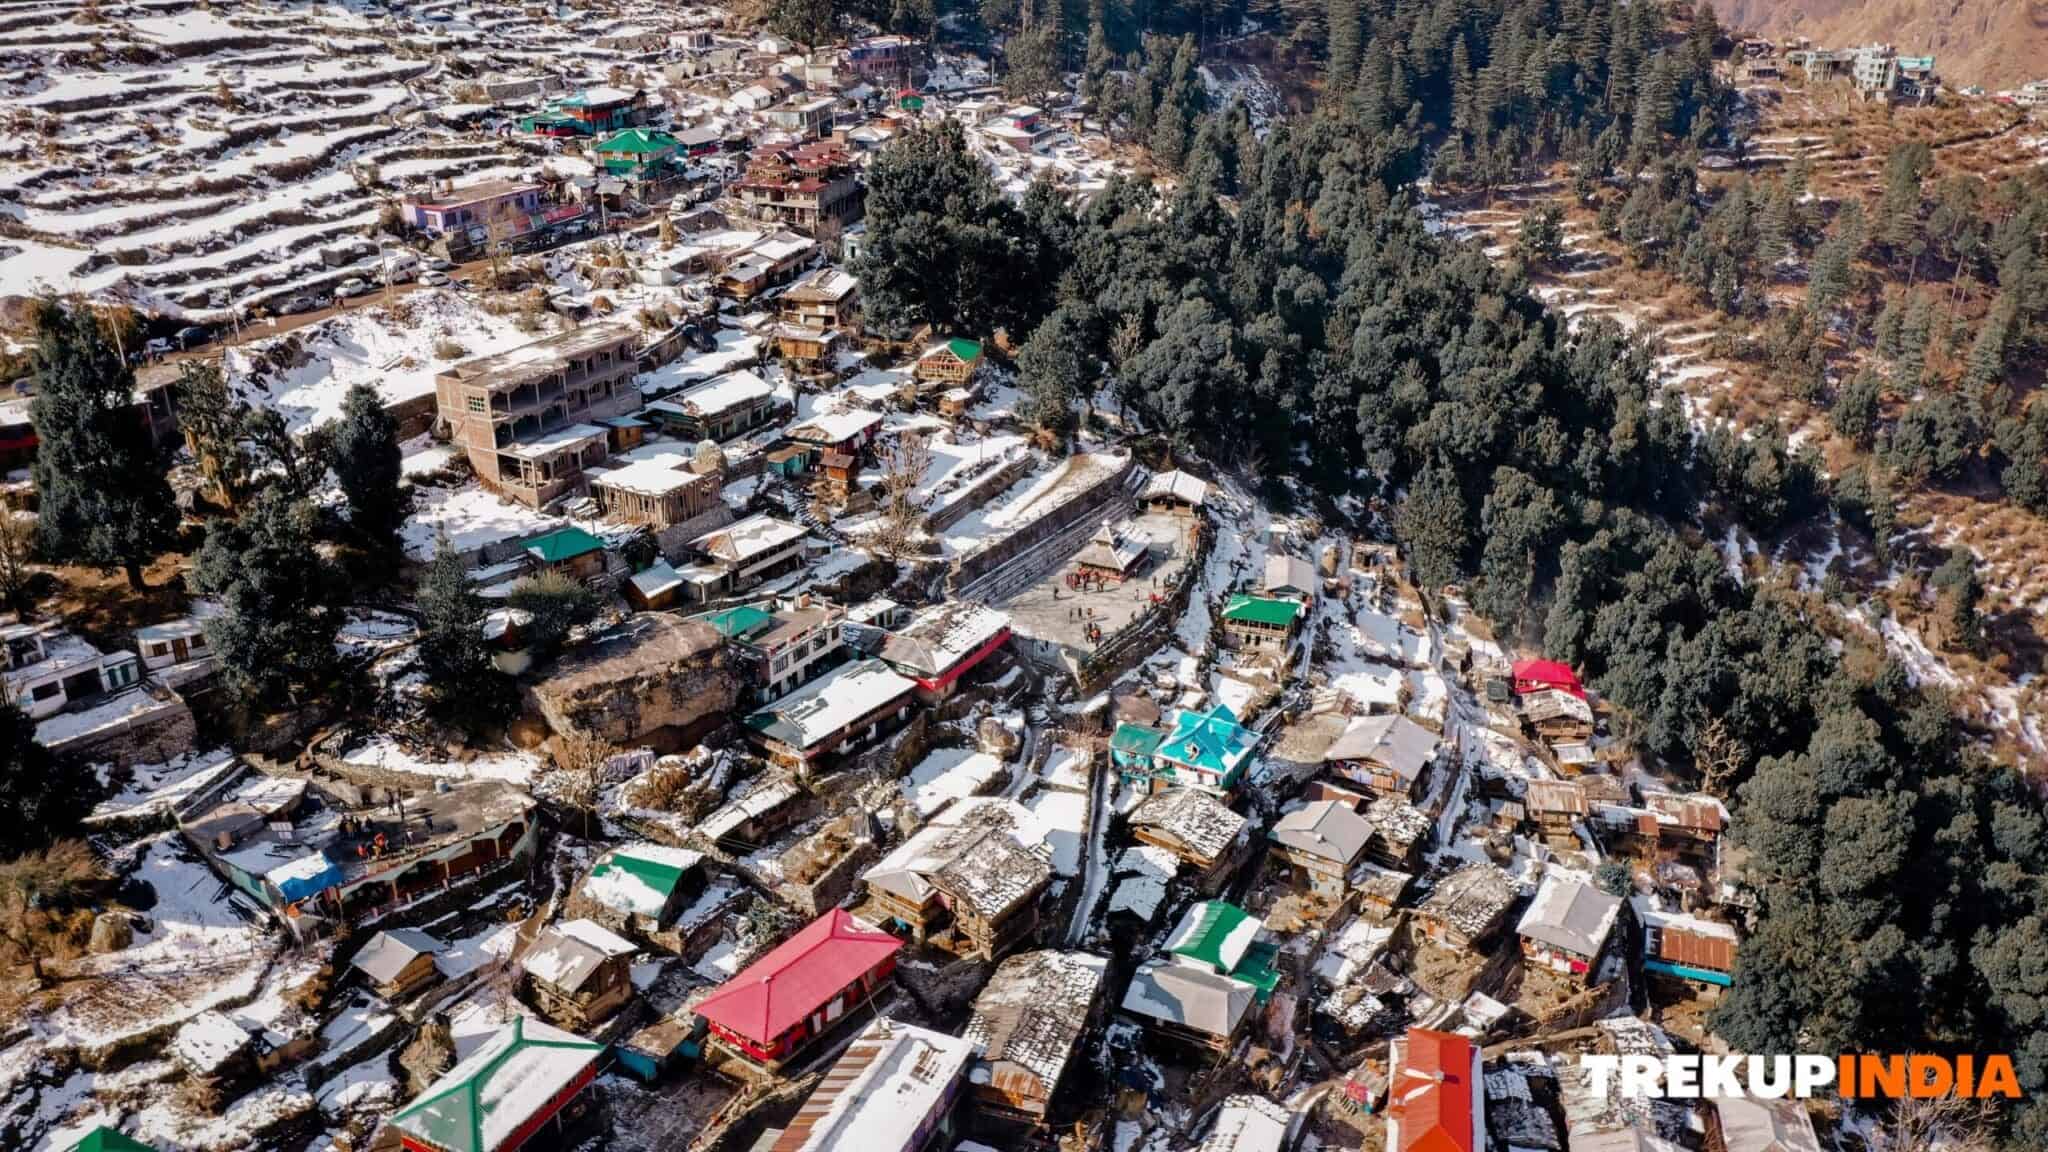
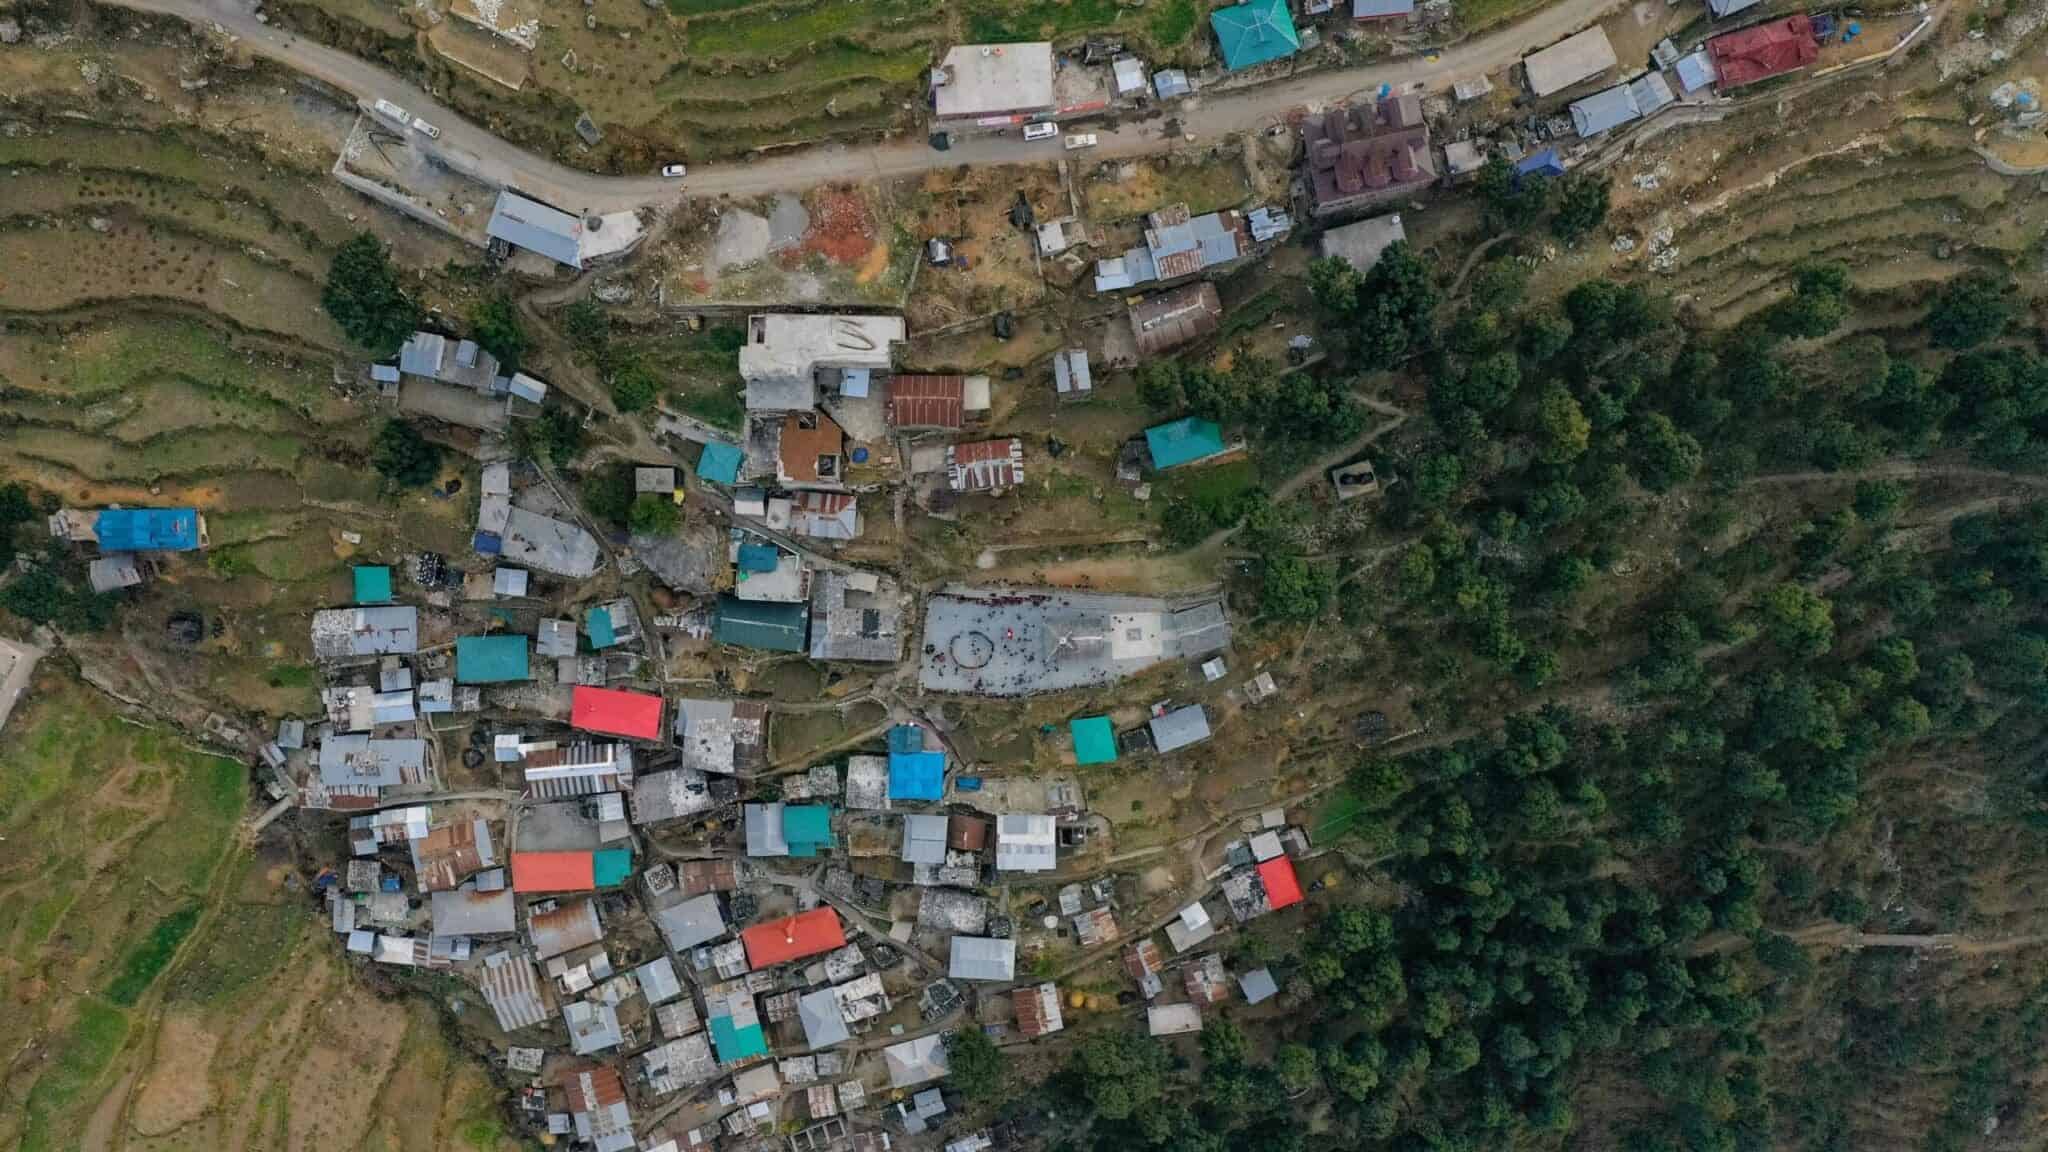
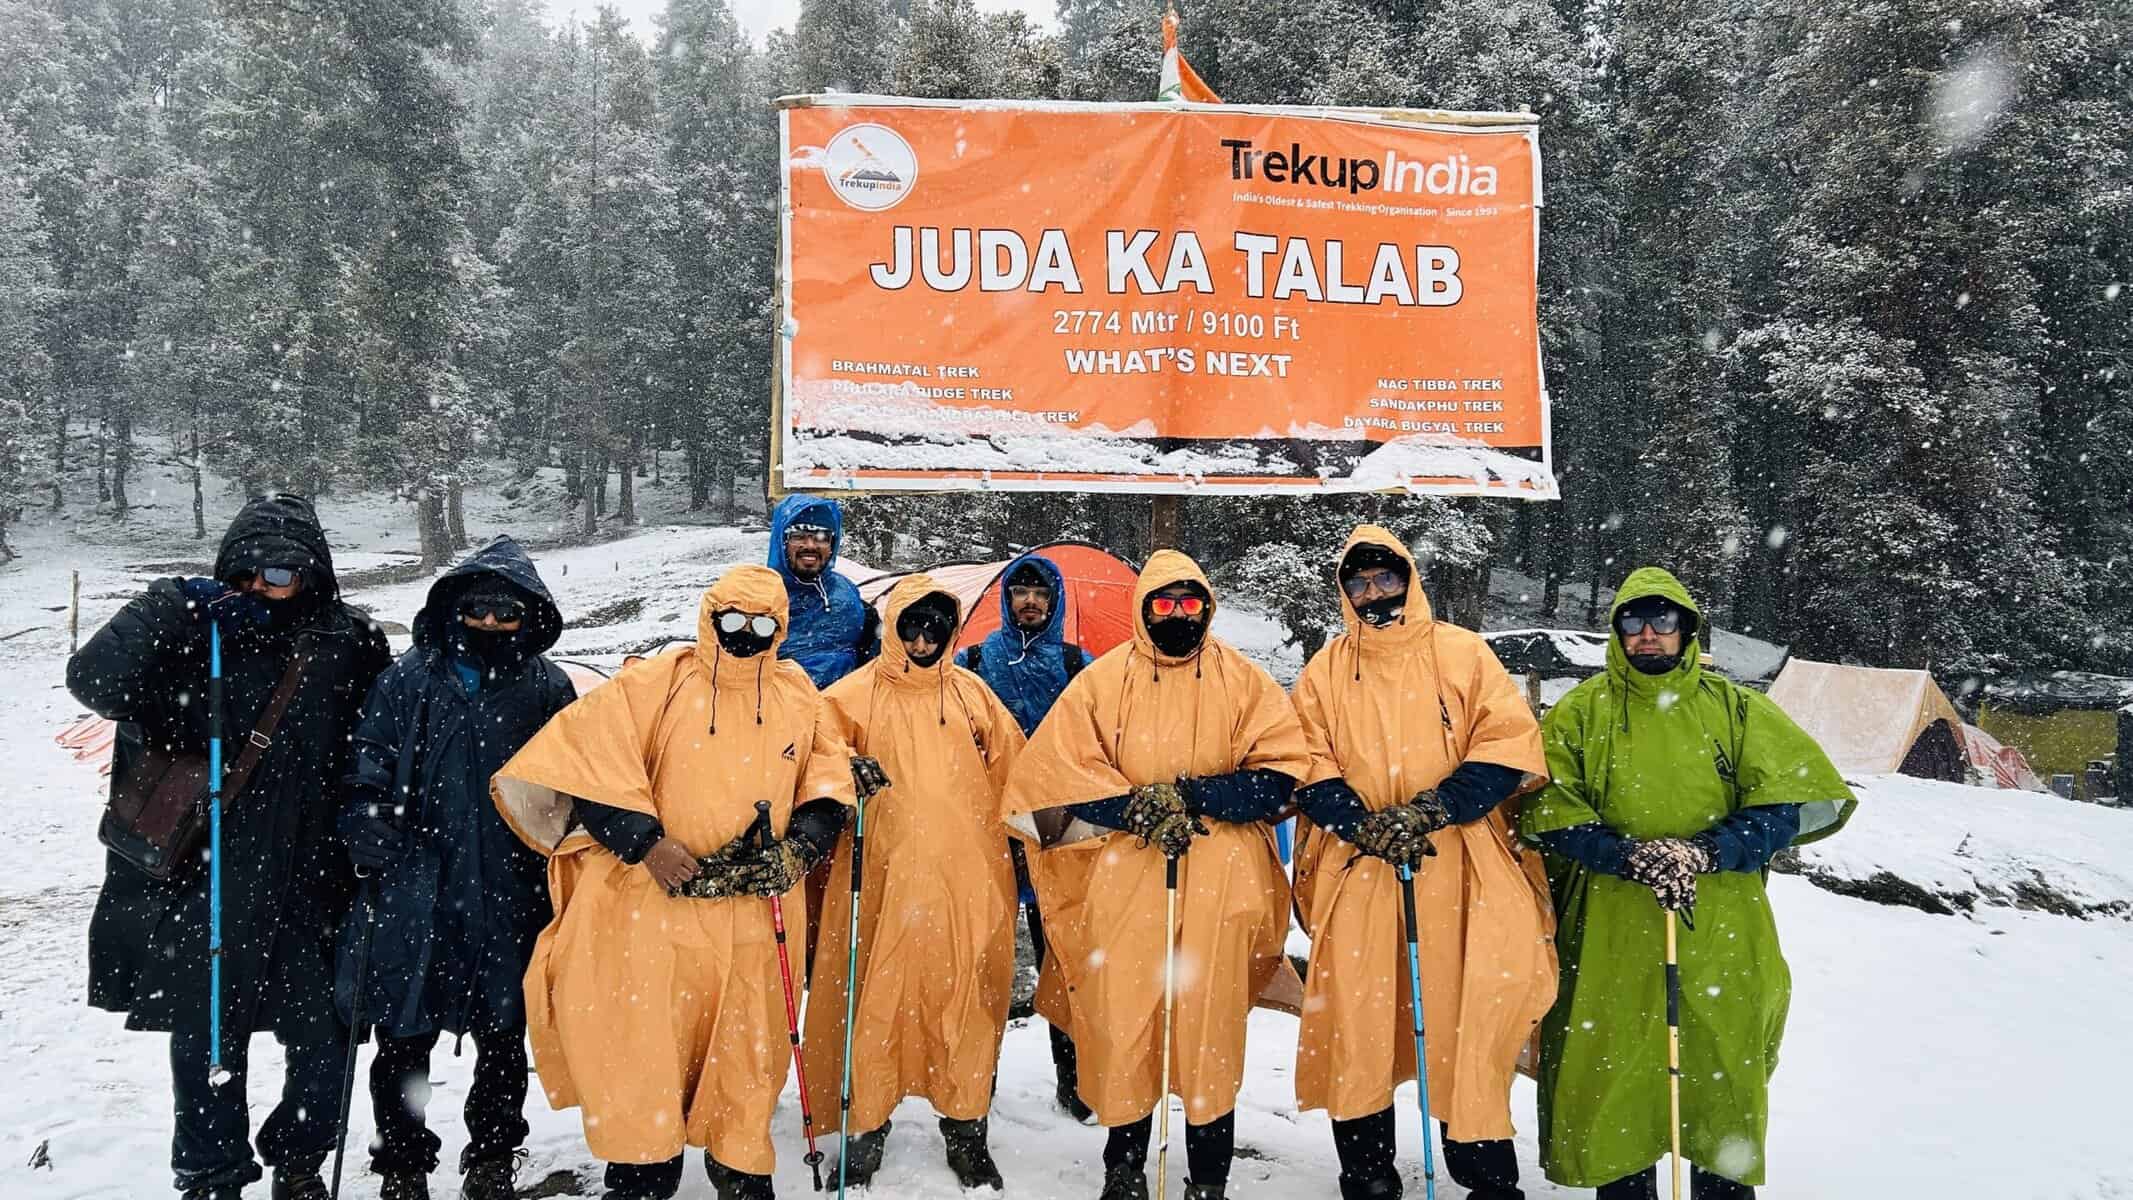
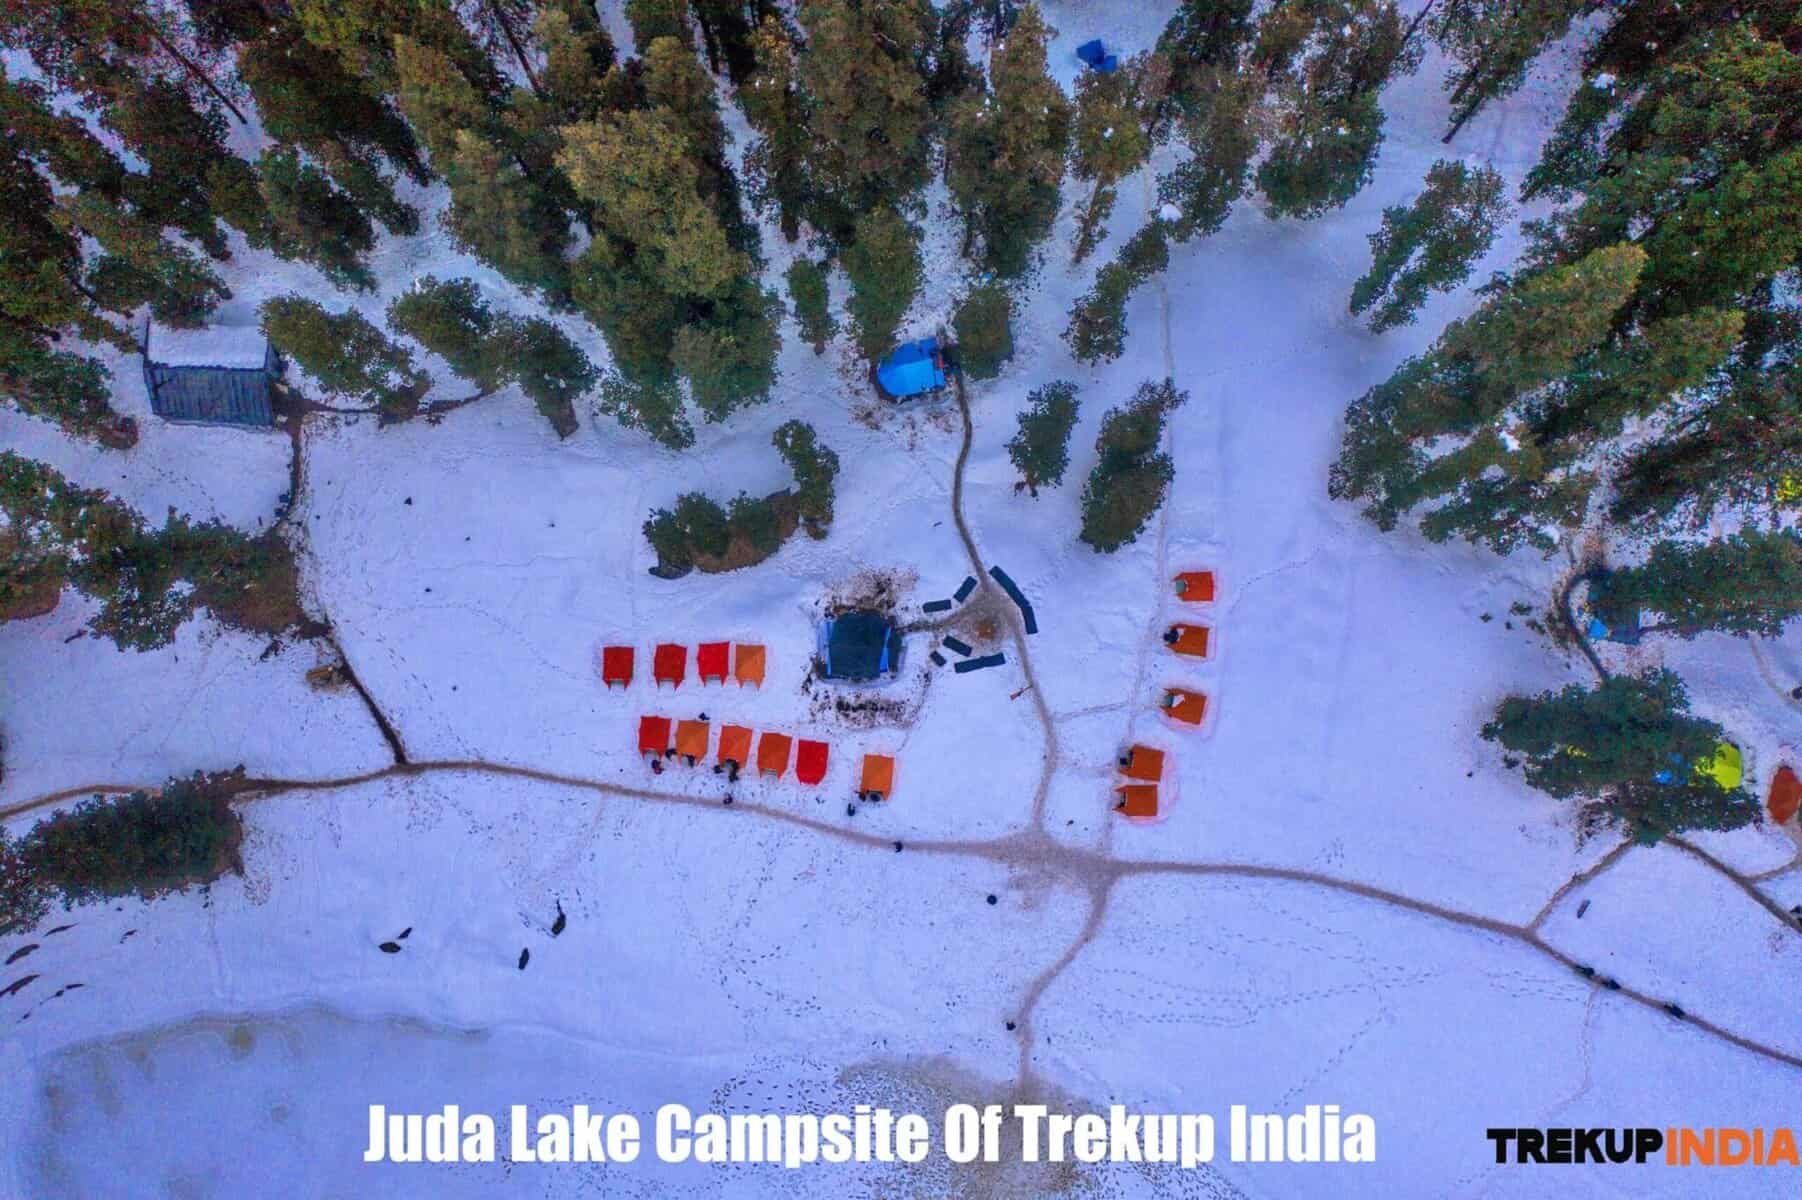
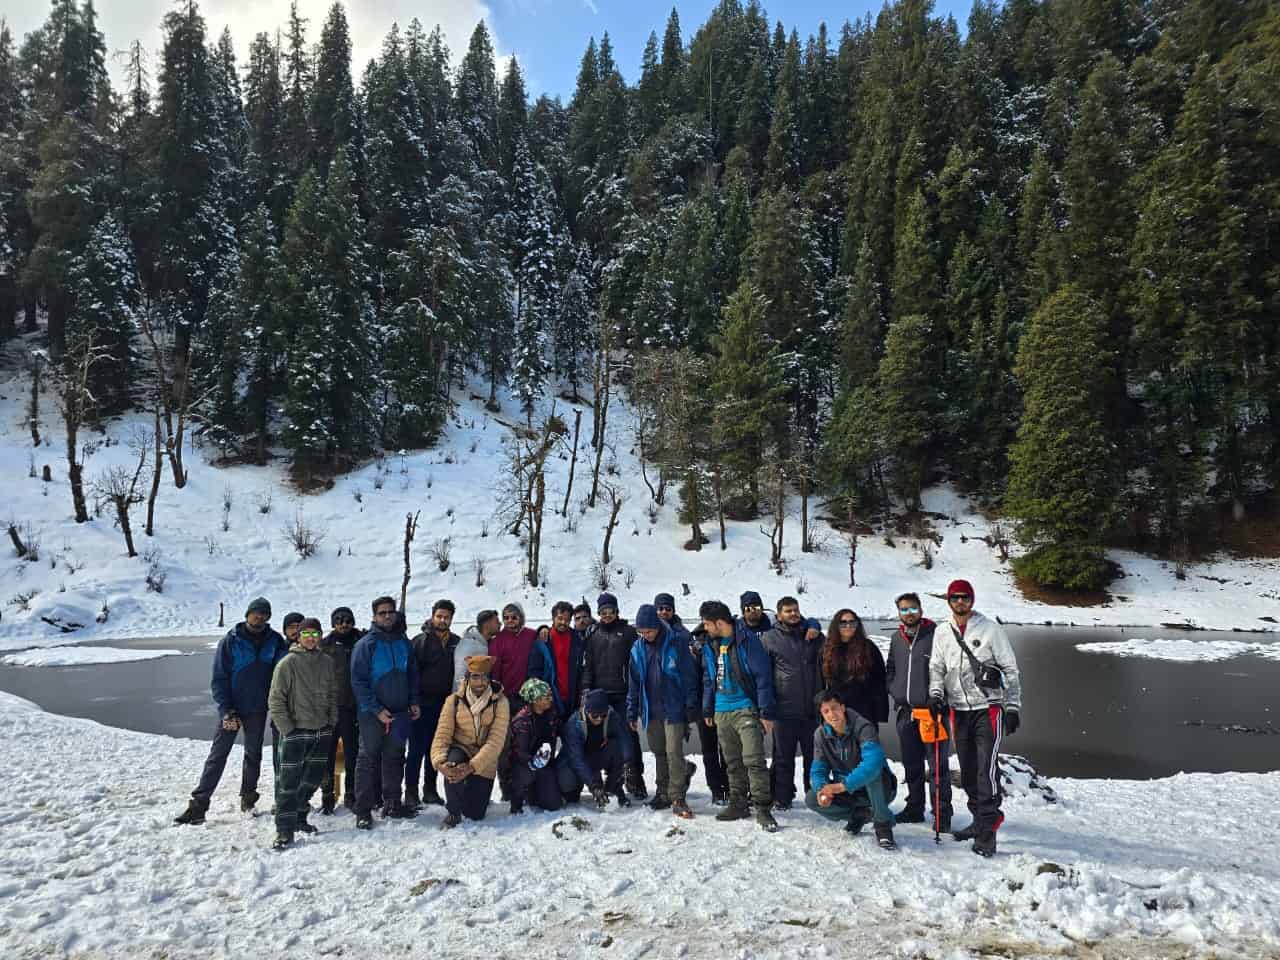
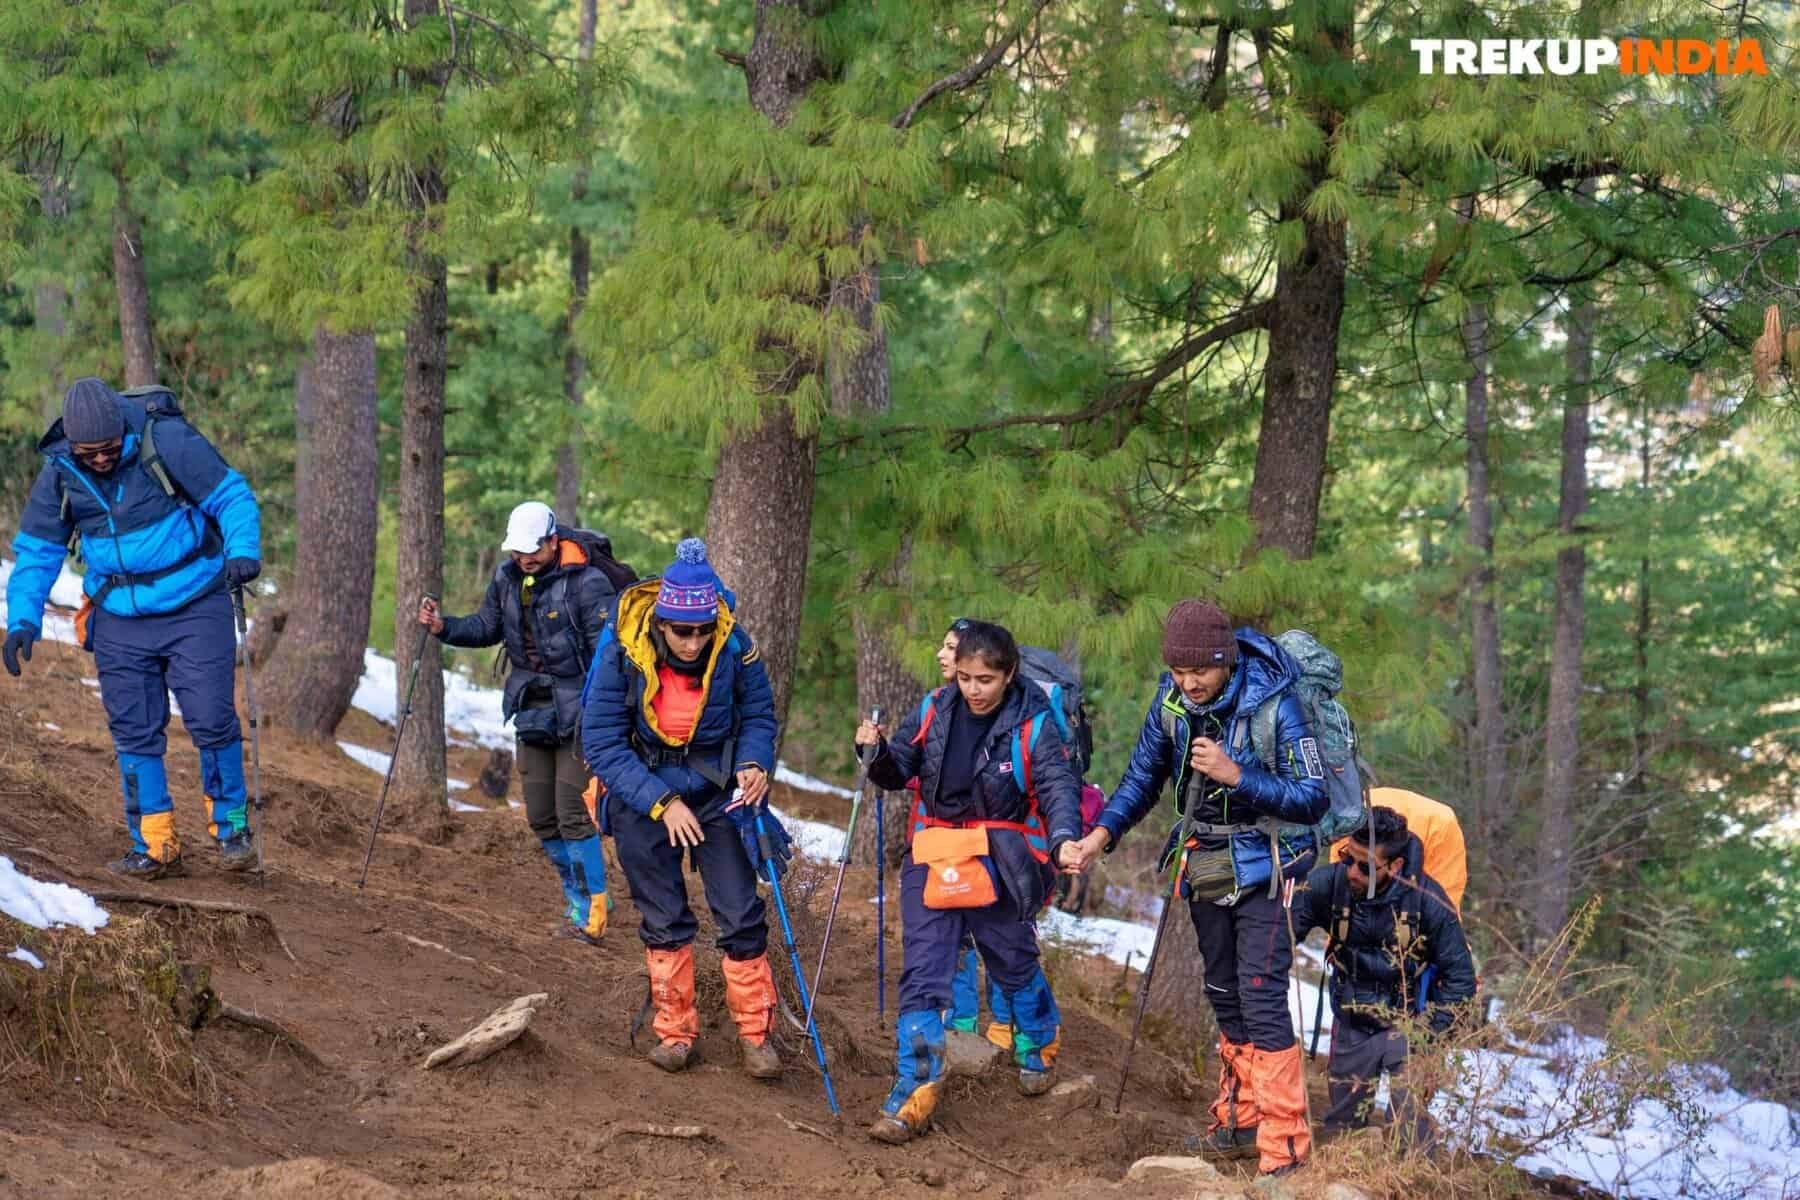
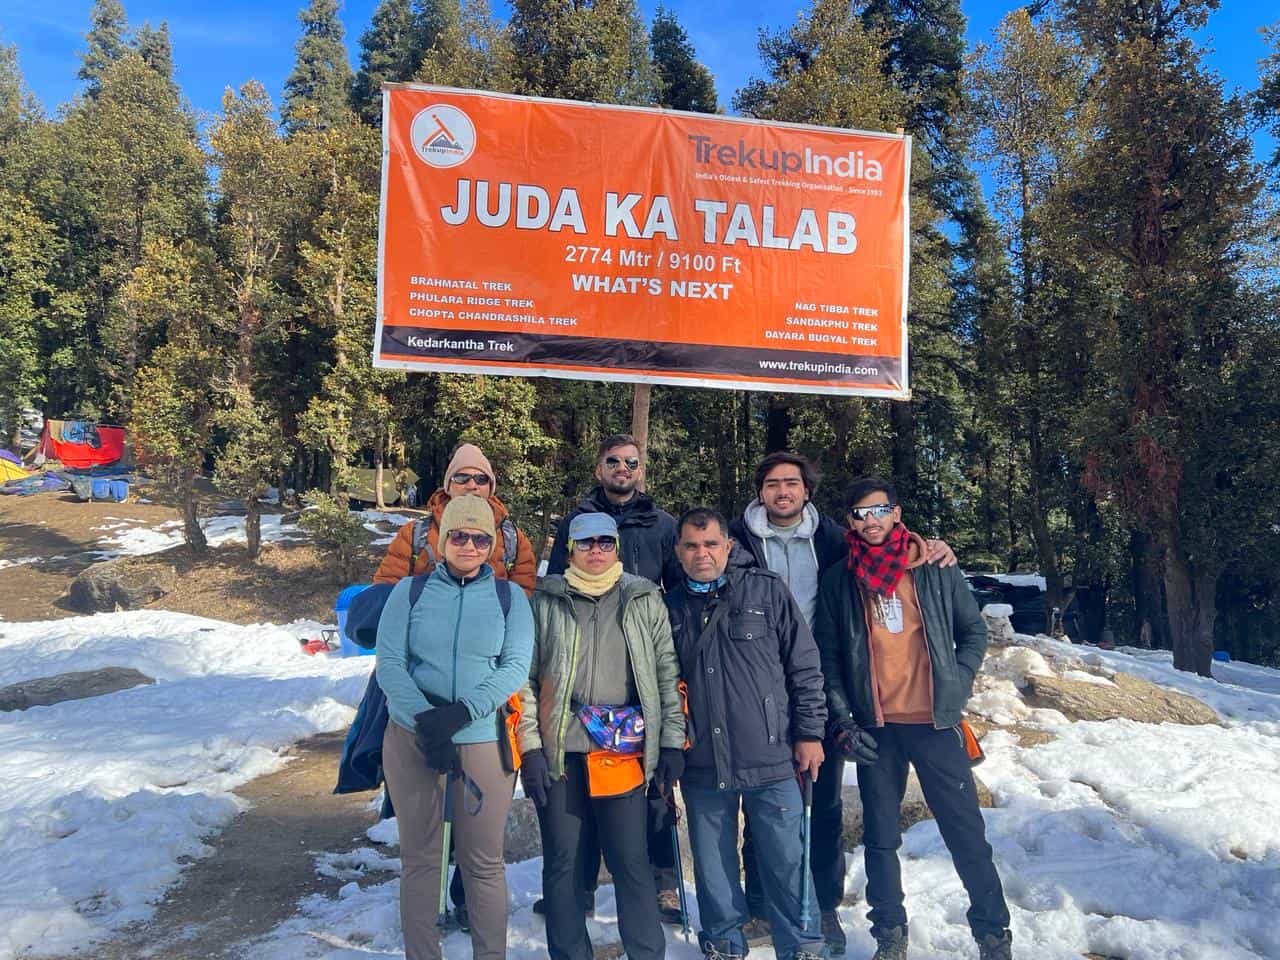
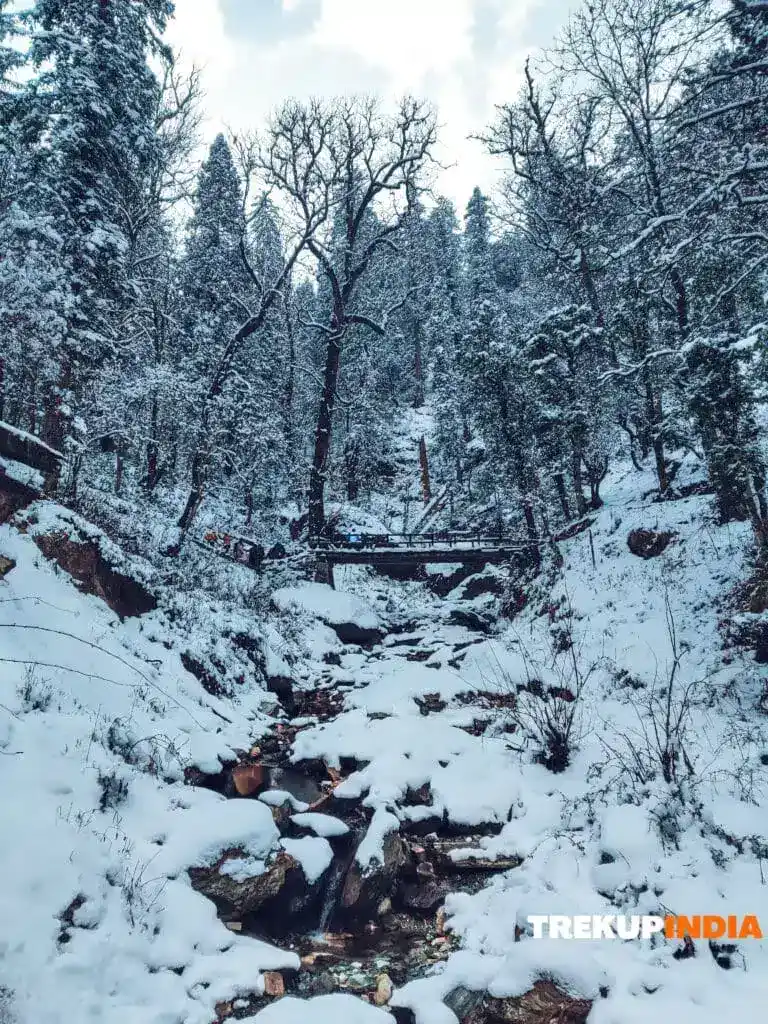
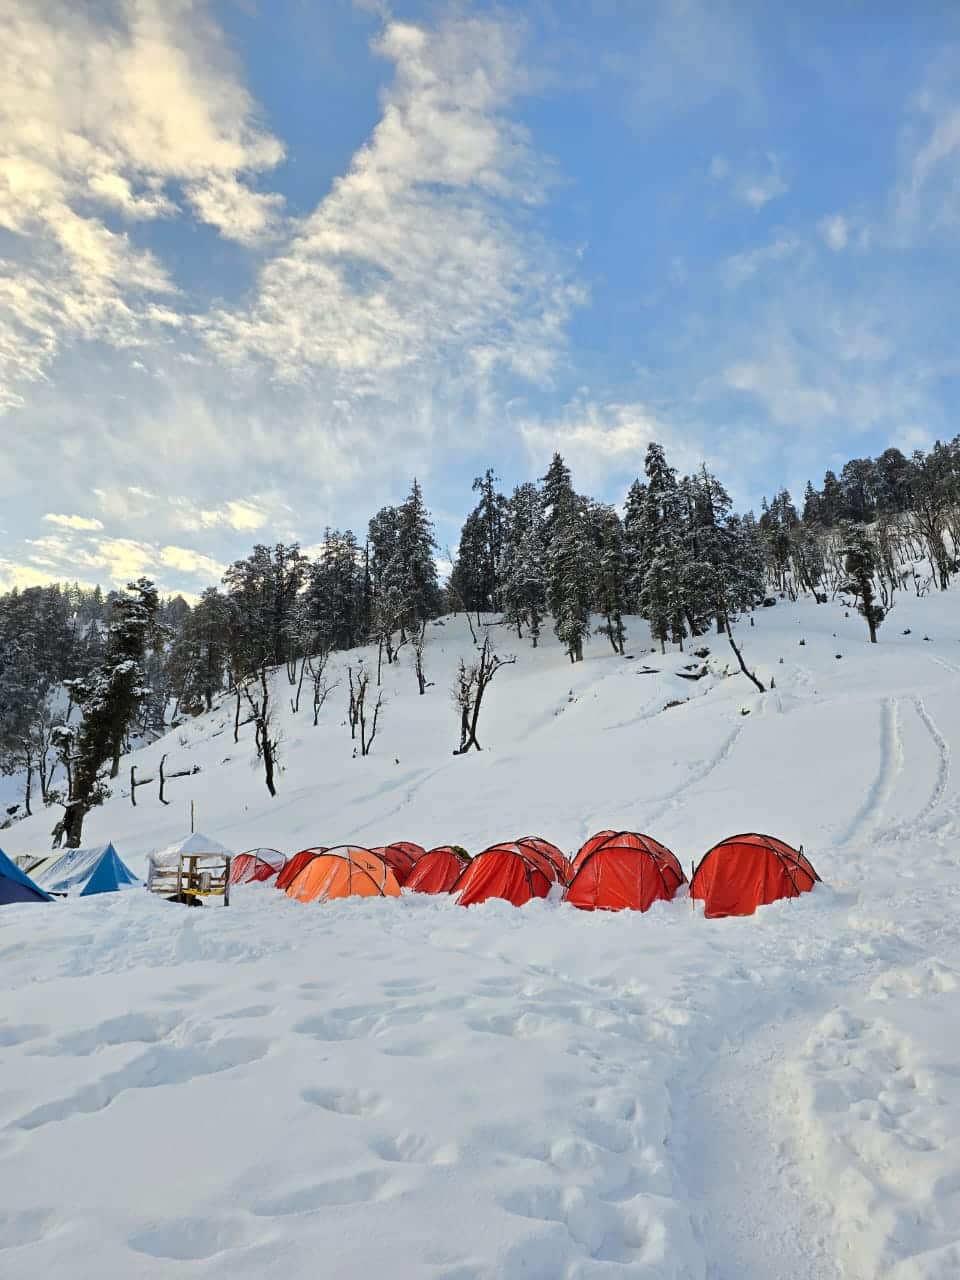
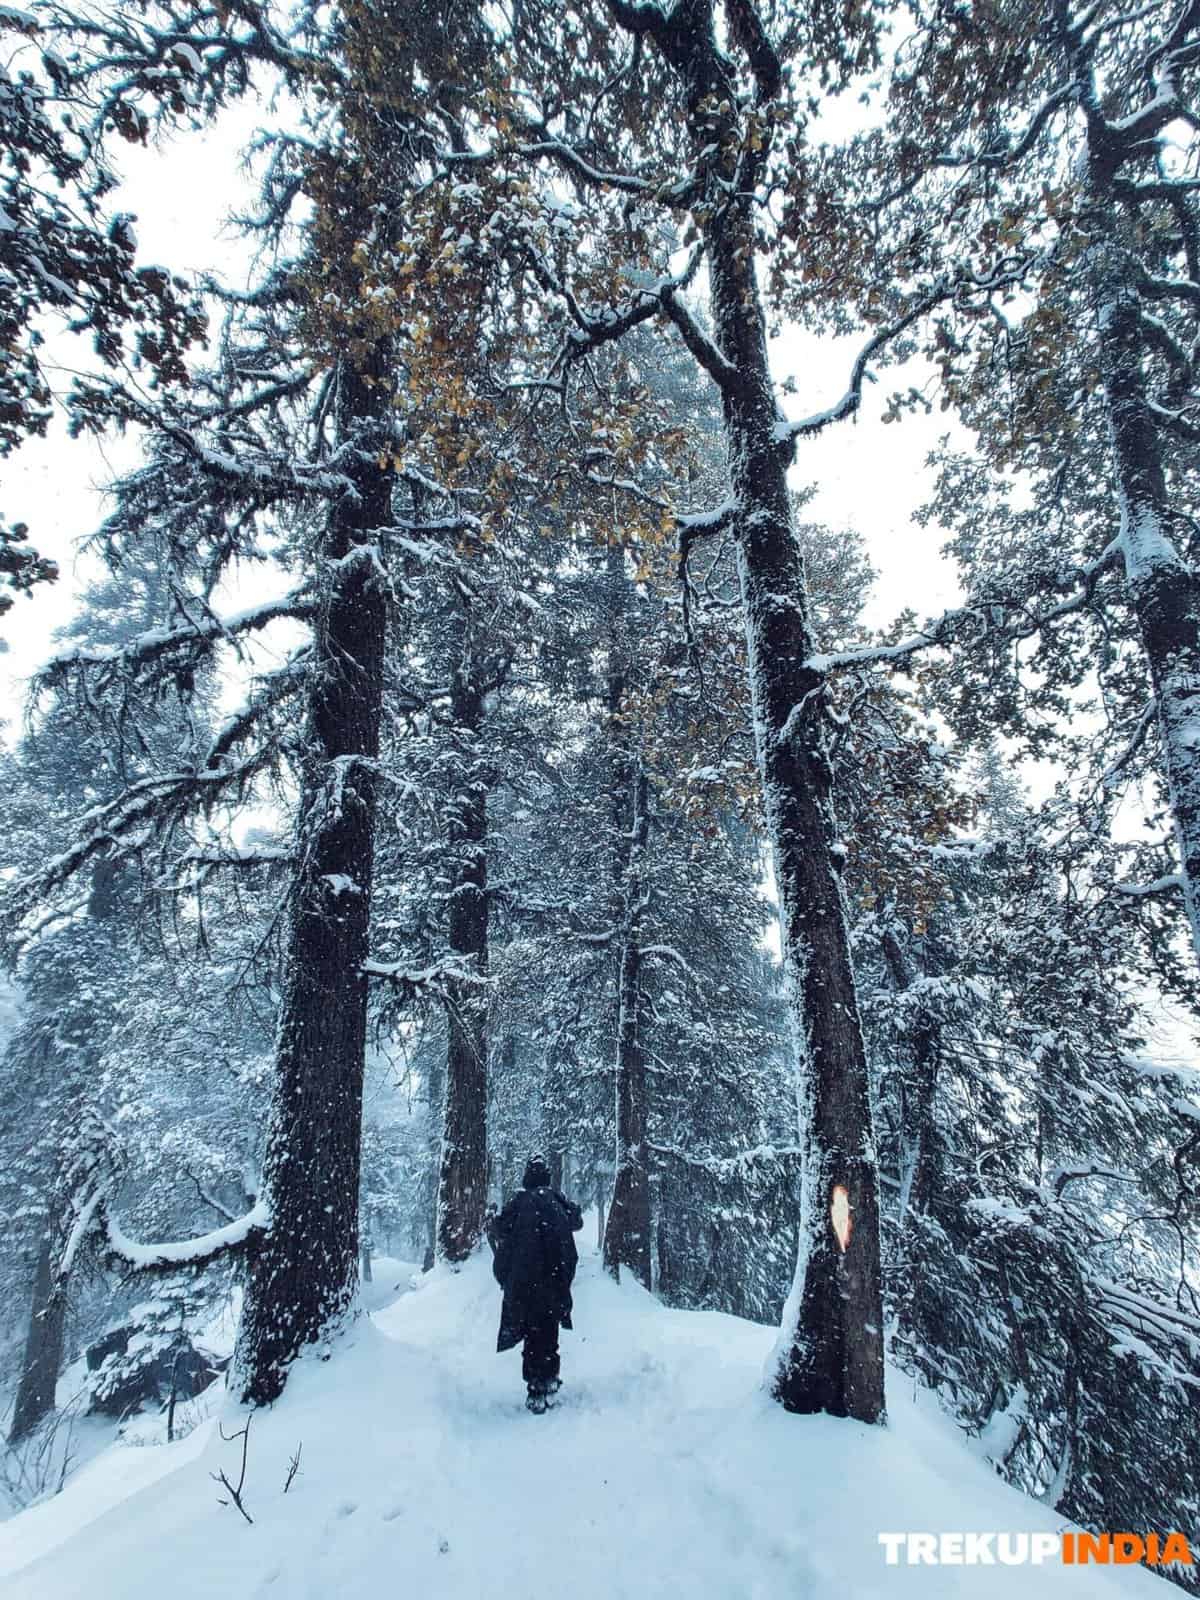
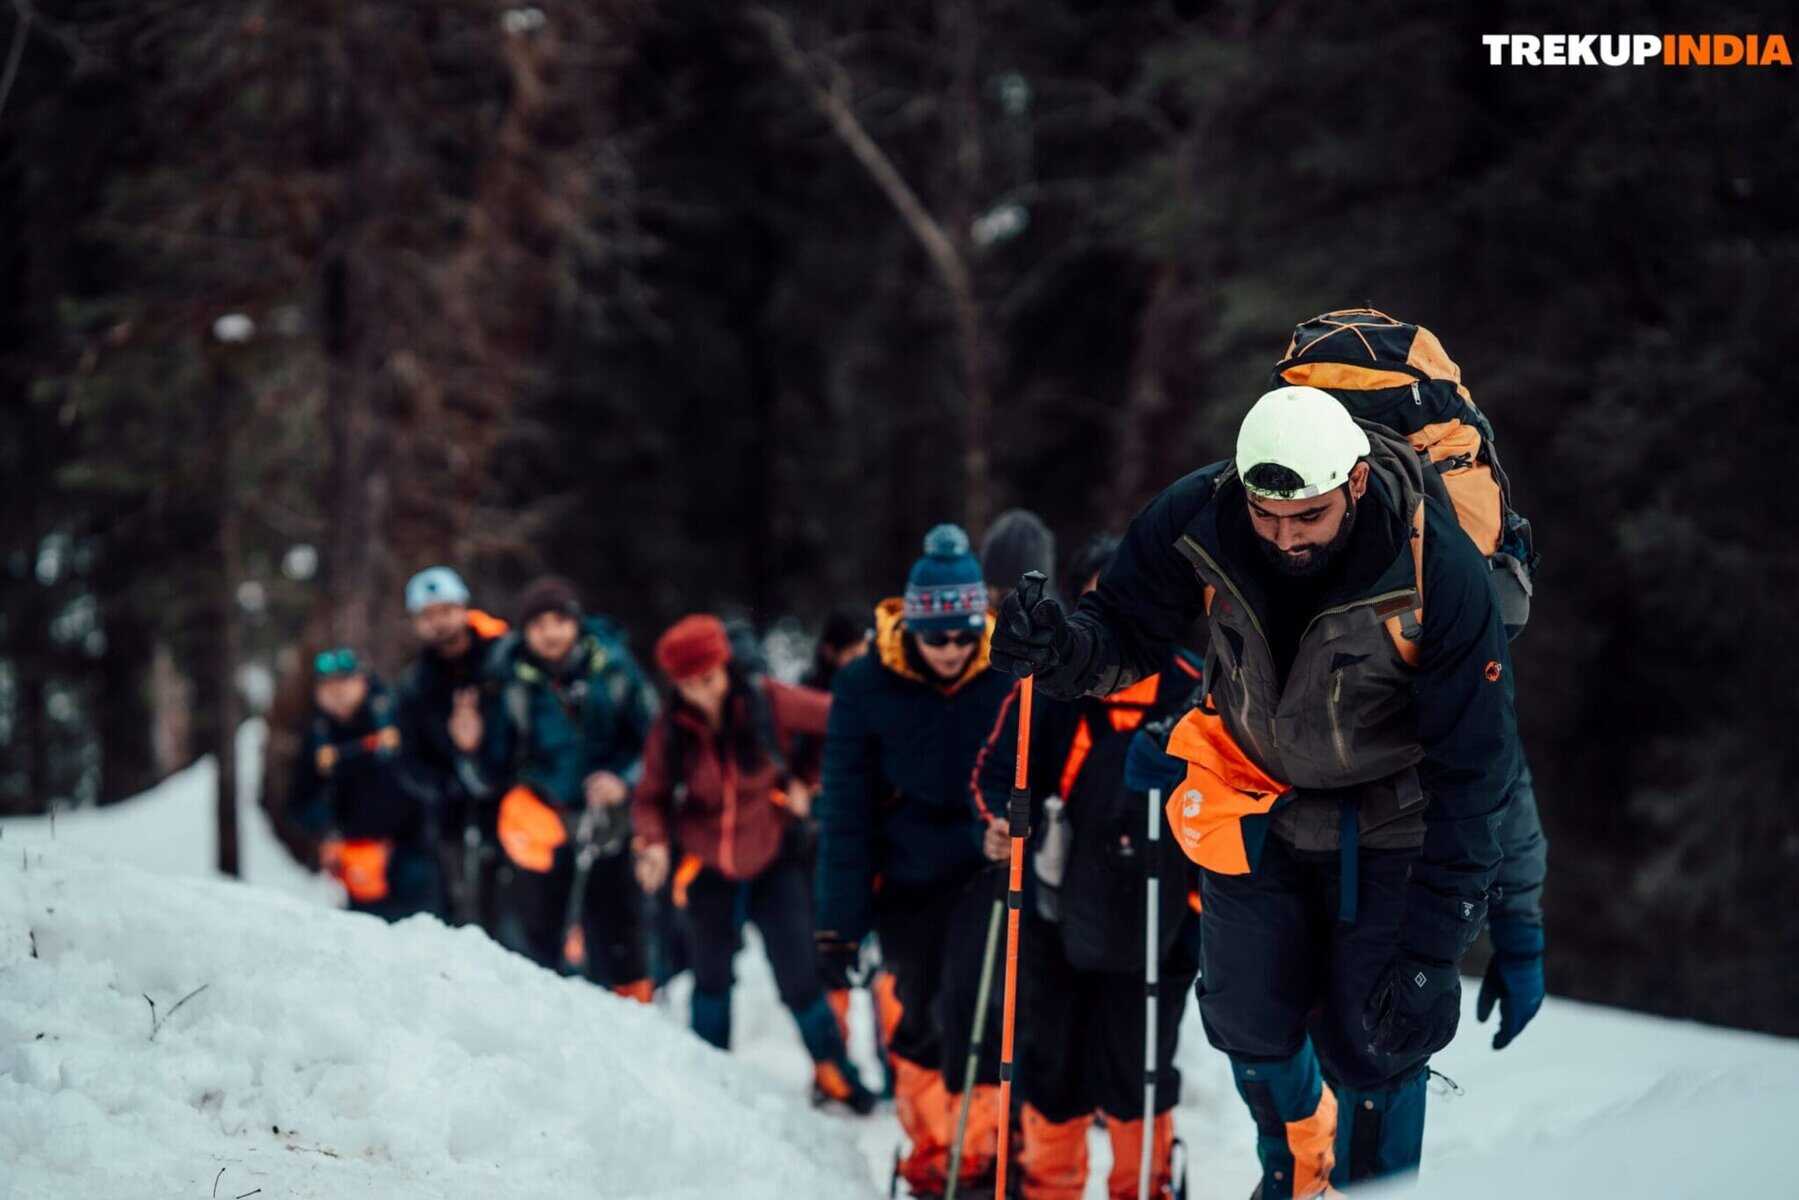
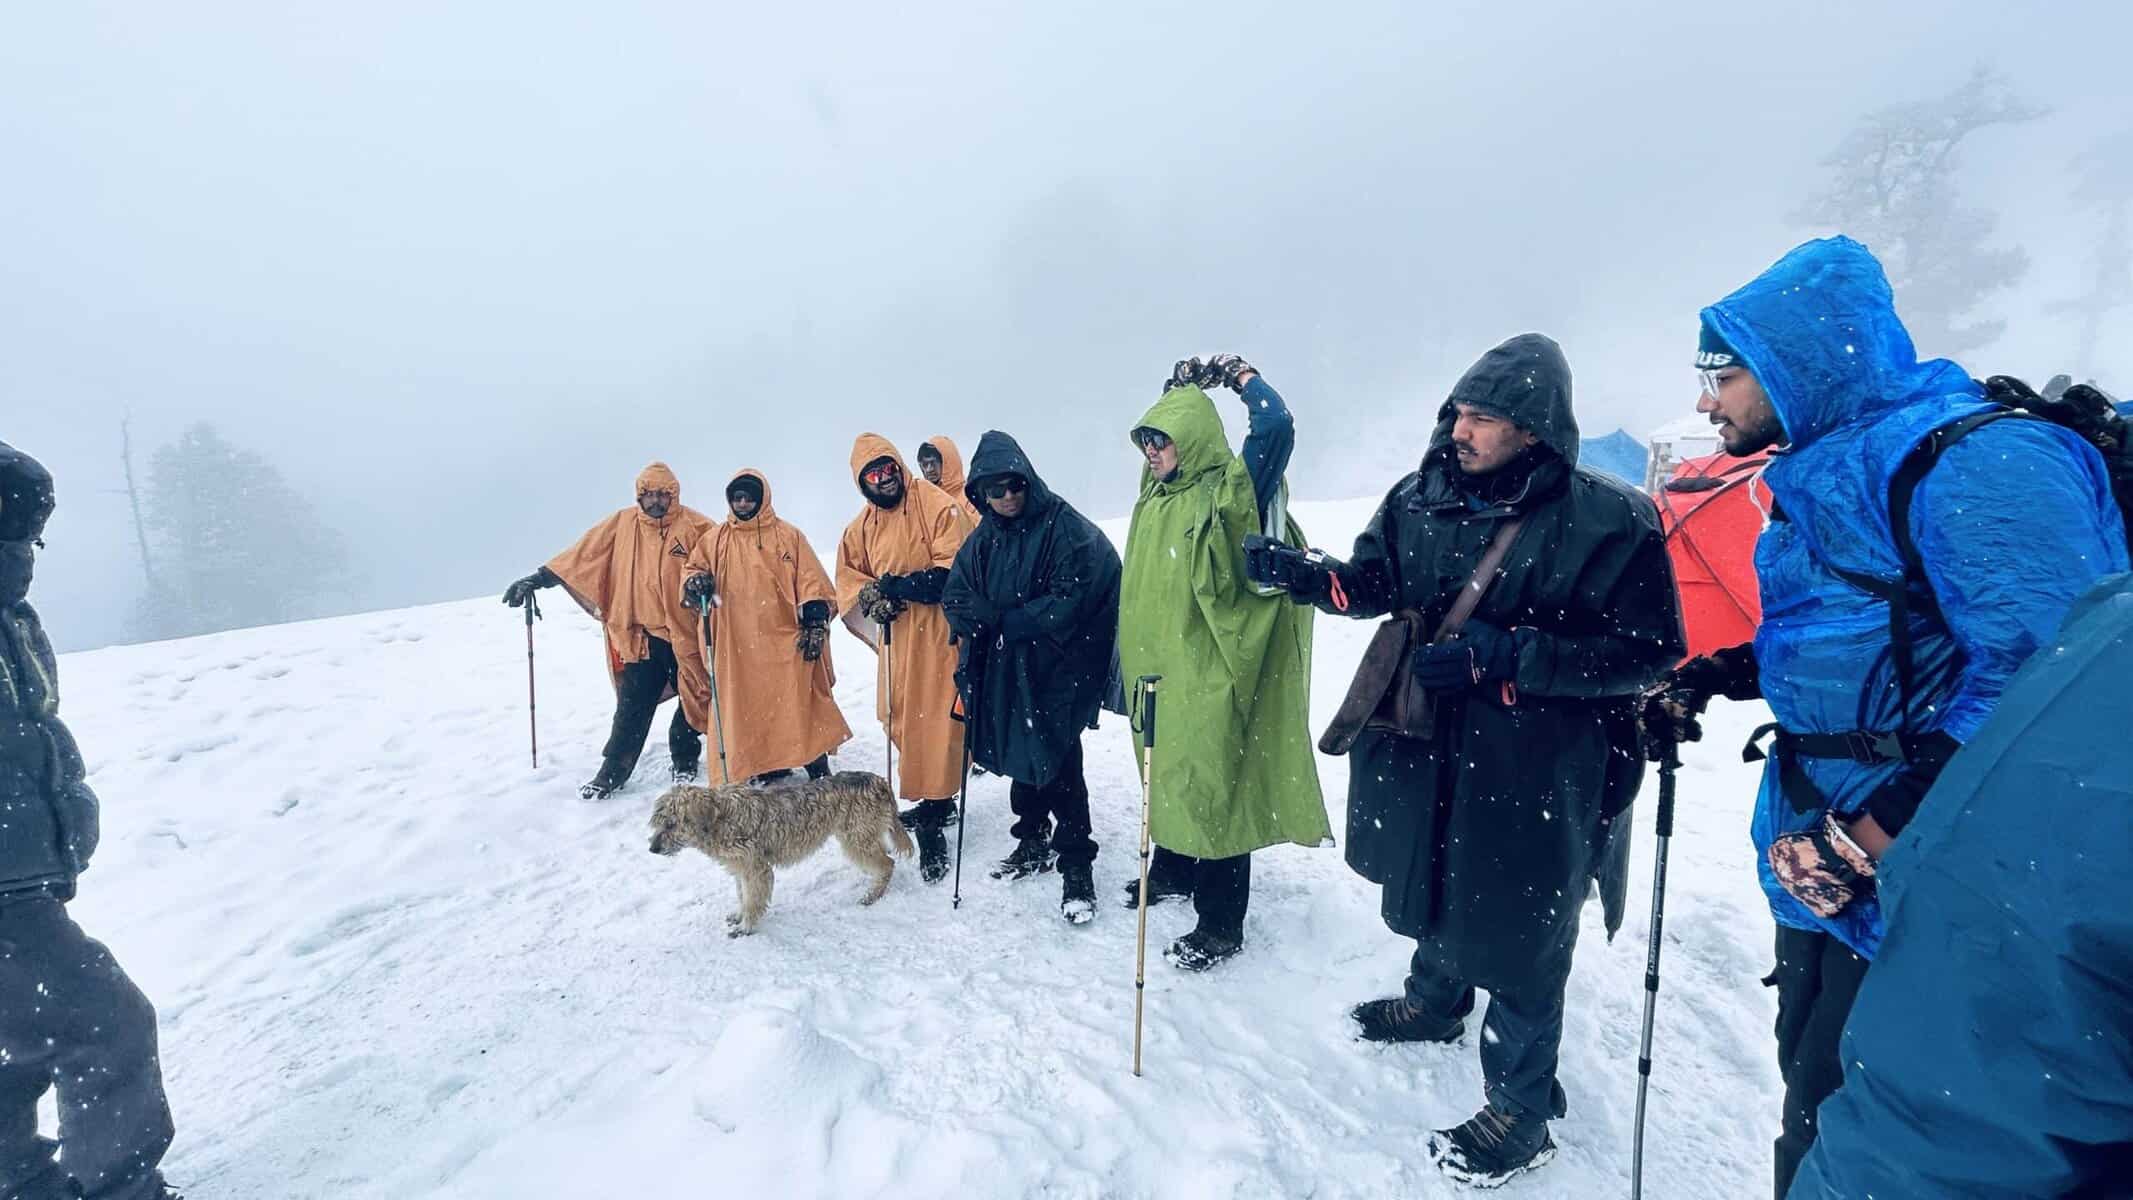
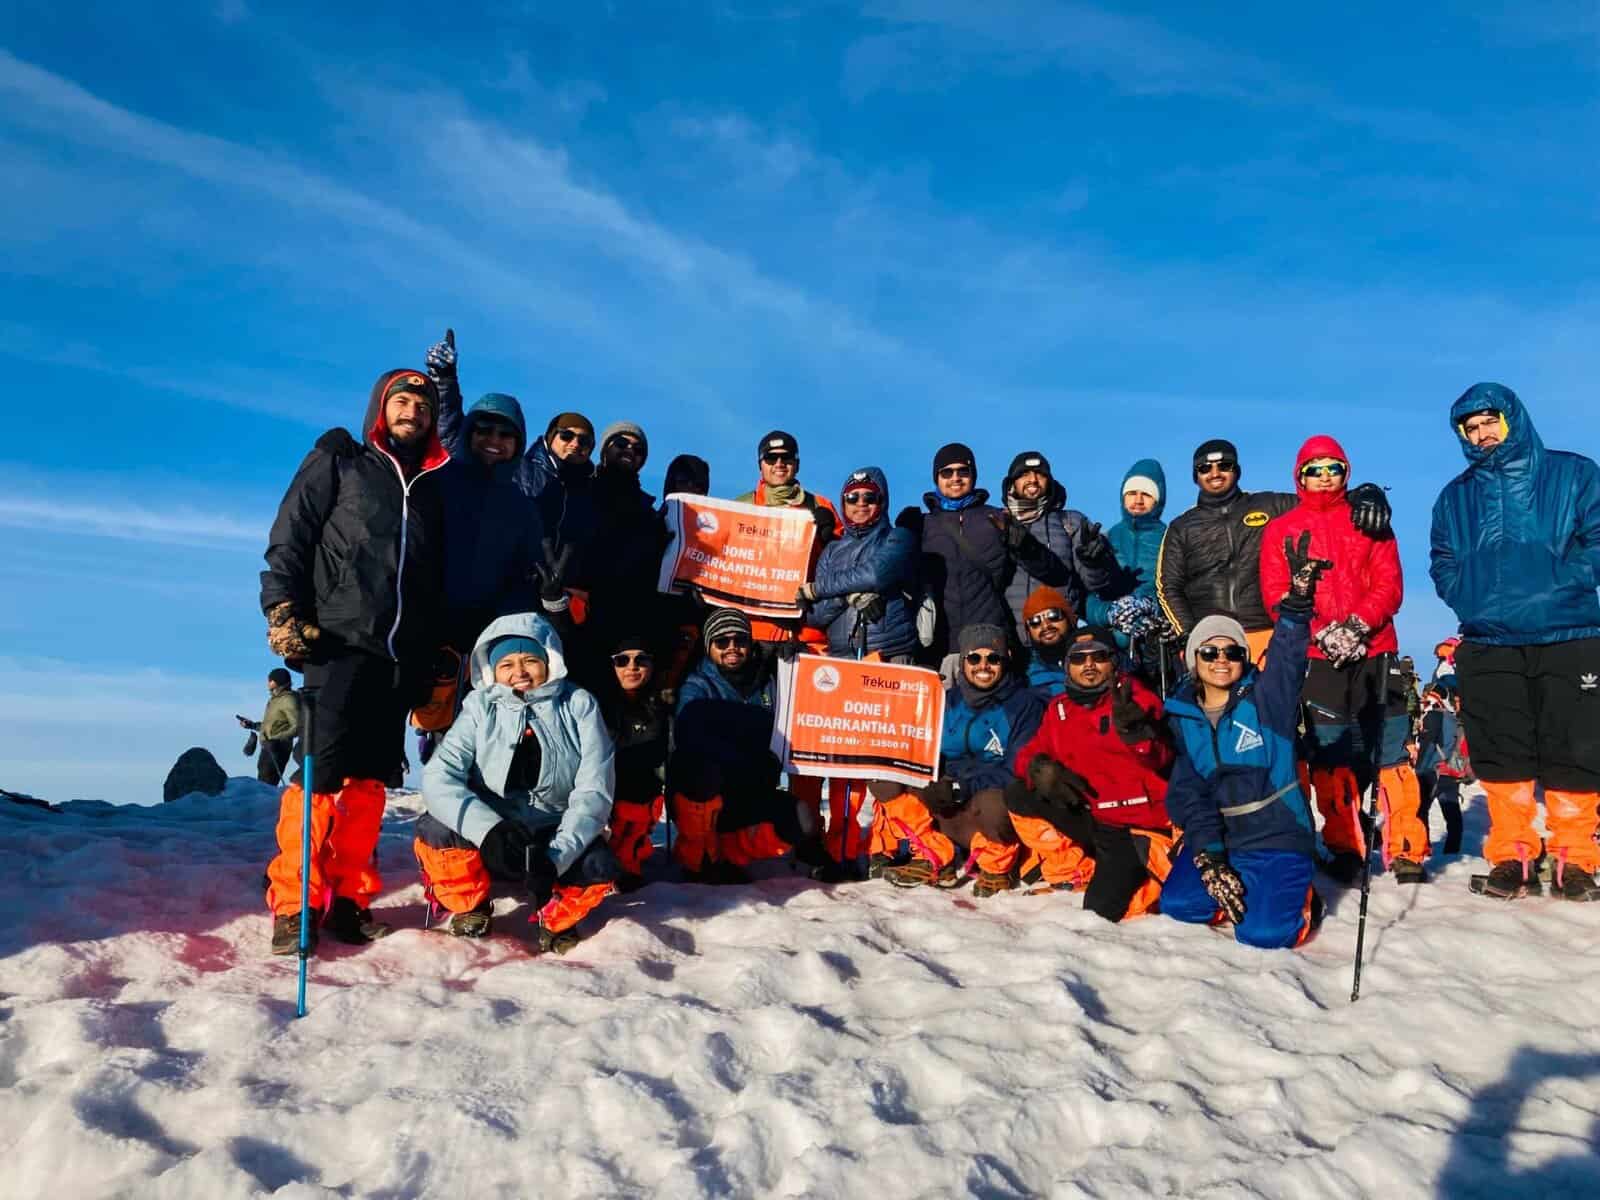
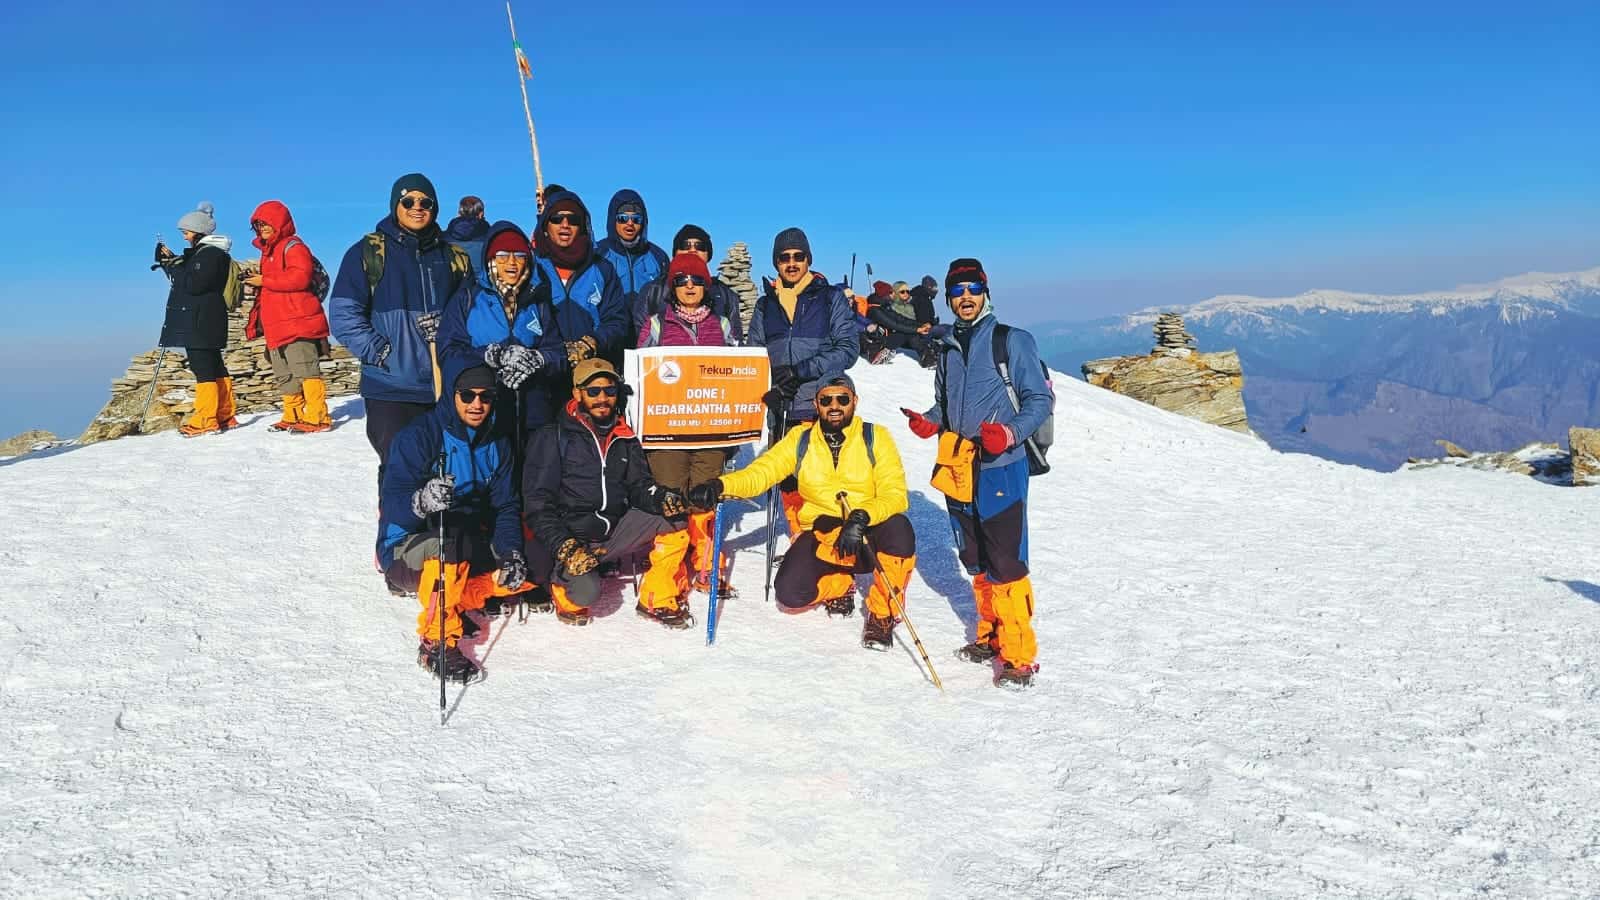
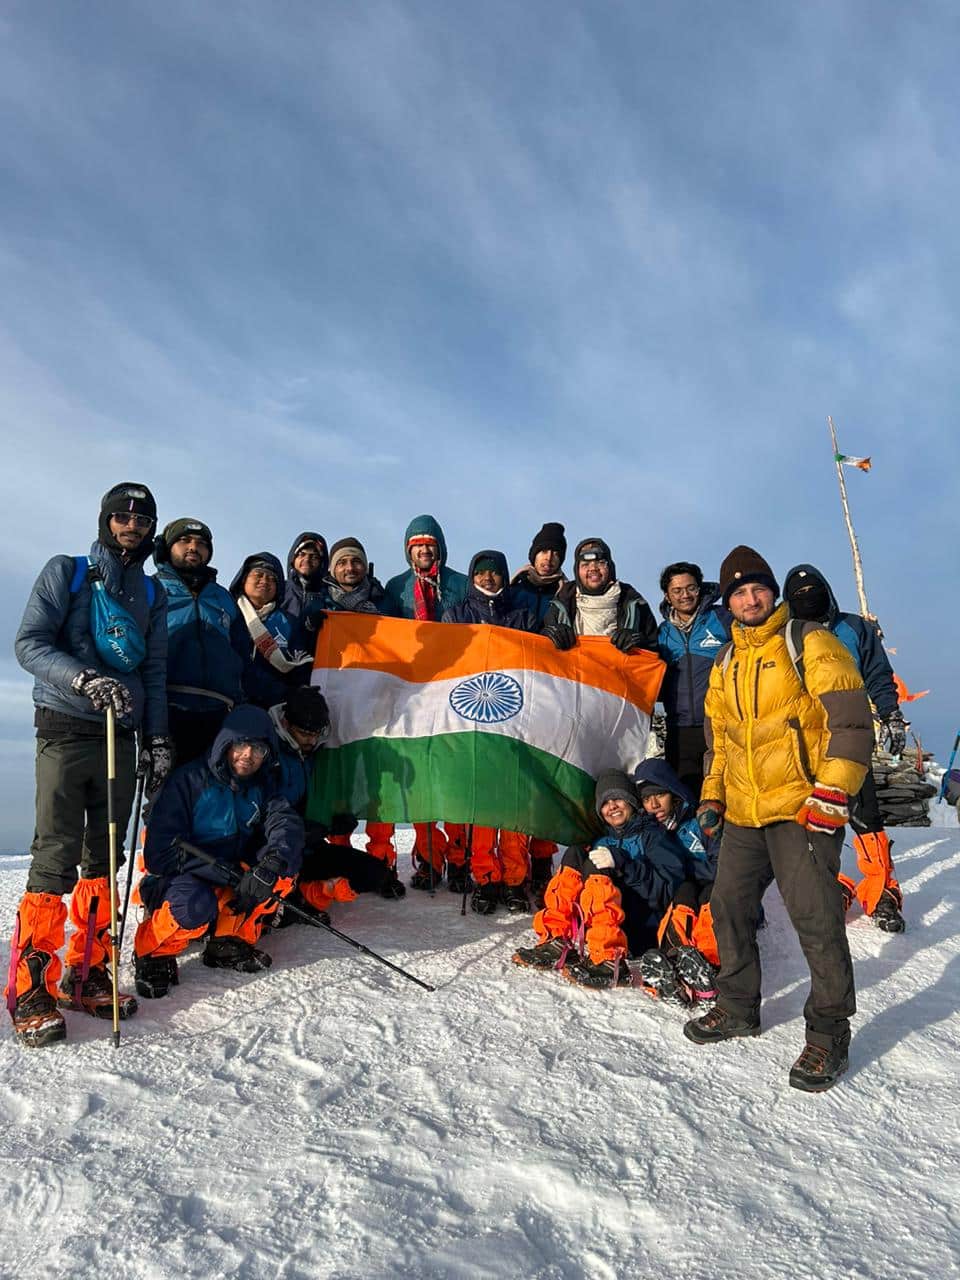
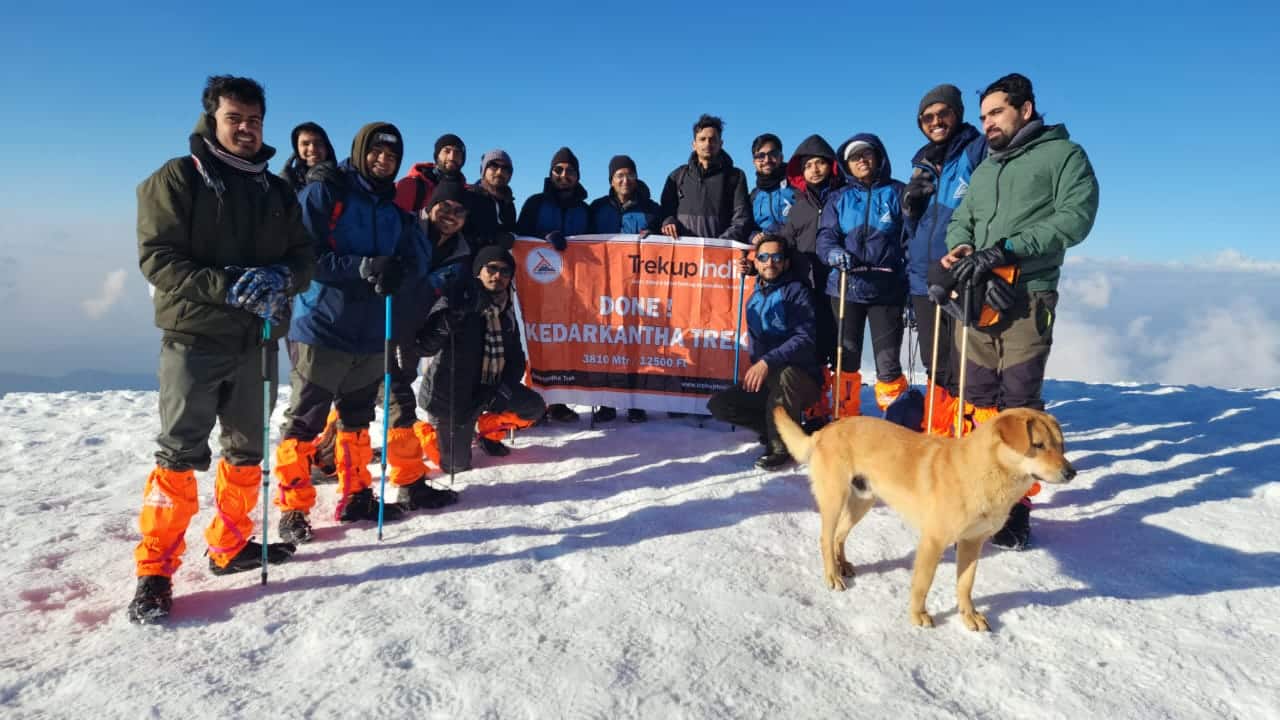
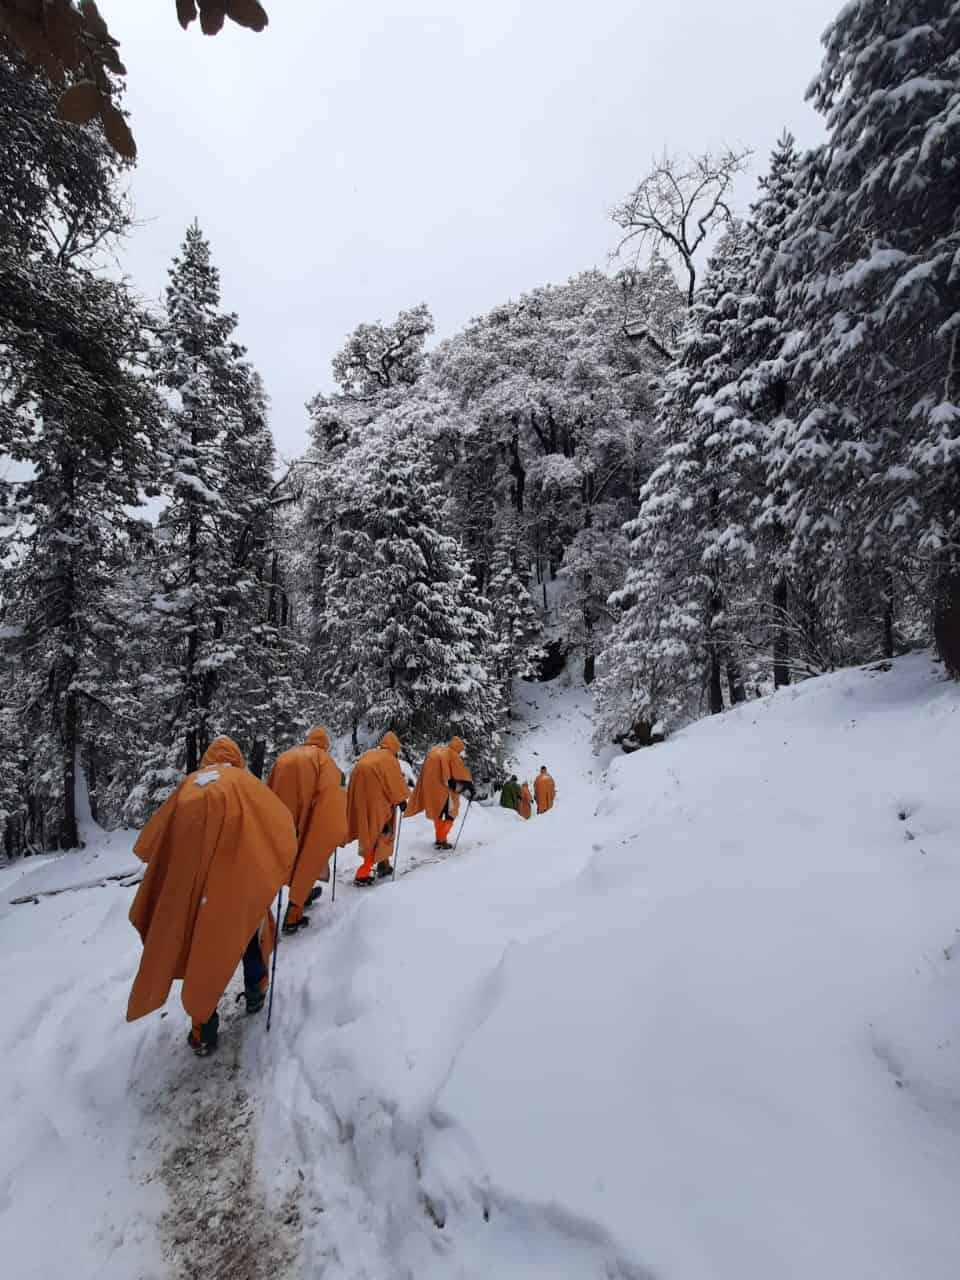
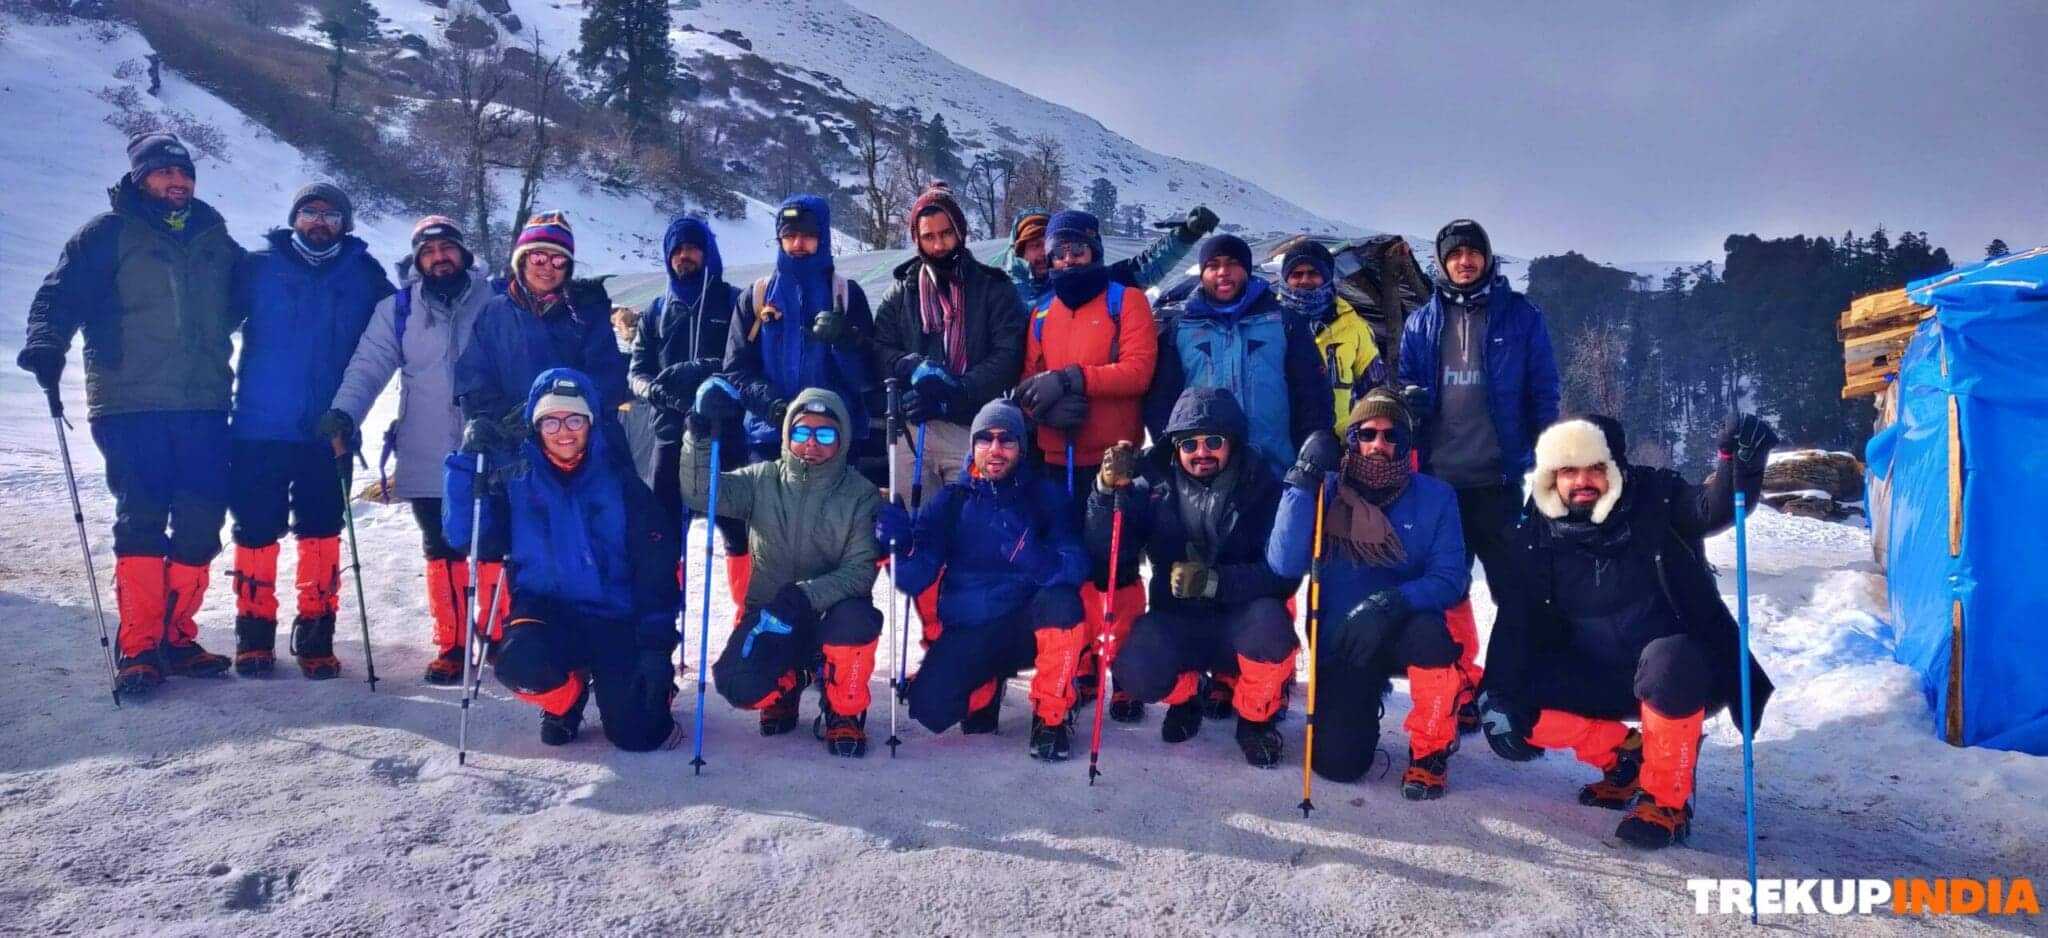
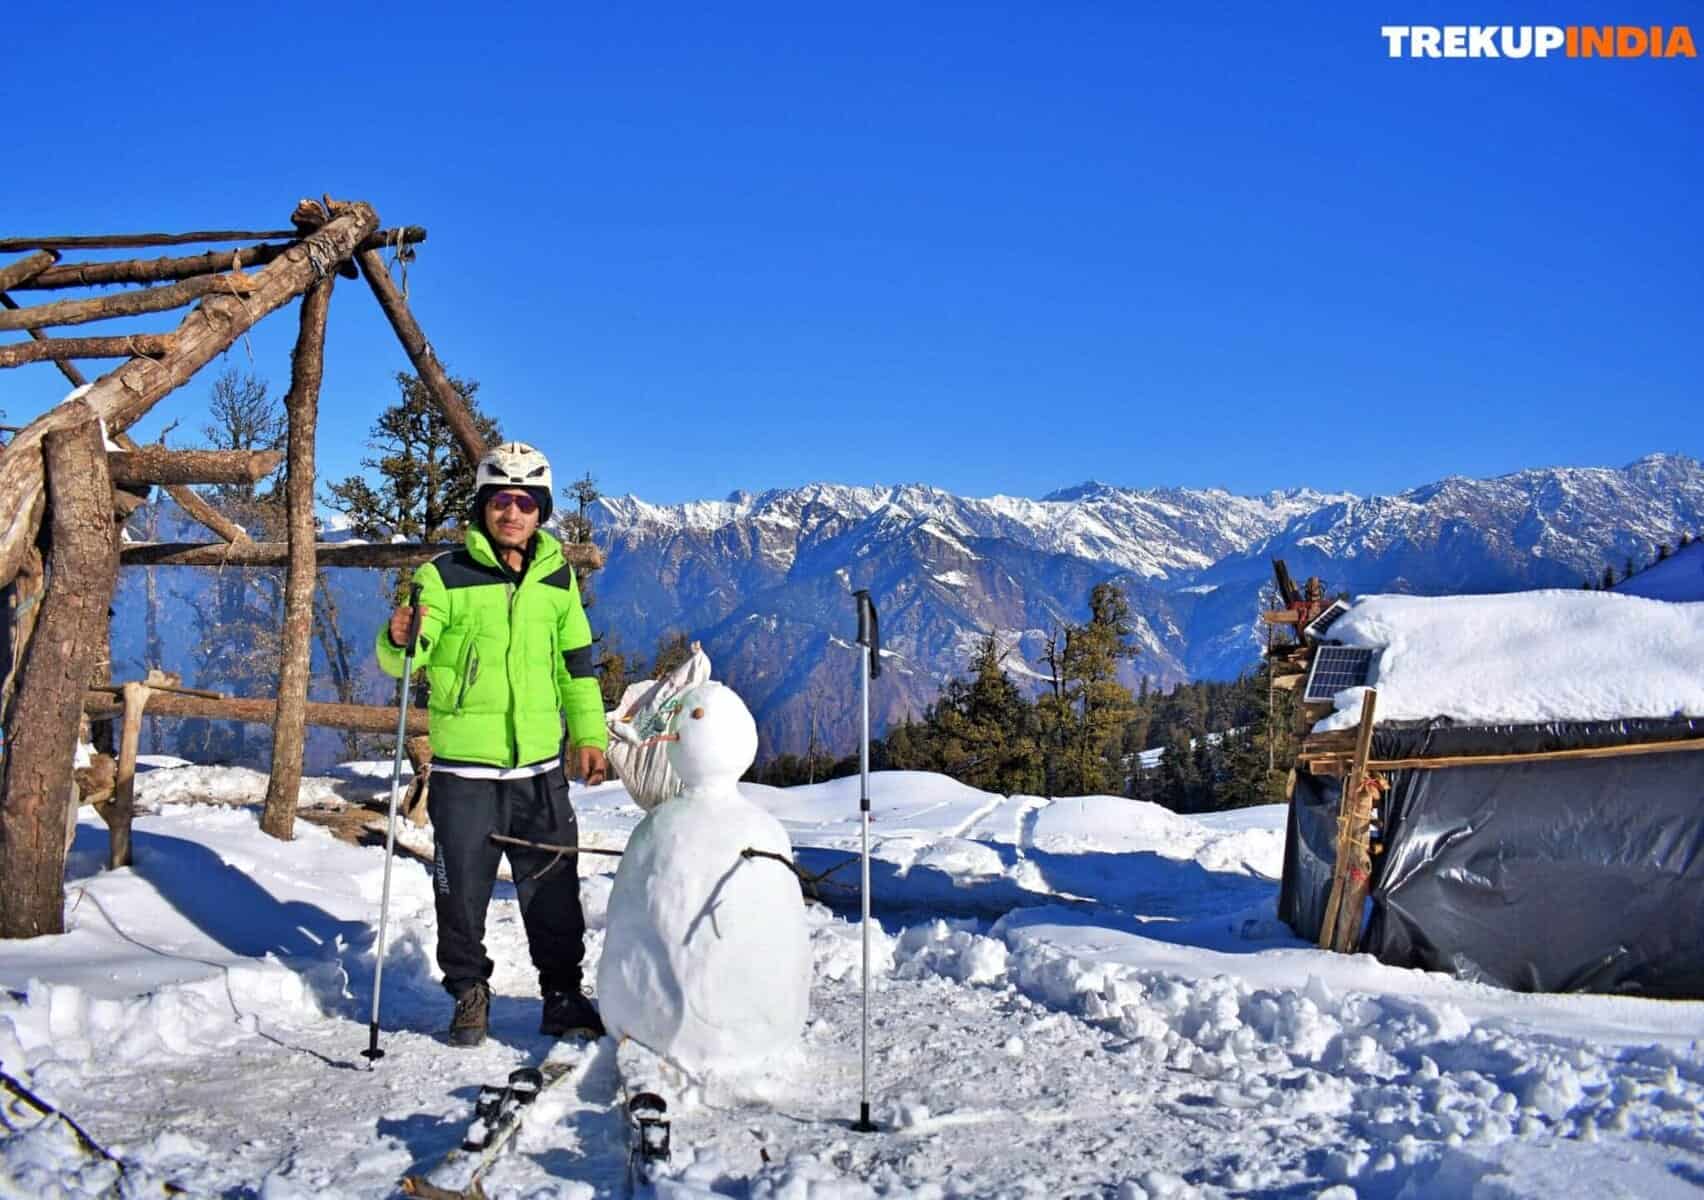
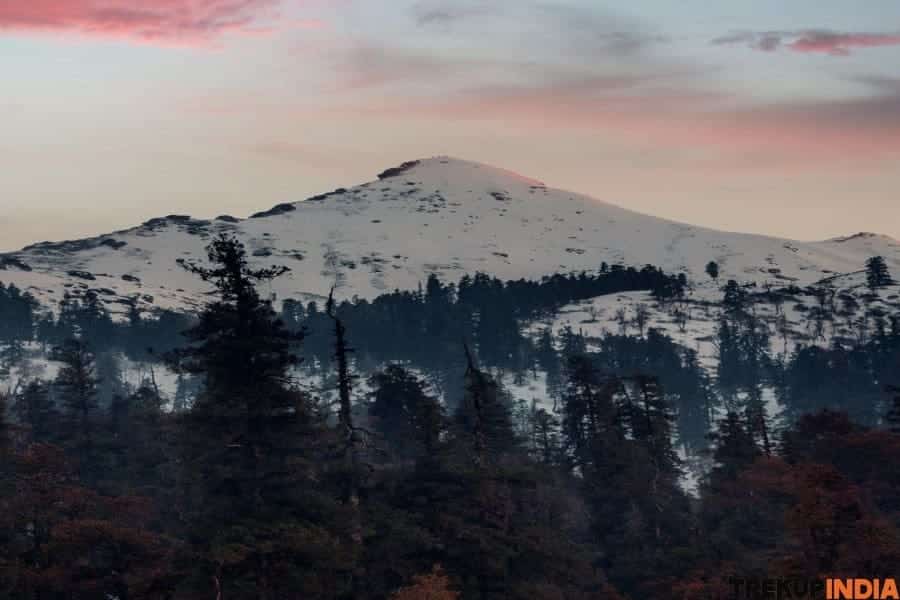
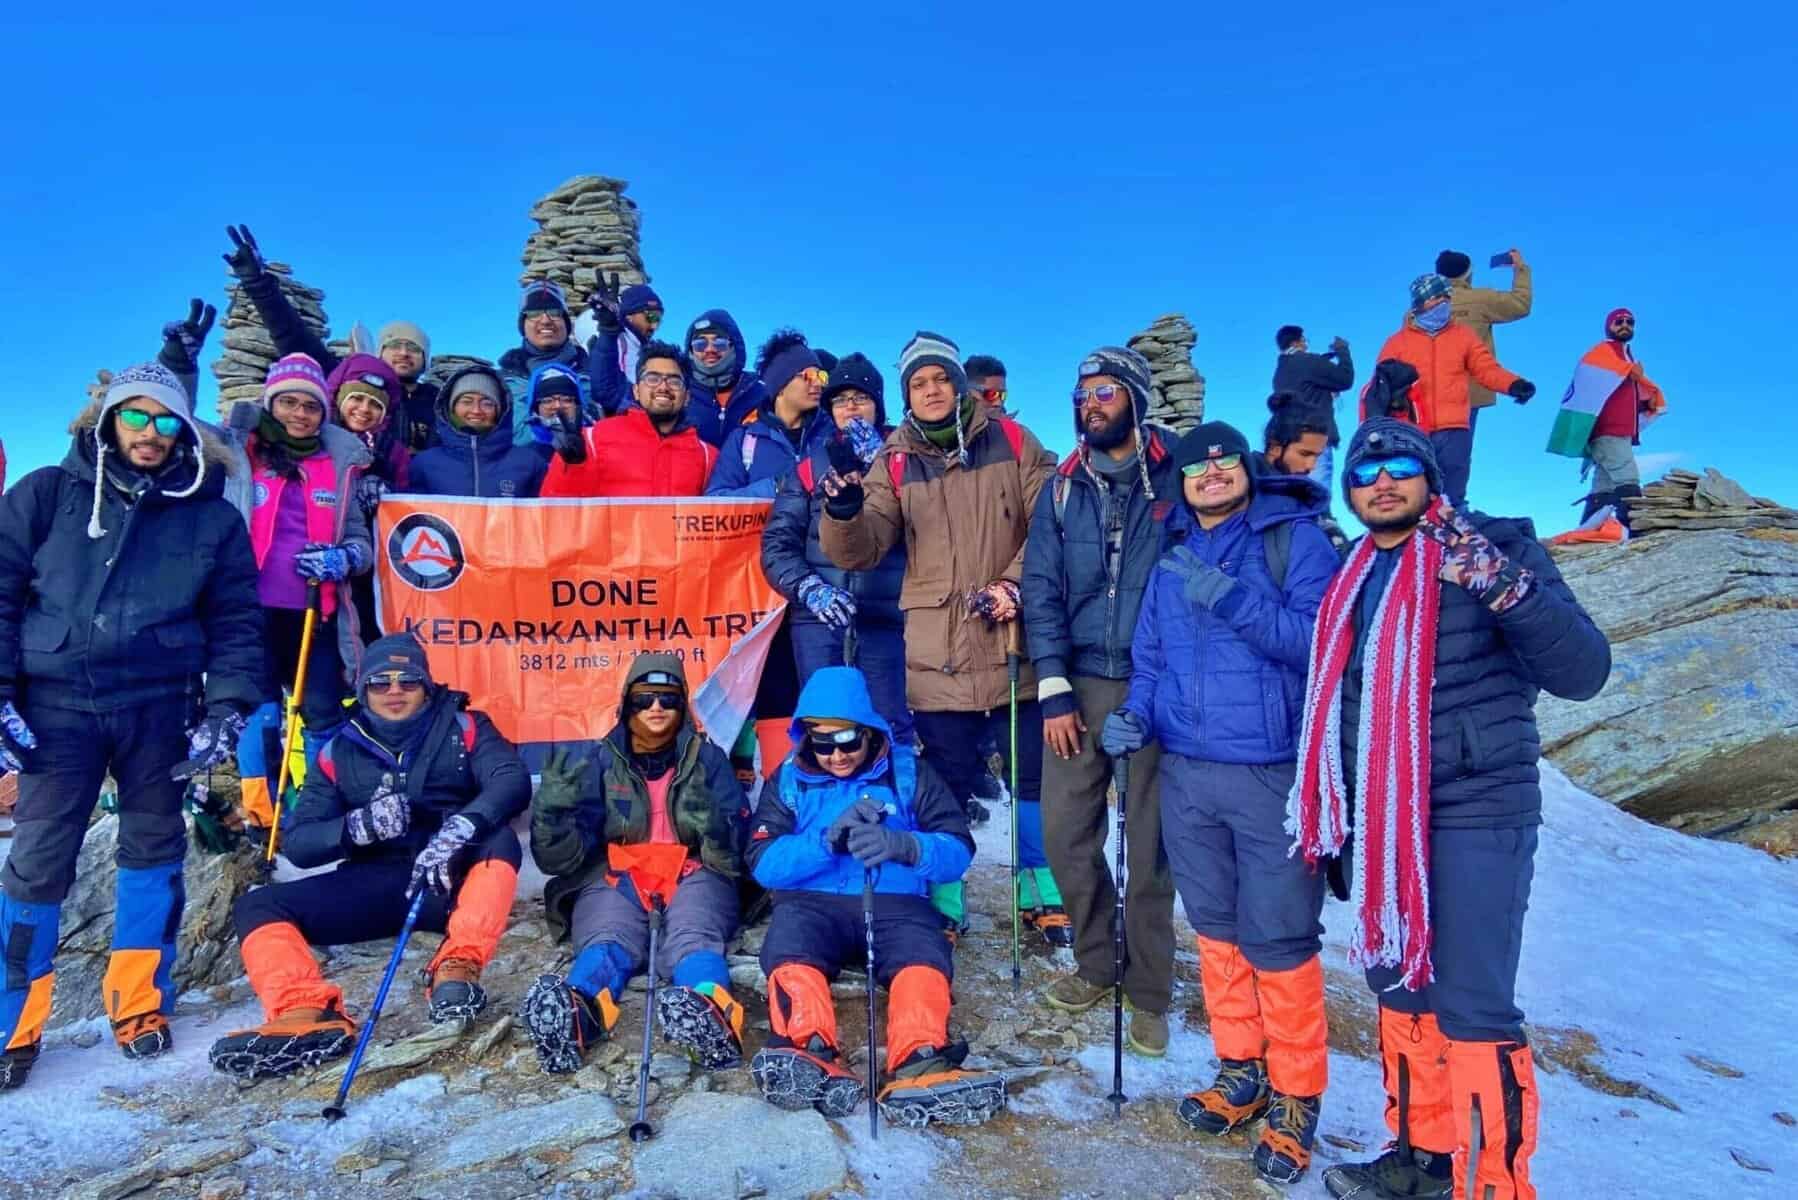
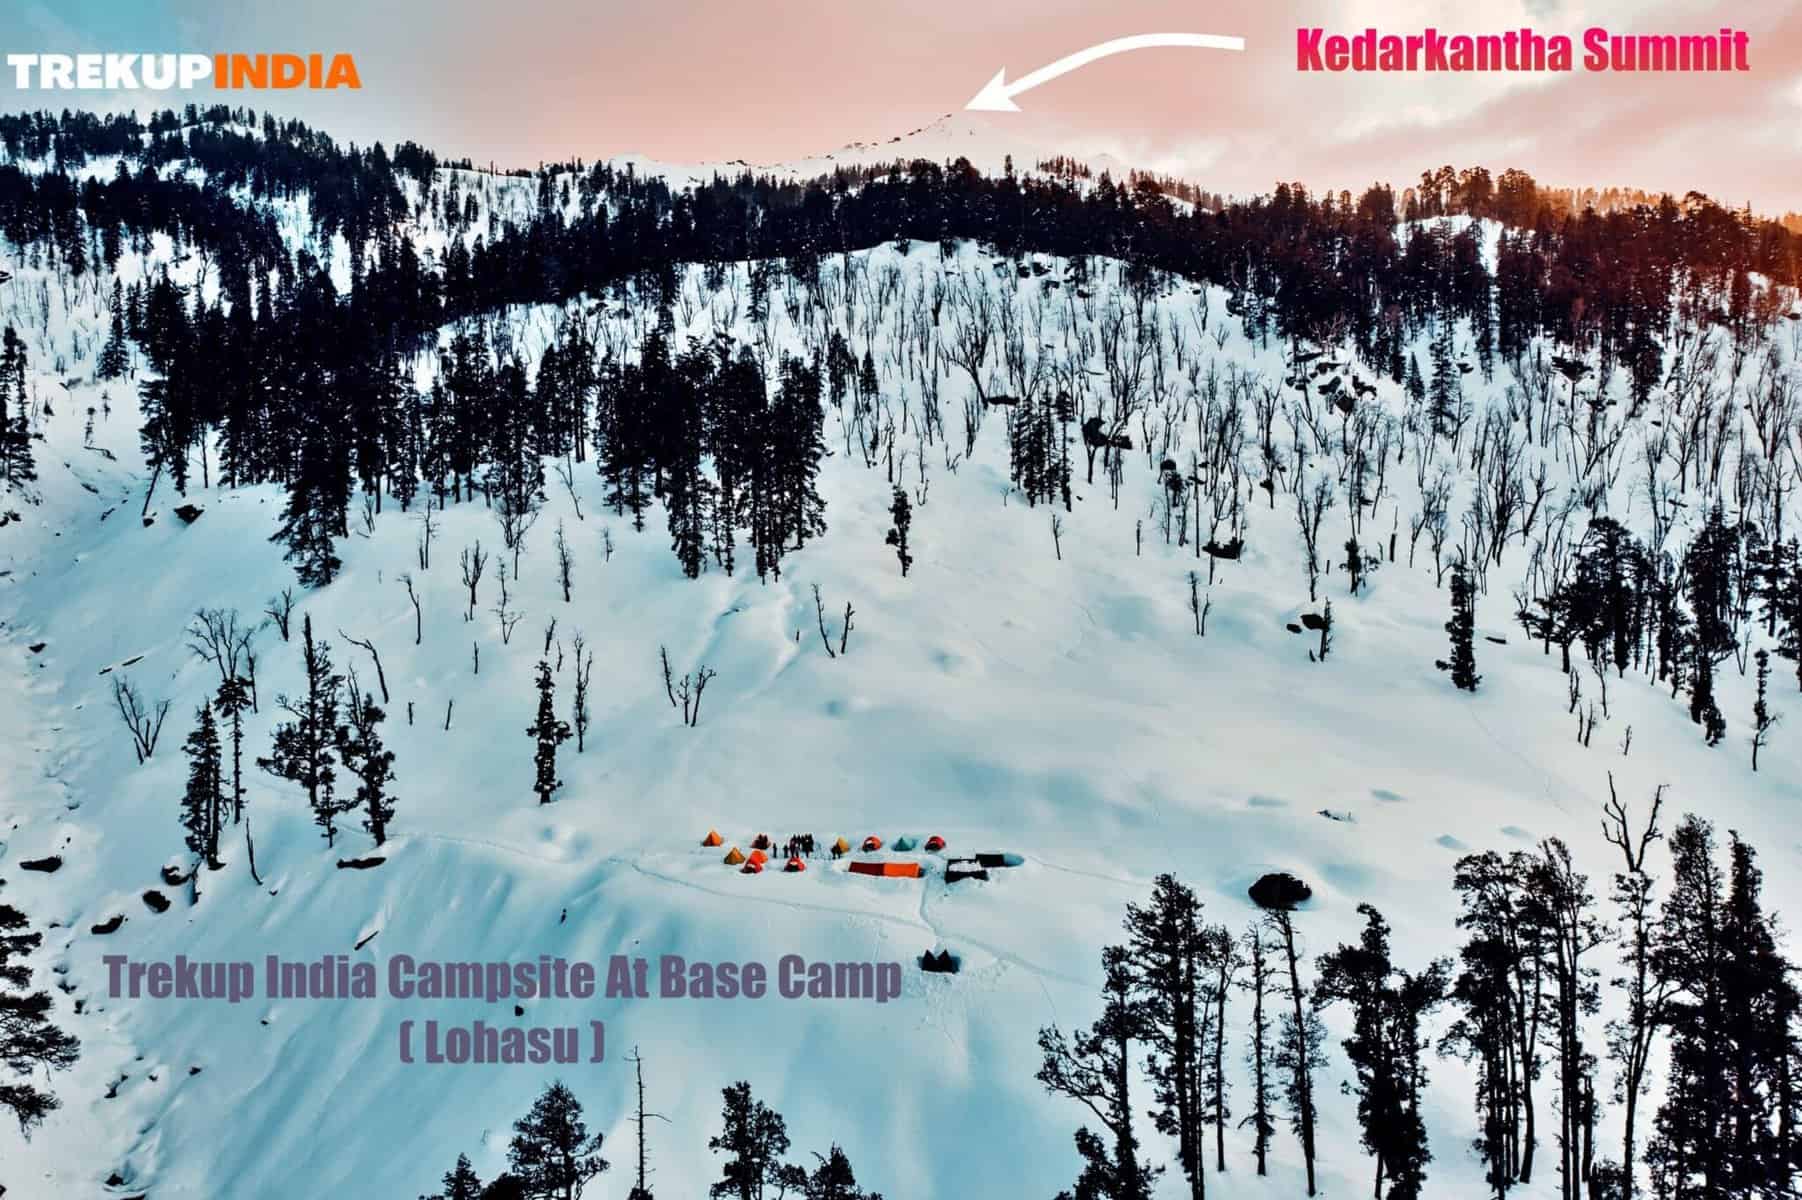
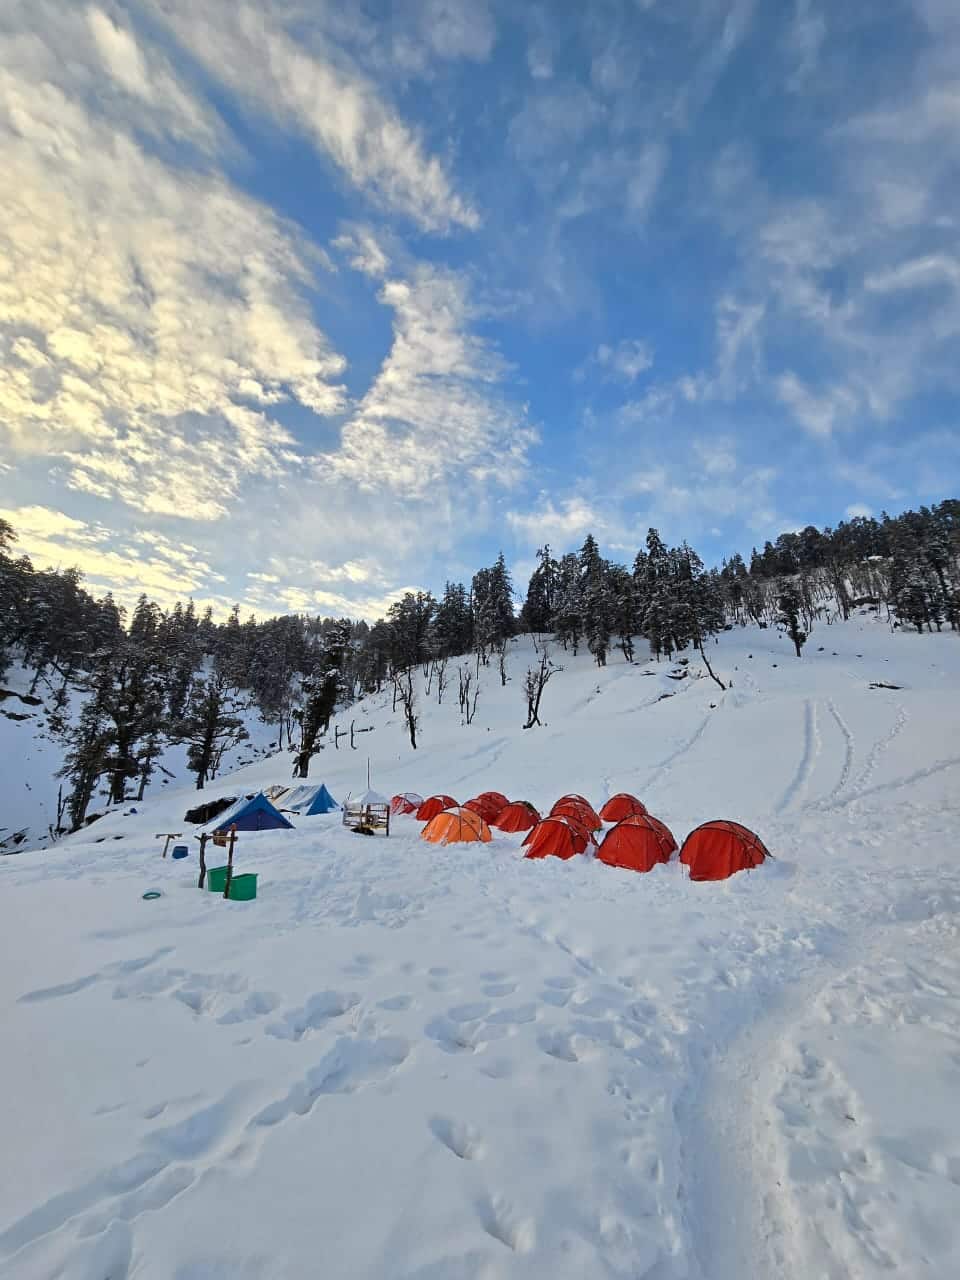
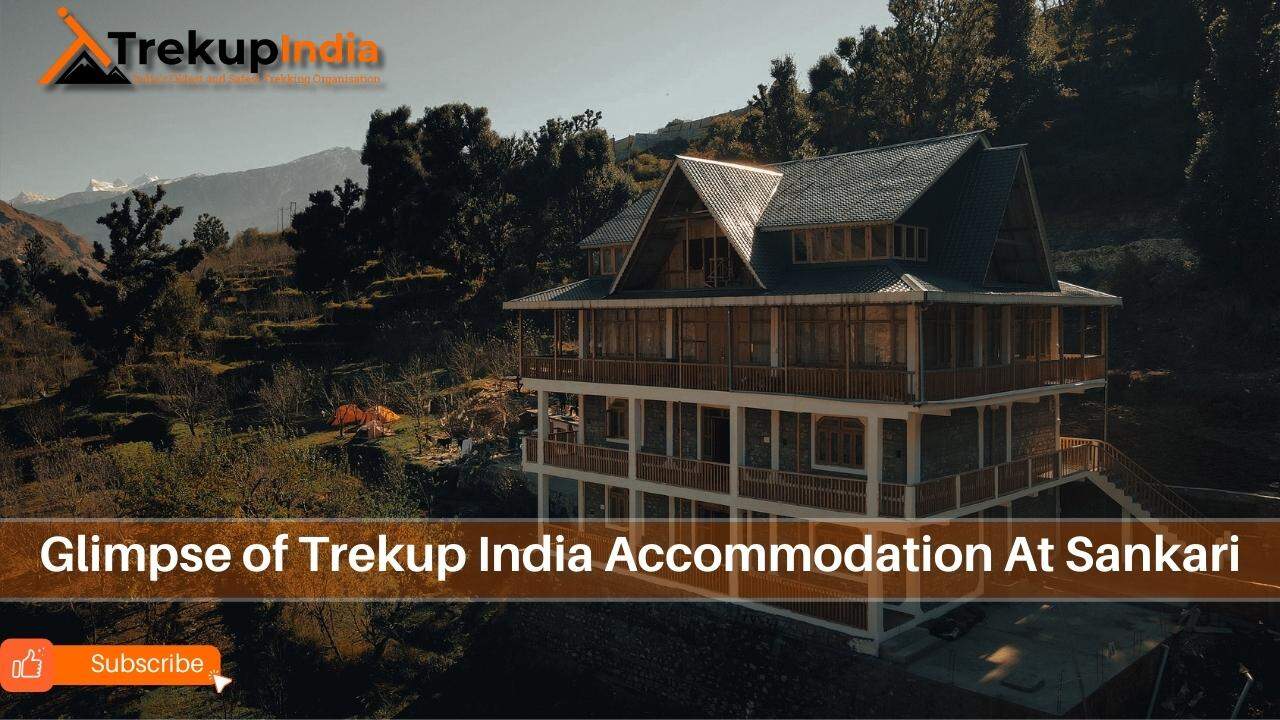
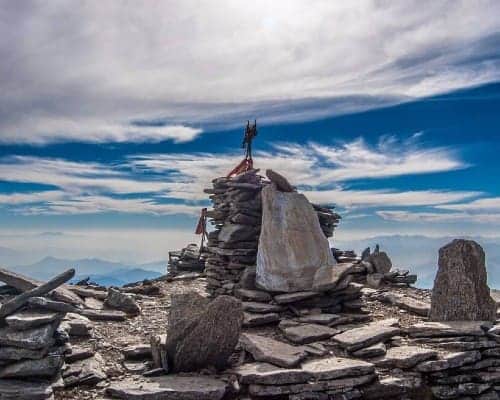