Trek Grade
Moderate to Difficult
Highest Altitude
19,340 feet
Base Camp
Moshi
Best Time
Jan, Feb, July, Aug & Sept
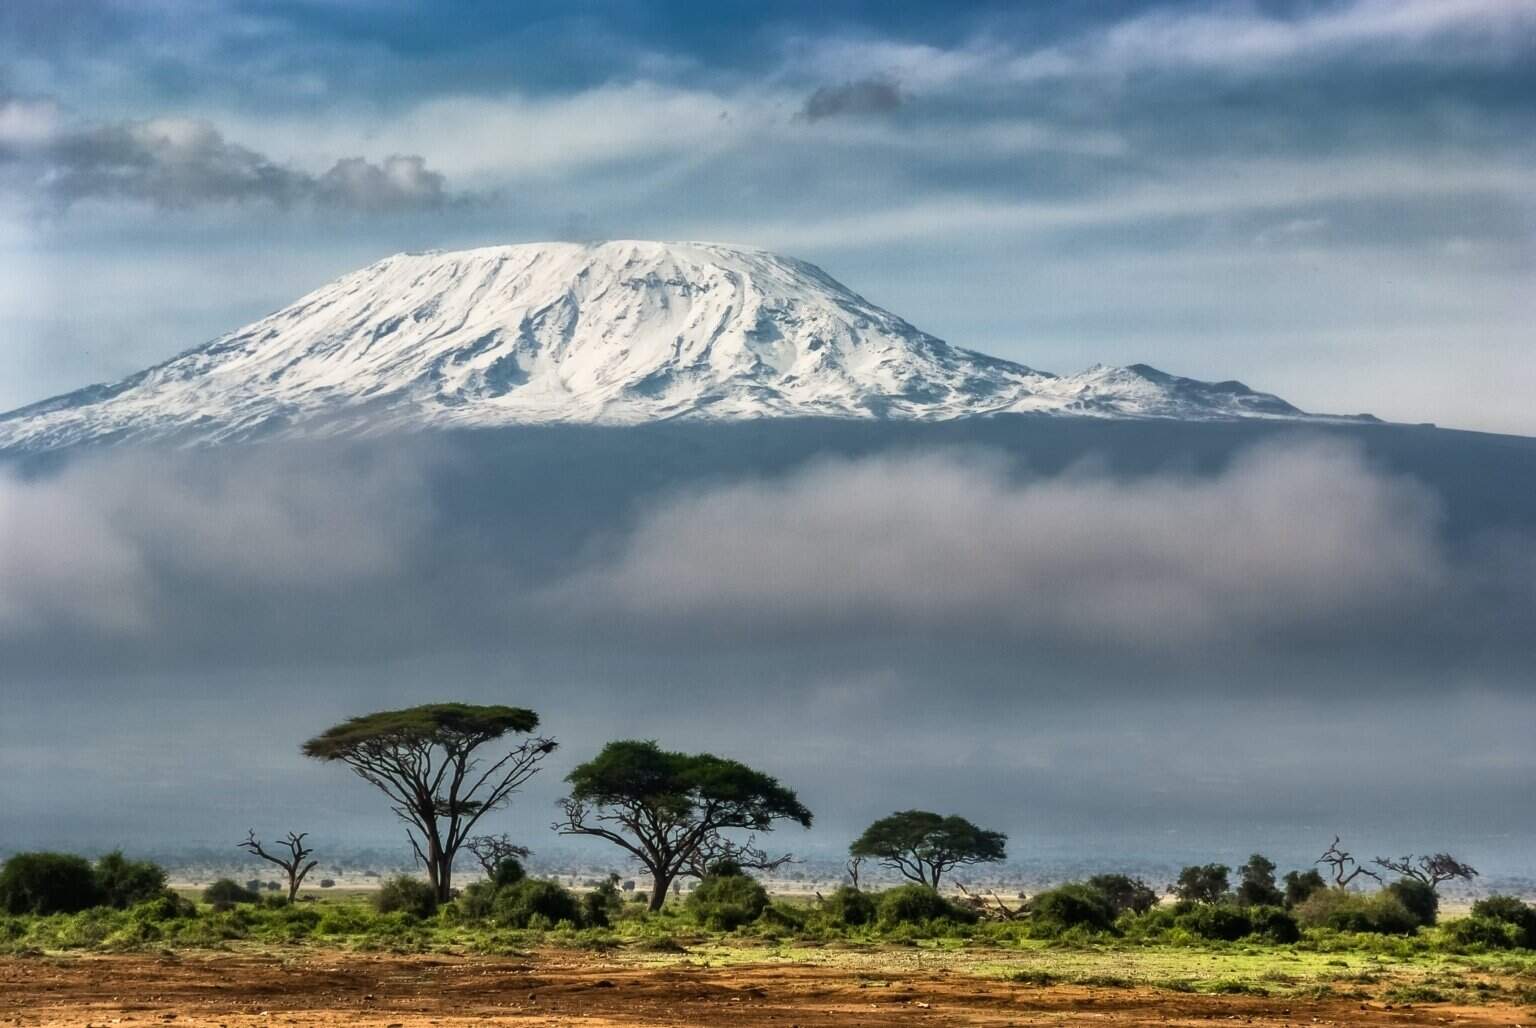
Kilimanjaro Trek
Mount Kilimanjaro, Africa’s highest peak, rises majestically above the Tanzanian landscape, reaching an impressive height of 19,341 feet. It is renowned as the world’s tallest freestanding mountain, standing alone without any connection to a mountain range. Every year, individuals from various backgrounds successfully conquer its summit, with the youngest recorded climber being six years old and the oldest an impressive 82 years old. Experts suggest that individuals with average physical fitness can undertake the challenge, making Kilimanjaro a popular adventure destination accessible to many.
To ensure a safe and successful climb, the Kilimanjaro National Park Authority mandates that a guide accompany trekkers. The mountain’s weather is notoriously unpredictable, with temperatures ranging from freezing near the summit to heavy rainfall at any time. As a result, climbers must pack warm, windproof clothing and high-quality waterproof gear. The dry season, which falls in January, February, July, August, September, and October, is considered the best time to climb Kilimanjaro, while the rainy season from March to June and November to December is best avoided.
The Machame route, also known as the Whiskey route, is the most popular path among the seven main routes to conquer Mount Kilimanjaro. This challenging climb offers breathtaking vistas and diverse ecosystems, attracting around 50% of all climbers, including seasoned adventurers. Unlike the easier Marangu route, the Machame route involves steeper inclines, longer distances, and camping in tents. The journey begins at Machame Gate, located at the mountain’s southern base, just a short drive from Arusha.
The trek starts in Kilimanjaro’s lush, fertile rainforest, where heavy rainfall is common. It progresses through steep and slippery trails that require trekking poles. As the route ascends to the Shira Plateau, the forest gives way to low-lying brush in the heather zone. The trail then climbs to the volcanic Lava Tower before descending and circling below the South Icefield via the southern circuit, offering climbers spectacular panoramic views.
The arduous ascent to the summit begins from the east, involving endless switchbacks up loose gravel until reaching the crater rim at Stella Point. From there, it’s a relatively flat hour-long hike to Uhuru Peak, the highest point on Mount Kilimanjaro. The descent follows the Mweka trail, providing a swift conclusion to this epic adventure.
Covering approximately 62 km/37 miles from one gate to another, the Machame Route is suitable for physically fit individuals with some hiking experience, although many first-time trekkers have also successfully completed it. It is highly recommended over the more conventional Marangu route. Additionally, optional Wildlife Safari Tours can be included in your package, but please contact us via email for further information. Safari tours require specific arrangements and have a separate itinerary that must be planned in advance.
Several preparations need to be completed prior to climbing Kilimanjaro, such as booking flights, arranging visas, getting necessary vaccinations, obtaining or renting equipment, and ensuring physical fitness. Indian visitors can enter Tanzania through Kilimanjaro International Airport (pick-up and drop-off services are available only at this airport), Karume International Airport, and Julius Nyerere International Airport.
Tanzania offers a recommended visa for Indians planning to visit for mountaineering and holidays. The single-entry tourist visa allows for a 3-month consecutive stay in the country. Indian citizens applying for the Tanzania e-visa online must have a valid Indian passport for at least six months upon arrival, a scanned copy of the passport information page, a digital passport-sized photograph, a digital return or onward ticket, a credit or debit card for the visa processing fee, and an email address to receive the approved visa. The e-visa processing typically takes 7-10 working days. It is advisable to carry sufficient cash as credit cards are only accepted by major airline companies and larger hotels in Tanzania. Traveller’s checks are accepted at some banks and hotels, but a surcharge may apply, and many shops and hotels may not accept them.
Tanzania has two distinct rainy seasons: the extended rainy period from late March to June and a shorter rainy period from November to mid-January. Heavy downpours and intense storms characterize the long rains, while the short rains are generally milder. The local currency is the Tanzanian Shilling, and travellers should use the traveller’s. The exchange rate is currently around 2100 to US$ 1. Foreign currency can be exchanged at the Bureau de Change for better rates than hotels and most banks.
When travelling to countries with a risk of yellow fever transmission, it’s essential to consider vaccinating. While Tanzania is regarded as a low-risk area for yellow fever, travellers from there to South Africa will need a vaccination certificate. If visiting Tanzania without a vaccination card, taking precautions against mosquito bites is essential. Remember to verify current regulations before travelling, as they may change unexpectedly.
Tanzania poses a moderate threat of Malaria infection, particularly in areas below 1800 meters. To ensure a safe and healthy trip, taking preventive measures against Malaria before your holiday begins is essential. It’s advisable to consult your doctor about necessary precautions, especially if you’re taking oral contraceptives or planning to use Diamox during your Kilimanjaro climb. Preventive measures against Malaria include using reliable insect repellents, sleeping under netting, and wearing protective clothing after dark. For personalized guidance, please contact your local Travel Clinic or medical professional.
For preventive measures, it is advisable to consider receiving recommended immunizations such as Hepatitis A and Typhoid. Entry requirements for Tanzania include an onward ticket and adequate funds. It is highly recommended to obtain travel insurance that covers baggage, personal accidents, and medical expenses, specifically including coverage for your Kilimanjaro expedition.
When exploring Tanzania, it’s best to avoid walking alone at night and instead opt for hotel-based taxi services. Additionally, take necessary precautions to safeguard your belongings by storing cash and valuables in a hotel safe deposit box rather than leaving them in your room.
Most visitors to Tanzania require a visa, which can be obtained through the local Tanzanian Embassy or upon arrival at specific entry points. To avoid delays, it’s essential to hold a valid visa before arrival at all other entry points.
Our guides have undergone rigorous, standardized, comprehensive training to minimize risk. Climbing expertise is just the starting point – our guides have honed their guiding skills through extensive experience and evaluation. Most of our lead guides are certified by the esteemed KINAPA, and we’re proud to work with exceptional local assistant guides who have proven invaluable assets to our expeditions. With their unmatched familiarity with the mountain, our guides are widely recognized and respected among climbers, ensuring you receive the best possible experience on your climb.
Trek Cost
- Stay will be on a twin-sharing basis in tents
Pickup & drop from Kilimanjaro International Airport to Airport according to trekkers flight time
Fix Diparture Dates
Kilimanjaro Trek Videos
Videos by experts watch these videos to prepare well for a Successful Tre

Want To Trek Like Pro?
Basically, watch these videos if you want to trek the same way professional trekkers do and make your skills better. These videos contain useful tips and techniques to further improve your trekking skills itself. These videos actually help both new and experienced trekkers improve their trekking skills. These videos definitely provide useful tips that make your trek better. We are seeing that these videos by Trekup India experts will only help you make your trekking skills better.


Know Everything About Acute Mountain Sickness
Acute Mountain Sickness occurs when people trek to high altitudes above 8,000 feet. This condition itself develops further due to reduced oxygen levels at such heights. Basically, as you go higher up, the air pressure and oxygen levels decrease, which causes the same problem. Acute Mountain Sickness surely causes headache, nausea, vomiting, and dizziness in affected persons. Moreover, peoples also experience difficulty in sleeping during this condition. To avoid mountain sickness, you should actually trek up slowly to higher altitudes. To learn further about this condition itself, watch the videos by Trekup India.


Day Wise Detailed Itinerary of Kilimanjaro Trek
Day 1: Kilimanjaro International Airport To Arusha
- Arrive at Kilimanjaro Airport
- Check in at a resort in Arusha, located 50 km from the airport
- Journey takes about 1.5 hours
- Attend a pre-climb briefing and equipment check in the evening
- Option to explore the city or relax before the climb
Upon arrival at Kilimanjaro International Airport, your assigned driver will meet you and take you to your pre-arranged accommodations at a hotel and resort in Arusha. Once you’ve checked in, you’ll have time to relax before meeting with our representative at 5:30 pm. During this meeting, you will receive a detailed briefing about your upcoming climb and a review of your gear to ensure everything meets the specifications. Depending on your preferences, you’ll also have the option to explore the city or unwind at the hotel.
Day 2: Moshi to Machame Gate by road and from Machame Gate to Machame Camp by Trek
- Stay – overnight stay at the campsite.
- Meal – Breakfast, Lunch and Dinner
- Distance – Moshi to Machame Gate by Road (32 km), Machame Gate to Machame Camp by Trek (11 km)
- Time took – Moshi to Machame Gate by Road (approx. 45 min), Machame Gate to Machame Camp by Trek (approx. 7 hrs)
- Altitude – Moshi (3120 ft / 950 meters), Machame Gate (5906 ft / 1800 meter), Machame Camp (9900 ft / 3018 meters)
- Altitude gain – Moshi to Machame Gate (2786 ft / 850 meters), Machame Gate to Machame Camp (3994 ft / 1218 meters)
- Trek grade – Gradual to Moderate
In the morning, after having breakfast at the hotel, you will begin the journey, which will be by road from the Hotel in Moshi to Machame Gate, which is a short drive. On the drive, you will see Coffee, bananas, and many root crops. You will then begin the trek from Machame Gate, which will be through dense rainforest. At the Machame Gate, you will be fulfilling registration details by the armed guards of TANAPA (Tanzania National Parks). On the trail, you will see huge trees and bright-coloured flowers like orange and red Kilimanjaro Impatiens. You could also see some Colobus Monkeys if you are lucky enough; after crossing the forest, you will walk through the moss-covered landscape. After walking for a few hours, you will then reach Machame Camp.
Day 03: Machame Hut to Shira Camp
- The trekking trail covers 3,000 to 3,750 meters above sea level and extends for approximately 5-6 kilometres.
- Hikers can expect the journey to last 4-5 hours, traversing through moorland terrain.
- All meals will be provided at Shira Cave Camp.
Our morning routine starts with a 7:00 a.m. breakfast, aiming to leave the camp by 8:30 a.m. Our goal for the day is to tackle a 750-meter incline, reaching an elevation of 3,750 meters. The total distance is around 5-6 kilometres, and we anticipate walking for 4.5 to 5 hours. The trail will be narrow, steep, and dusty, initially winding through heather forests before leading to towering groundsels. The ascent to our midday lunch will be steep, but the views of Kibo and the southern landscape will be stunning. With our early start and shorter distance, we expect to arrive at camp by 2:00 p.m. There, you’ll have ample time to explore the Shira Plateau, including the moorland lobelias, dark obsidian rock, and landmarks like Shira Cathedral, Klute Peak, and Mount Meru. Dinner will be served at 6:00 p.m.
Day 4: Trek from Shira Camp to Barranco Camp with a stopover at Lava Tower Camp.
- The trek from Shira Cave Camp at an altitude of 3,750 meters to Barranco Camp at 3,900 meters involves passing through Lower Tower Camp at 4,600 meters. This 10-kilometer hike typically takes around 5 to 6 hours to complete. The landscape along this trail is – The trek from Shira Cave Camp at an altitude of 3,750 meters to Barranco Camp at 3,900 meters involves passing through Lower Tower Camp at 4,600 meters.
- This 10-kilometer hike typically takes around 5 to 6 hours to complete.
- The landscape along this trail is defined by moorland.
- Barranco Camp offers accommodation for trekkers.defined by moorland. Barranco Camp offers accommodation for trekkers.
Today’s trek is going to be quite an adventure. It’s a bit longer than yesterday’s, but the good news is that the elevation gain is minimal. We’ll start our trek at 3750 meters and only ascend by 150 meters by the time we reach camp this afternoon. Along the way, we’ll make our way up to the base of Lava Tower at 4600 meters before returning to our camp. The Lava Tower is a fascinating remnant of Kilimanjaro’s volcanic past. Our strategy of ascending and then descending adds to the adventure and aids in acclimatization, which is crucial at these altitudes.
The trek spans 10 kilometres and will take approximately 6-7 hours, excluding breaks. Our day will kick off with breakfast at 07:00 and departure at 08:30 as we traverse the rocky terrain of the Shira Plateau. Initially, you’ll notice a scarcity of vegetation, with lichens among the few resilient plants in this harsh environment. As we ascend towards the Lava Tower, the landscape will transition to rocky terrain and impressive lava formations. While the climb is relatively steep, the altitude can make it physically demanding.
We’ve planned a picnic lunch for 13:00 at the Lava Tower, a perfect spot to refuel and enjoy the stunning surroundings. After reaching the high point near the Lava Tower, we’ll descend to Barranco Camp. The Barranco Valley, enclosed by towering cliffs, was created by a massive landslide thousands of years ago. As we descend towards camp, you’ll glimpse the imposing Barranco Wall.
Upon reaching camp around 16:00, take a moment to appreciate the breathtaking views of Kibo’s southern face and the Heim Glacier. Dinner will be served at 19:00, giving us all a chance to reflect on the day’s incredible journey.
Day 05: Barranco Camp To Karanga Camp
- Starting from Barranco Camp, which is 3,900 meters above sea level, the 6-kilometer journey to Karanga Camp, located at 3,995 meters, is expected to take 4 to 5 hours – Starting from Barranco Camp, which is 3,900 meters above sea level
- The 6-kilometer journey to Karanga Camp, located at 3,995 meters, is expected to take 4 to 5 hours at a moderate pace
- The trek will lead you through the scenic moorland habitat, offering picturesque views
- The journey ends with comfortable accommodations at Karanga Campat a moderate pace. The trek will lead you through the scenic moorland habitat, offering picturesque views, before reaching the comfortable accommodations at Karanga Camp.
This morning, we will enjoy breakfast at 07:30 and then start a relatively short 4km hike, which will take about 3.5 to 4 hours to complete. The hike will begin at 08:30, and we’ll have a warm lunch at 13:00 in Karanga. The afternoon will be free for you to enjoy the stunning views before we have dinner at 18:00. Today’s altitude gain is a modest 100 meters. The most challenging part of the day will be the initial climb up the steep and nearly vertical Barranco Wall, also known as the ‘Breakfast Wall’. This part of the hike is strenuous due to the thin air and steep incline, but the reward is the stunning views of the Heim Glacier at the top. After that, the hike becomes more manageable as we descend into the picturesque Karanga Valley, a cold and windy oasis. We will then tackle steep zig-zags to reach the Karanga Camp. In the afternoon, you are welcome to explore the area, and if you’re interested in photography, you may spot Malachite sunbirds near the camp.
Day 06: Karanga Camp to Barafu Camp
- The journey from Karanga Camp, situated at an elevation of 3,995 meters, to Barafu Camp at 4,673 meters spans 4 kilometers and generally takes 3 to 4 hours to complete.
- This part of the trek traverses the Alpine Desert habitat, with accommodation available at Barafu Hut Camp.
Today’s trek will be relatively short as we move from Karanga Camp to Barafu Camp. We will start our day with breakfast at 07:30 and depart at 08:30. The ascent will be approximately 678 meters over a distance of about 4km, taking us around 3.5 to 4 hours of walking. Our goal is to reach Barafu Camp by 13:00 for a hot lunch. Since tomorrow is the summit day, relaxing and preparing for the challenging climb ahead is crucial. Dinner will be served at 17:30, allowing you to rest early. After leaving Karanga, the trail gradually ascends through a rocky landscape, offering views of the Decken and Kersten glaciers to the left. The terrain becomes steeper as we approach Barafu Camp until we reach our destination. Upon arrival, take time to explore the area and rest well in preparation for the summit ascent.
Day 07: Ascend from Barafu Camp to the highest point, Uhuru Peak, and then descend back to Barafu Camp before continuing on to Millennium Camp.
- The trekking distance is 13 kilometers
- The trekking duration is approximately 10-11 hours
- The final climb to Uhuru Peak offers the opportunity to witness the stunning sunrise from the top of Africa
The journey to the summit of Kilimanjaro typically begins at midnight from the Barafu Camp. Climbers will navigate steep inclines towards the summit glaciers, where the effects of global warming have led to a reduction in glacial deposits. After about 4 to 5 hours of climbing through loose rock (scree), they will reach the crater’s rim at Stella Point. Here, they will be surrounded by stunning ice-capped peaks as the first light of dawn graces the mountains. Another hour of walking will bring them to Uhuru Peak, the highest point of Kilimanjaro. After spending some time at the summit, climbers will retrace their steps to Barafu Camp before descending to Millenium Camp for a well-deserved rest. The satisfaction of reaching the mountain’s peak will stay with them as they make their way down.
Day 08: Descend from Millennium Camp to Mweka Gate, situated at an elevation of 3100 meters, followed by a drive to Moshi.
- You can expect a 13-kilometre hiking distance and a 5-hour duration for the hike.
- If you plan to travel by car, the distance is 25 kilometres, and the journey will take approximately 2 hours.
- After the hike, you’ll go down the rainforest to Mweka Gate to collect your well-deserved certificates.
- After the hike, enjoy a comfortable car ride back to Moshi for a relaxing gathering and some well-deserved rest.
After leaving Millenium Camp, we will descend to Mweka Gate, which marks the final leg of our journey back to Moshi. The descent will take us through a rainforest area with a gentle slope, allowing us to spot unique species found in Kilimanjaro’s diverse ecosystem. Upon reaching Mweka Gate, transportation will take you back to Planet Lodge in Moshi, where you can relax or celebrate.
Day 09: Final Farewells: The Journey Home Begins
- As you journey from Moshi to Kilimanjaro International Airport, you are concluding an unforgettable adventure.
- As you say goodbye to the region, carry with you the pride and satisfaction of accomplishing your goals.
After a good night’s sleep at the lodge, please check out by 10:00. If you’d like to stay at the hotel during the day, let us know ahead of time so we can tell you the cost for a day room, which is available until 18:00, and make the booking for you. If you’ve arranged a ride to the airport, the hotel will organize your pick-up and drop-off. Guests going on a safari will get a briefing from our guide in the evening.
Mount Kilimanjaro Trek Route Map
We’ve prepared a comprehensive Trek Route Map for your upcoming adventure to Mount Kilimanjaro Trek, which outlines the entire journey including all stops and trails. This map provides detailed information on the terrain, distance between points of interest, and estimated travel time to help ensure a safe and enjoyable trek. We’ve carefully curated the map to ensure that you have all the necessary information at your fingertips. Please take a moment to review it thoroughly, and don’t hesitate to reach out if you have any questions or concerns.
Mount Kilimanjaro Trek Altitude Chart
The Trek Altitude Chart is a useful tool for Trekkers to monitor their altitude changes during their rides, allowing them to plan their routes more efficiently and track their progress over time. This Mount Kilimanjaro Trek chart is beneficial for both casual and experienced Trekkers, helping them make the most out of their Trek experience.
Trek Cost Inclusions
- Stay: As outlined in the travel plan, lodging arrangements include a one-night stay at a hotel in Arusha on Day 1 and another night’s accommodation at a hotel in Moshi on Day 8. During the trek, participants will be provided with a camping stay on a twin-sharing basis.
- Meals: Trekup India will provide freshly cooked meals during the trek starting with Dinner on Day 1 to tea, coffee on day 9 (Meals are simple, nutritious, and vegetarian)
- Transport from Kilimanjaro International Airport to Airport
- Trek Insurance (Optional): Trekup India recommends that all trekkers consider getting trek insurance. This is optional, but highly recommended. Trek insurance covers unexpected events that may occur during your trek. The cost of the insurance starts from INR 210. Please read more about what is included in the coverage and why it is mandatory on treks.
- Trek Equipment: Sleeping bag, Sleeping tents, Kitchen tent, Dining tent, Toilet Tent.
- Amenities: All utensils, sleeping mattresses (Black foam mats), Crampons, and Gaiters for snow.
- Health & Safety: First Aid Box, Oxygen Cylinders, Stretchers, Oxi meters, BP Machines, health.
- Permits: Forest Permits and Camping Permission Fee
- Trek Crew: High Altitude Chef, Helpers, Trek Leader & Guides, and other support teams.
- Potters & Mules: Potters and Mules are to carry all trekking equipment, ration, and vegetables.
Trek Cost Exclusions
- GST 5% (it is Mandatory)
- Any Meals/accommodation beside the itinerary or not mentioned in the program.
- Any Bus / Airfare to/from trek start/end point
- Personal Medical expenses do carry your medication.
- Any personal services such as Laundry, phone calls, liquors, mineral water, etc.
- Any still / video camera fee
- Any Entrance fee Monuments, Monasteries, Museums, Temples – Pay directly on the spot.
- Mules or porter charges to carry private baggage (Offload Charges for bag 365 per day, per bag if paid online (at base camp 2,550). Note: Bag weight should not be more than 10 kg.
- Any emergency evacuation charges
- Any services that are not mentioned in the cost inclusion section.
What should you pack for the Mount Kilimanjaro Trek
Mount Kilimanjaro Trek is a high-altitude trek. The trekking gear you have to have for this particular trek differs from normal treks. Thus, read this whole segment. There is an important question that the trekker who is doing trek asks, like what all things to carry while trekking. Below, we have provided the details on everything you should take; an easy way to remember is by Head to foot or foot to head. We have prepared from Head to foot.

Head Gears
When trekking it's important to carry headgear to protect your head and face.
Heading out for a trek? Don’t forget to carry headgear to protect your beautiful face and head from the sun, wind, and dust! It’s an essential accessory that keeps you safe and comfortable throughout your adventurous journey. So, make sure you pack it before you step out into nature!
- Head Lamps – When trekking at night, headlamps are essential to illuminate your path while keeping your hands free. Headlamps come in different sizes and lumens, so it is essential to choose one that suits your needs.
- Hats or Cap – Caps or hats are also necessary when trekking in different weather conditions. Caps protect your head from the wind and freezing temperatures at night, while hats provide shade and protection from the sun during the day. It’s essential to ensure that your hat has a strap to prevent it from being blown away by the wind.
- Sunglasses – Sunglasses are also essential for trekking. Your sunglasses should protect your eyes from harmful UV rays and fit your face perfectly to avoid falling off while climbing, jumping, or crossing obstacles. The glass of your sunglasses should also be designed for different weather conditions to provide optimal visibility.
- Buff / Balaclava – Lastly, a buff or balaclava is a must-have to protect your mouth or neck from extreme temperatures and keep them warm. Buffs and balaclavas come in different materials, thicknesses, and designs, so it’s important to choose one that suits your needs and preferences. Depending on the weather conditions and your activities, you can wear them as neck warmers, face masks, or headbands.
Clothes
When trekking in high altitudes, prepare for cold weather by wearing layers. Layering traps heat, keeps you warm, and allows you to easily adjust your clothing as temperatures fluctuate.
Layering is important for different seasons when trekking. When planning a high-altitude trek, it is important to prepare for the cold weather. Wearing layers is the best approach as it provides both protection and flexibility when the weather changes frequently in the mountains. Layering helps to trap heat and keep your body warm, while at the same time allowing you to easily adjust your clothing as the temperature fluctuates. By wearing layers, you can enjoy your trek comfortably and stay safe in the unpredictable mountain weather
- For spring, summer, and monsoon treks, consider wearing three layers: a woollen sweater, a fleece, and a padded jacket.
- For autumn treks, add one more fleece layer to make it four layers.
- For winter treks, you may need five layers with thermals, a woollen sweater, two fleeces, and a padded jacket.
- T-shirt/sleeve shirt– Bring three T-shirts and two quick-dry trek pants, wearing one and carrying the others. Long sleeve shirts help to protect from sun UV rays. We recommend synthetic T-shirts as they get dry quickly when they get wet.
- Hiking / Trekking Jacket– down jackets (-5 to-10 C) or two-three-layer jackets.
- Thermals– at least two pairs of thermals help keep the body warm during cold weather.
- Undergarments– you can carry them according to your habitual and hygiene requirements.
- Gloves– 1 pair of gloves will keep your hand warm and nice.
- Trek Pants– Bring 2 to 3 comfortable trekking pants. Trekking pants play a significant role, as they are designed for comfort and mobility, making trekking easier. It should be Synthetic so that it gets dry quickly when wet.
- Rain Wear– you can carry a raincoat or Poncho. During long rains and snowfalls, the waterproof jackets start leaking. Still, the Poncho and raincoats keep you dry, so choose accordingly.
Tip: If you choose a raincoat on your trek, carry a small waterproof cover so things inside your backpack can’t get wet. If you carry a Poncho, you don’t need to worry. It protects both you and your backpack.
Foot Gears
When it comes to planning a trek, one of the most important aspects is to ensure that you have the right kind of foot gear.
- Trekking shoes which are waterproof and have ankle support. Walking / Hiking sandals which can be used off the trek, i.e., in the morning and evening hours when you reach the campsite, basically to get your feet rest from heavy boots, sometimes used for crossing streams and rivers, it’s more comfortable and safer than crossing barefoot or wetting your shoes. Sneakers (Optional) can be worn for normal driving days or used around the camp.
- Socks– you should at least carry 3 to 4 pairs.
- Microspikes & Gaitorswill be provided by Trekup India when required. You don’t have to carry them.
Personal First Aid Kit
Don't forget to pack your personal first aid kit! It's always better to be safe. So, make sure you're prepared for any unforeseen circumstances.
Below are some common medicines generally required/used during your adventure trip; however, please consult your doctors prior.
- Antiseptic towel or water syringe (to clean the wound)
- Butterfly bandage for a small cut
- Cotton and elastic bandages and sterile gauze pad for larger wounds
- Latex gloves are used when the wound bleeds.
- Medicine for Diarrhea (Upset stomach)
- Medicine for cold, flue/fever, headache
- Some pain killers
- ORS pouches
- Quick pain relief spray (External use)
- Any personal medicine prescribed by your doctor
- Dimox / Similar for high altitude sickness
- Bug Repellent
- Carry some nutria/energy bars and drinks (non-alcoholic)
- Note: Kindly consult your doctor before purchasing or taking any medicine.
Gadgets and Other Items
You might also consider bringing a camera, binoculars, portable charger, and snacks. Be well-prepared and tackle any trail with confidence.
- Trekking Poles
- Mobile phone
- Camera
- Spare batteries for phone and camera, power bank
- Lightweight flashlight or headlight
- A waterproof bag made of plastic is used for the camera.
- Plug/converter for electrical items
- 1-litre water bottle
- A journal with a pen would be a good idea to keep your notes.
- Some book of your interest for the ideal time
- Get into the habit of maintaining a Map and guidebook of the region.
Hygiene & Personal toiletry
Remember to pack hygiene and personal toiletry items such as soap, shampoo, toothbrush, toothpaste, deodorant, and toilet paper.
- Sunscreen with UV protection to shield your skin from harmful rays
- 1 or 2 small quick-drying towels to help you dry off quickly in case of rain or sweat
- Toilet paper, tissues or wet wipes for maintaining hygiene while on the trek
- Toothbrush, toothpaste, and mouth freshener to keep your mouth clean and fresh throughout the journey
- Deodorant or talcum powder to help you stay fresh and odor-free, especially during hot and humid climates
- Shampoo to keep your hair clean and healthy
- Sanitary pads or tampons (for female trekkers) to manage menstrual cycles
- Lip-gloss or salve to protect your lips from dryness and chapping
- Bio-degradable soap to keep yourself clean and hygienic while on the trek
- Nail clipper and other personal items that you use daily
Compulsory Documents to Carry
There are certain documents that you should always carry with you. These documents are not only necessary for your safety and security, but they may also be required by local authorities.
These files must be submitted to the Forest Department before your trek. With none of these, you will not be permitted to trek—original and photocopy of government photo identity card. Carry IDs like Aadhaar, voter ID, etc.
How To Plan Your Trek & Reach?
The specified place for picking up and dropping off is Kilimanjaro Airport, and this is included in the trek price.
Tanzania has three main international airports: Kilimanjaro International Airport in Kilimanjaro, Julius Nyerere International Airport in Dar Es Salaam, and Karume International Airport in Zanzibar. Travellers can also access Tanzania through other airports, such as Addis Ababa Bole International Airport in Ethiopia and Jomo Kenyatta International Airport in Kenya.
Optimizing Your Journey to Kilimanjaro
For a cost-effective and convenient trip to Tanzania, consider a combination of flying and shutting. Begin by flying into Nairobi or Ethiopia, then transfer to a shuttle service that will transport you to Kilimanjaro.
Upon arrival at Kilimanjaro Airport, travellers can easily reach Arusha, one of the two closest urban centres, along with Moshi. Taxis are readily available at the airport to transport passengers to Arusha, and booking in advance can ensure a hassle-free journey. The trip typically takes around 60 minutes under normal traffic conditions.
Reaching Arusha from Dar Es Salaam Airport
As an alternative entry point to Tanzania, Dar Es Salaam Airport is famous for Kilimanjaro climbers. The city also offers internal flights to Arusha via smaller planes. Travelling to Arusha from Dar Es Salaam Airport has six convenient options. You can take a direct flight, fly to Kilimanjaro and then hail a taxi, or opt for a shuttle, which takes around 18 hours. Alternatively, you can take a ferry to Zanzibar and then fly to Arusha for approximately 4 hours. Other options include a 10-hour bus ride or a 9-hour taxi journey from Dar Es Salaam to Arusha.
Alternative Route to Arusha: Via Zanzibar Airport
Instead of flying directly to Arusha or Moshi, some climbers prefer to start their Kilimanjaro adventure by landing at Zanzibar International Airport. From there, they can choose from four different options to reach Arusha. The fastest way is to take a 1-hour flight to Arusha. Alternatively, they can take a ferry to Dar Es Salaam, followed by a 3-hour train ride to Arusha. Another option is to fly to Kilimanjaro and then take a 3-hour taxi ride to Arusha. The most time-consuming route involves a ferry ride to Dar Es Salaam and a 12.5-hour bus journey to Arusha.
If you’re bound for Arusha from Kenya, there are a few options to consider. For a budget-friendly route, shuttle services from Nairobi Airport to Arusha offer a cost-effective solution, with a journey time of around 5 hours. Those who are short on time may prefer to fly, which reduces the travel time to just 2 hours. Alternatively, Kidia One Express operates daily direct bus services from Nairobi to Arusha, arriving at Arusha Station in approximately 4.5 hours.
If you plan a trip to Arusha from Ethiopia, consider taking a taxi for the most cost-effective option from Addisaba Airport. The journey can be lengthy, lasting up to 28 hours. Alternatively, the quickest way is to fly from Addis Ababa to Arush, which typically takes around 3.5 hours. Another option is to fly to Kilimanjaro International Airport from Addis Ababa and take an anrusha. Ethiopian Airlines, Kenya Airways, and Precision Air provide flights from Addis Ababa to Kiliman.
Travelling to Tanzania from India, as no non-stop flights are available. Fortunately, several flights link key Indian cities such as Delhi, Kolkata, Mumbai, and Bangalore to Tanzania, with layovers in major hubs like Dubai, Abu Dhabi, Doha, Addis Ababa, and Nairobi.
Travelling to Tanzania from the UK can be most efficiently and affordably done by flying to Nairobi and then taking a shuttle to Tanzania. Alternatively, some airlines offer direct flights to Kilimanjaro Airport.
Travelling to Tanzania from Canada can be done by taking a direct flight to Kiliman Airport, the quickest option, or by flying to Nairobi in Kenya and then transferring to Tanzania via shuttle.
Travelling from the US to Tanzania
For US travellers, multiple direct flights are available to Kilimanjaro International Airport, offering the quickest route to Tanzania.
Another option is to fly into Nairobi, Kenya, and then take a shuttle to Tanzania.
Our transportation package includes pick-up and drop-off at Kilimanjaro International Airport, eliminating additional costs. We prioritize your convenience by streamlining our transportation services and grouping travellers by flight duration. Those with flights arriving between 1 and 2 hours are paired together, ensuring a tailored and hassle-free airport transfer experience.
Fitness Required & Preparation Guide For Mount Kilimanjaro Trek
If you’re preparing for a Mount Kilimanjaro Trek, Trekup India recommends jogging as part of your fitness routine. Jogging helps work out the same muscle groups that you’ll use during trekking and can help you build endurance. You don’t need any special equipment to get started.
Fitness Target
Trekup India has put the Mount Kilimanjaro Trek into an moderate to difficult grade-level trek.

For Moderate – Difficult Treks – In order to be well-prepared for your upcoming trek, it is recommended that you focus on building your endurance by aiming to cover a distance of 4.5 kilometers in less than 40 minutes. This will help you to develop the necessary stamina and strength required to successfully complete your journey.
How to Achieve This Fitness Target?
To start preparing for your trek:
- Try jogging for at least five days every week.
- If you find 5 km too difficult at first, begin with 2 km and gradually increase over 2-3 weeks.
- Once you feel more comfortable running 5 km, focus on improving your speed gradually on a daily basis.
It is important to ensure that you can consistently complete 4.5 km in under 40 minutes for at least two weeks before your planned trek. Allow yourself 6-8 weeks to prepare physically for the journey.
Strength Training exercises that benefit Trekking
Trekking is an activity that demands a good level of strength.

Trekking is a demanding activity that requires good cardiovascular endurance, muscular strength, and overall fitness. To help you prepare for your trek, incorporating bodyweight exercises into your training routine can be an effective way to build strength, improve stability, and enhance endurance, all of which are crucial for a successful trek. In this regard, here’s a breakdown of body weight exercises categorized by the specific body parts they target and the benefits they offer during trekking.
1. Lower Body Exercises
Lower body exercises like squats and lunges are great for building lower body strength, essential for trekking.
a. Squats
Squats are an excellent exercise for building lower body strength, essential for trekking. They target the quadriceps, hamstrings, glutes, and calves. Solid quadriceps and glutes provide power for ascending and tackling uphill climbs, while vital hamstrings aid stability during descents. This is particularly helpful in navigating uneven terrain during trekking.
How to perform Squats Exercises:
- Stand with feet shoulder-width apart, toes pointing slightly outward.
- Lower your body by bending your knees and hips, keeping your back straight.
- Lower until your thighs are parallel to the ground or as low as comfortable.
- Push through your heels to return to the starting position.
b. Lunges
Lunges target the quadriceps, hamstrings, glutes, and calves. They improve lower body strength, balance, and stability, crucial for maintaining control on rocky trails and steep slopes. Additionally, they enhance flexibility, reducing the risk of injury while trekking.
How to Perform Lunge Exercises:
- Stand with feet hip-width apart, hands on hips or sides.
- Take a step forward with one foot, lowering your body until both knees are bent at 90-degree angles.
- Push through the heel of your front foot to return to the starting position.
- Repeat on the other side, alternating legs.
2. Upper Body Exercises
Upper body exercises such as push-ups and pull-ups effectively strengthen the upper body, especially the chest and shoulders, which are essential for carrying a backpack during treks.
a. Push-Ups
Targets: Chest, shoulders, triceps, and core.
Benefits for Trekking: Push-ups are an effective exercise to strengthen the upper body, especially the chest and shoulders, essential for carrying a backpack during treks. Improved upper body strength will also help maintain posture and stability while traversing challenging terrain.
How to Perform Push-Ups Exercises:
- Start in a plank position with hands shoulder-width apart and body in a straight line from head to heels.
- Lower your body by bending your elbows until your chest nearly touches the ground.
- Push through your palms to return to the starting position.
- Keep your core engaged throughout the movement.
b. Pull-Ups/Bodyweight Rows:
Targeting the back, biceps, and shoulders can significantly benefit trekking. You can strengthen these muscle groups by performing pull-ups or bodyweight rows and improve your posture and balance while carrying a backpack. Additionally, more muscular back muscles can help reduce the risk of back strain and fatigue during long treks, making your journey safer and more comfortable.
3. Core Exercises
Core exercises like planks and Russian twists can help strengthen the core muscles, which are crucial for maintaining stability and balance while trekking on uneven terrain.
a. Planks
Targets: Abdominals, obliques, and lower back.
Benefits for Trekking: Planks are an effective exercise that helps strengthen the core muscles. These muscles are crucial for maintaining stability and balance while trekking on uneven terrain. A strong core also helps improve posture, reducing the risk of back pain and fatigue during extended hikes.
How to Perform Planks Exercises:
- Start in a plank position with elbows directly under shoulders and body in a straight line from head to heels.
- Engage your core and hold the position, avoiding sagging or arching the back.
- Keep breathing steadily and hold for the desired duration.
b. Russian Twists
Targets: Obliques, abdominals, and lower back.
Benefits for Trekking: Russian twists engage the core muscles, particularly the obliques, improving rotational stability and balance. Enhanced core strength helps prevent injuries and improves overall performance during trekking.
How to Perform Russian Twist Exercises:
- Sit on the ground with knees bent and feet flat, leaning back slightly to engage the core.
- Clasp hands together and twist the torso to one side, bringing the hands towards the ground beside the hip.
- Return to the centre, then twist to the other side.
- Continue alternating sides for the desired number of repetitions.
4. Full Body/Cardiovascular Exercises
Full-body/cardiovascular exercises like burpees and mountain climbers are excellent for improving cardiovascular endurance, strength, and agility.
a.Burpees
Burpees are an excellent full-body exercise that targets your legs, chest, arms, and core. This exercise dramatically benefits trekking enthusiasts, improving cardiovascular endurance, strength, and agility. Regularly incorporating burpees into your workout routine can enhance your overall fitness level, which can help you endure long hikes and rugged terrains with ease.
How to Perform Burpees Exercises:
- Start in a standing position.
- Squat down and place hands on the ground.
- Jump feet back into a plank position.
- Perform a push-up.
- Jump feet back to the squat position.
- Explosively jump up into the air, reaching overhead.
- Land softly and repeat the sequence.
b. Mountain Climbers
Mountain climbers target the core, shoulders, chest, and legs. This dynamic, full-body exercise can significantly improve cardiovascular endurance and agility. It is an excellent functional workout for trekking preparation as it engages both the upper and lower body muscles while strengthening the core muscles.
How to Perform Mountain Climbers Exercises:
- Start in a plank position with hands shoulder-width apart and body in a straight line from head to heels.
- Drive one knee towards the chest, then quickly switch legs, alternating in a running motion.
- Keep the core engaged and the hips stable throughout the movement.
- Continue at a moderate to fast pace for the desired duration.
Incorporating bodyweight exercises into your training routine can help you build strength and endurance and prepare your body for the physical demands of trekking. Consistency and proper form are crucial to maximizing the benefits of these exercises and ensuring a safe and enjoyable trekking experience. Engaging your core muscles, including obliques, abdominals, and lower back, with Russian twists can improve your rotational stability and balance, preventing injuries and enhancing overall performance during trekking.
When incorporating strength training exercises into your workout routine, it’s essential to maintain proper form and technique to avoid injury. Start with lighter weights and gradually increase the intensity as you progress, focusing on compound exercises targeting multiple muscle groups simultaneously. Some examples of practical strength training exercises for trekking include squats, lunges, deadlifts, and pull-ups.
Remember to give your muscles time to recover between workouts, and remember to stretch before and after your workouts to prevent injury and improve flexibility. Combining strength training with jogging and proper stretching allows you to take your fitness to the next level and confidently tackle even the most challenging treks.
Our Trekkers Reviews And Expreinces
Food Provided by Us During Trek
We provide only Indian vegetarian food, and your meal will mainly consist of Indian bread, vegetables, lentils, rice, and a delicious dessert. During your trek, we will serve three meals a day, including breakfast, lunch, and dinner. You will also be served tea, snacks, and lip-smacking soup in the evening before dinner. If it is a long day of trekking, you will be given a packed snack.
After extensive research on the trekkers’ nutritional requirements, we prepare the menu. Before putting all the meals together, we also consider the altitude and the weather.
The meal we serve during the trek is perfectly balanced with calories, carbohydrates, vitamins, protein, fibre, and minerals. You need to know that all our cooks have great expertise in cooking and have undergone thorough training. So, get ready to enjoy delectable and lip-smacking dishes during your trek. You will be served with lemon tea in the tent to start your day with a refreshed feeling. Before leaving the campsite for trekking, you will be given a hot finger-licking breakfast like upma, Aallu Prantha, Besan Chilla, Poha, Daliya, Corn flakes, and Maggie, along with tea or coffee.
If your trek is longer, we also offer some fresh local fruits such as apples and healthy drinks like Frootie or Maaza. In the afternoon, you will be served a simple & healthy lunch, while at around 04:00 pm, you will be given tea and a light evening breakfast. After you reach your campsite at night, you will be served a hot and delightful dinner.
After reading this, you must have understood the food we provided on the trek; you don’t need to worry about food. Many trekkers repeatedly trek with us because of the food we provide. Thus, we will give you unforgettable experiences.
Safety During Mount Kilimanjaro Trek

Trekking with us for the Mount Kilimanjaro Trek is entirely safe because we have a team of trek leaders qualified in Wilderness first-aid and complete information about the high-altitude glitches. During the trek, we carry a full first-aid kit that contains all the essential medicines. Before trekking with us, you must ensure that you are medically fit for the trek; for us, your medical fitness is more important than anything else.
Right from our establishment, we at Trekup India have been continuously introducing new safety practices into Indian trekking to ensure the safety of voyagers. Trekup India introduced microspikes and made emergency bottled oxygen mandatory for all treks. Our trek leaders take your daily Pulse oximeter reading. We at Trekup India introduced the radio walkie-talkie as a safety communication device.
How can we ensure that your trek is safe with us?
We have noticed that most trek-organizing organizations do not follow these systems, but with time, they are following us; several competing companies are adopting these practices and organizing great, safe treks.
We ensure complete technical safety in the mountain. Our company has a vast team of more than 100 guides and trek leaders who serve on Himalayan treks. One of the best things about our team is that all the members are trained professionally by the Nehru Institute of Mountaineering, Indian Mountaineering Foundation Delhi, and Hanifle Center Outdoor Education Mussoorie.
Explore our New Safety Protocols
To ensure a perfect Trek, we have introduced some new safety checks to ensure excellent safety for our trekkers.
Our On-trek safety checks include:
- Daily oxygen saturation, along with pulse readings
- Stretchers team appointed on every trek
- Radios
- Trained mountain staff and complete safety
- Additional oxygen cylinders
- Special medical kit for high-altitude treks
- Microspikes on all types of snow treks
- Experienced Trek leaders, as well as safety
- Technical team on all snowy slopes
For Us, Your Safety Is the Top Priority
At Trekup India, you will find a team with local knowledge and fluency in English and Hindi. This helps ensure that you have a fantastic trek. Not only this, but we also pay attention to your health and safety because this is something we cannot ignore. All the team leaders involved in trekking have already undergone several professional courses in first aid, portable altitude chamber training, CPR, environmental awareness training, and advanced wilderness emergency medicine.
We also carry a complete first aid medical kit on every trek and trip we organize. Apart from the medical kit, we take a portable altitude chamber (if needed) and medical oxygen for all high-altitude treks. Our company has significant expertise in organizing all sorts of group adventure holidays for family groups, school and college groups, and friend groups. We have many travel options that suit different fitness levels and travelling styles.
Regardless of the group size, we value each and every member of our trekking groups. Our commitment to personal attention ensures that your needs and safety are always our top priority.
Who we are?
Trekup India has been a stalwart in the Adventure Tourism industry for 30 years. Since our inception, we have been dedicated to providing top-notch treks, voyages, trekking programs, and high-altitude expeditions. Our extensive experience is a testament to our commitment to your adventure and safety.
We organize treks in Uttarakhand, Kashmir, Sikkim, and Himachal while being part of the trekking community; we feature more than 75 documented Himalayan treks. In addition to other outdoor activities, our company also organizes trips for schools, colleges, and families.
Therefore, we maintain the quality of services offered to our valuable customers.
Must Read These Information Of Mount Kilimanjaro Trek
Why You Should Do Mount Kilimanjaro Trek
This is the perfect trek for hikers and Trekkers keenly seeing high peaks and views from the top. There are many reasons to do this trek, and we provide a few below to make you understand why you must do this.
1. Mount Kilimanjaro is a dormant mountain with a grand view from the top and of the peak from afar.
The view of the Mountain from afar is like a mountain floating above clouds, which is just a majestic sight, and it is different when you are up close.
2. You will get up close to the wildlife and nature of Africa.
The plants found there are sycamore trees, ferns, lichen (known as older man’s beard) that covers most trees, Giant groundsels by the name Red hot pokers, Lobelias, and Senecio trees. You might also see or hear some animals like some birds (tropical Boubons, Harthlaub Turacos, Silver cheeked Hornbill), and animals like Olive Baboons, Colobus Monkeys, and Blue Monkey, along with Dik-DIK, Abbott’s Duikers, Civets, Elephants and Bushpins.
3. Local Culture of the villages.
You would be mesmerized by the vibrant culture of Tanzania, whether it’s their music, traditional music, attire, or house design. But this would be a sight to behold to experience it in person.
4. Trekking through the barren hills.
As you get close to Mount Kilimanjaro’s top, the landscape changes from green grasslands and forests to rocky terrain, a beautiful sight to behold and worth seeing through one’s eyes.
Best time to do Mount Kilimanjaro Trek
The ideal time to do this trek is in the Wet Season, which is from July to September and the Dry Season in January & February. Mount Kilimanjaro is near the equator and does not experience hot or cold weather like other mountains. The weather is clearer in the Wet Season, and the chance of snowfall and rivers is very low. In contrast, January and February are the Dry Seasons with warm weather and some showers, so it is the best time to trek.
How Difficult is the Mount Kilimanjaro Trek
The challenge of trekking Mount Kilimanjaro can fluctuate based on factors like the selected route, the climber’s fitness level, and the altitude. Generally, it is regarded as a demanding trek, but with adequate preparation, including physical training and acclimatization, individuals with reasonable fitness can reach the summit successfully. Selecting a reputable tour operator and adhering to their guidance is crucial to guarantee a safe and gratifying trek.
Frequently Asked Questions About Mount Kilimanjaro Trek
When is the ideal time to embark on a Mount Kilimanjaro expedition?
The mountain is accessible year-round, but the climate varies. The lower regions experience heavy rainfall in April, May, and November, with March and June as transition periods. The most incredible and driest conditions occur in August and September. The most popular times to tackle the climb are during the dry months of January, February, July, August, September, and October.


