Trek Grade
Difficult
Highest Altitude
18,197 ft
Base Camp
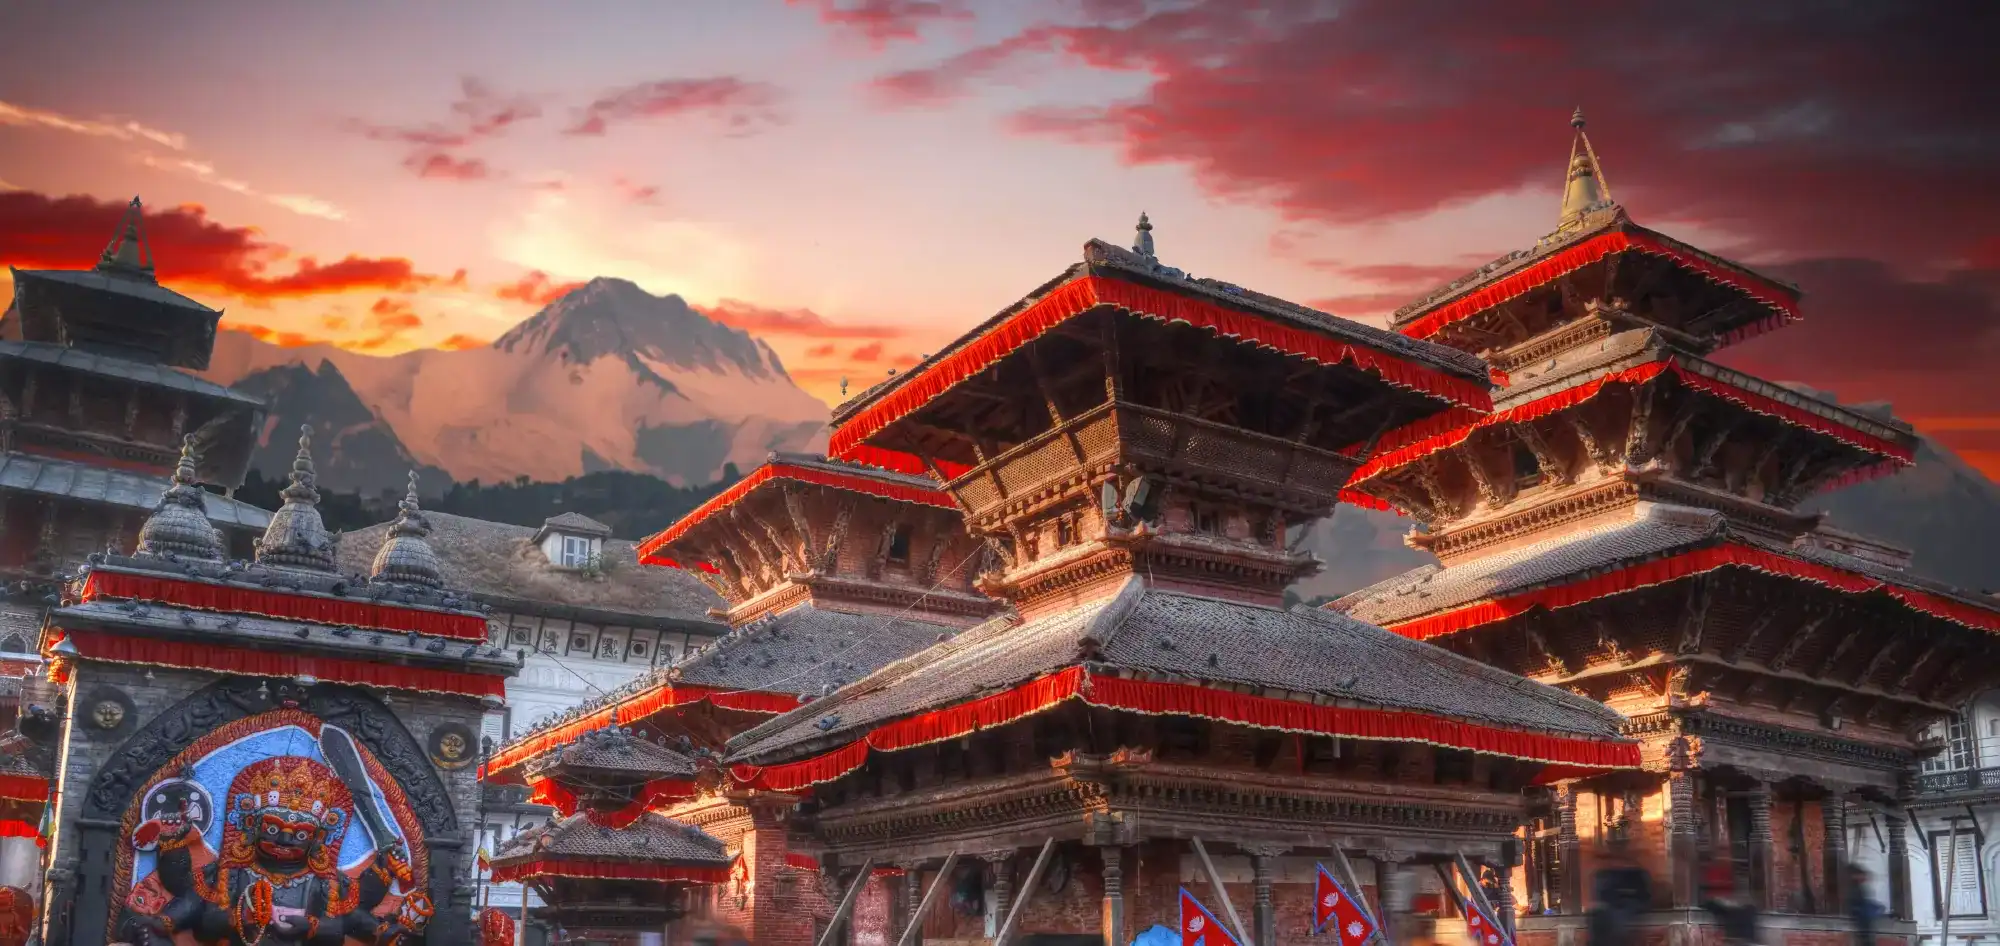
Kathmandu
Best Time
Spring, Summer & Autumn
Trek Distance
126 Km
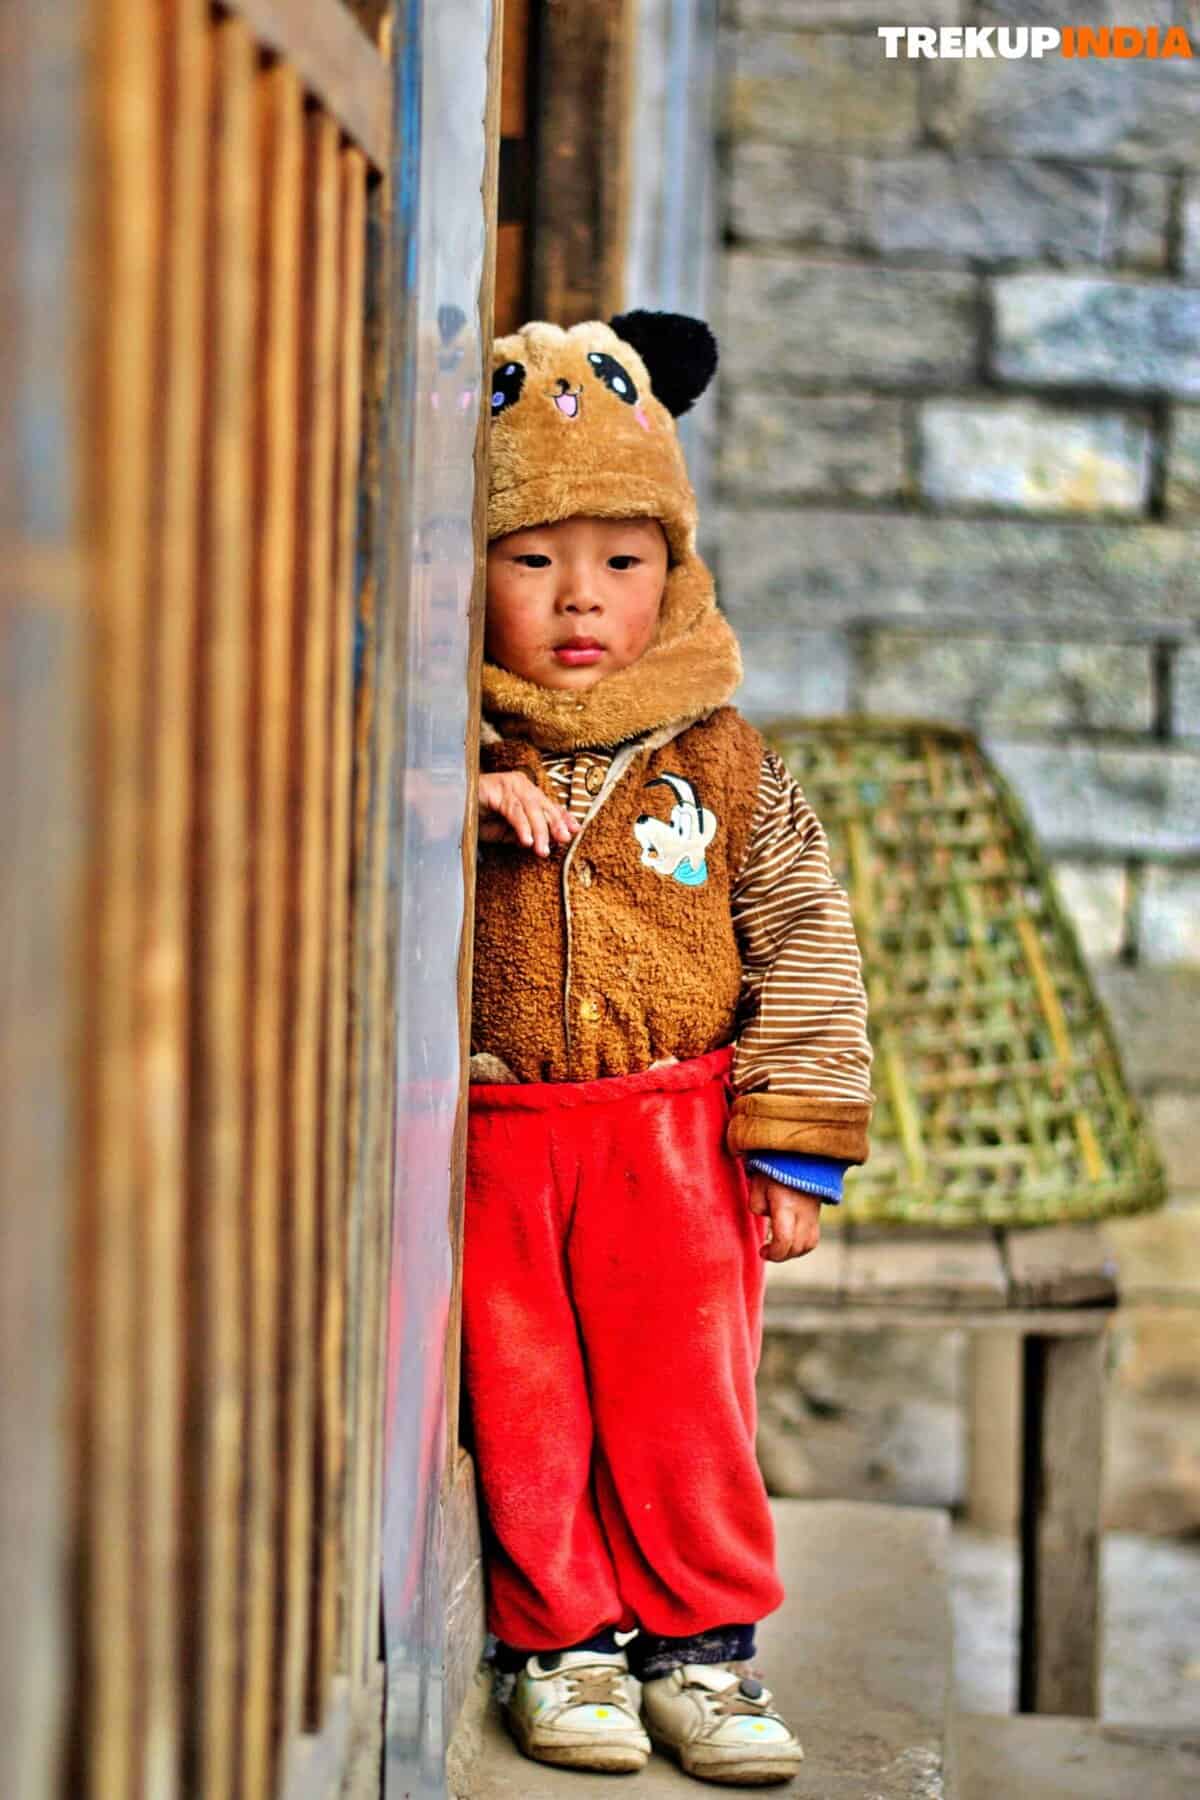
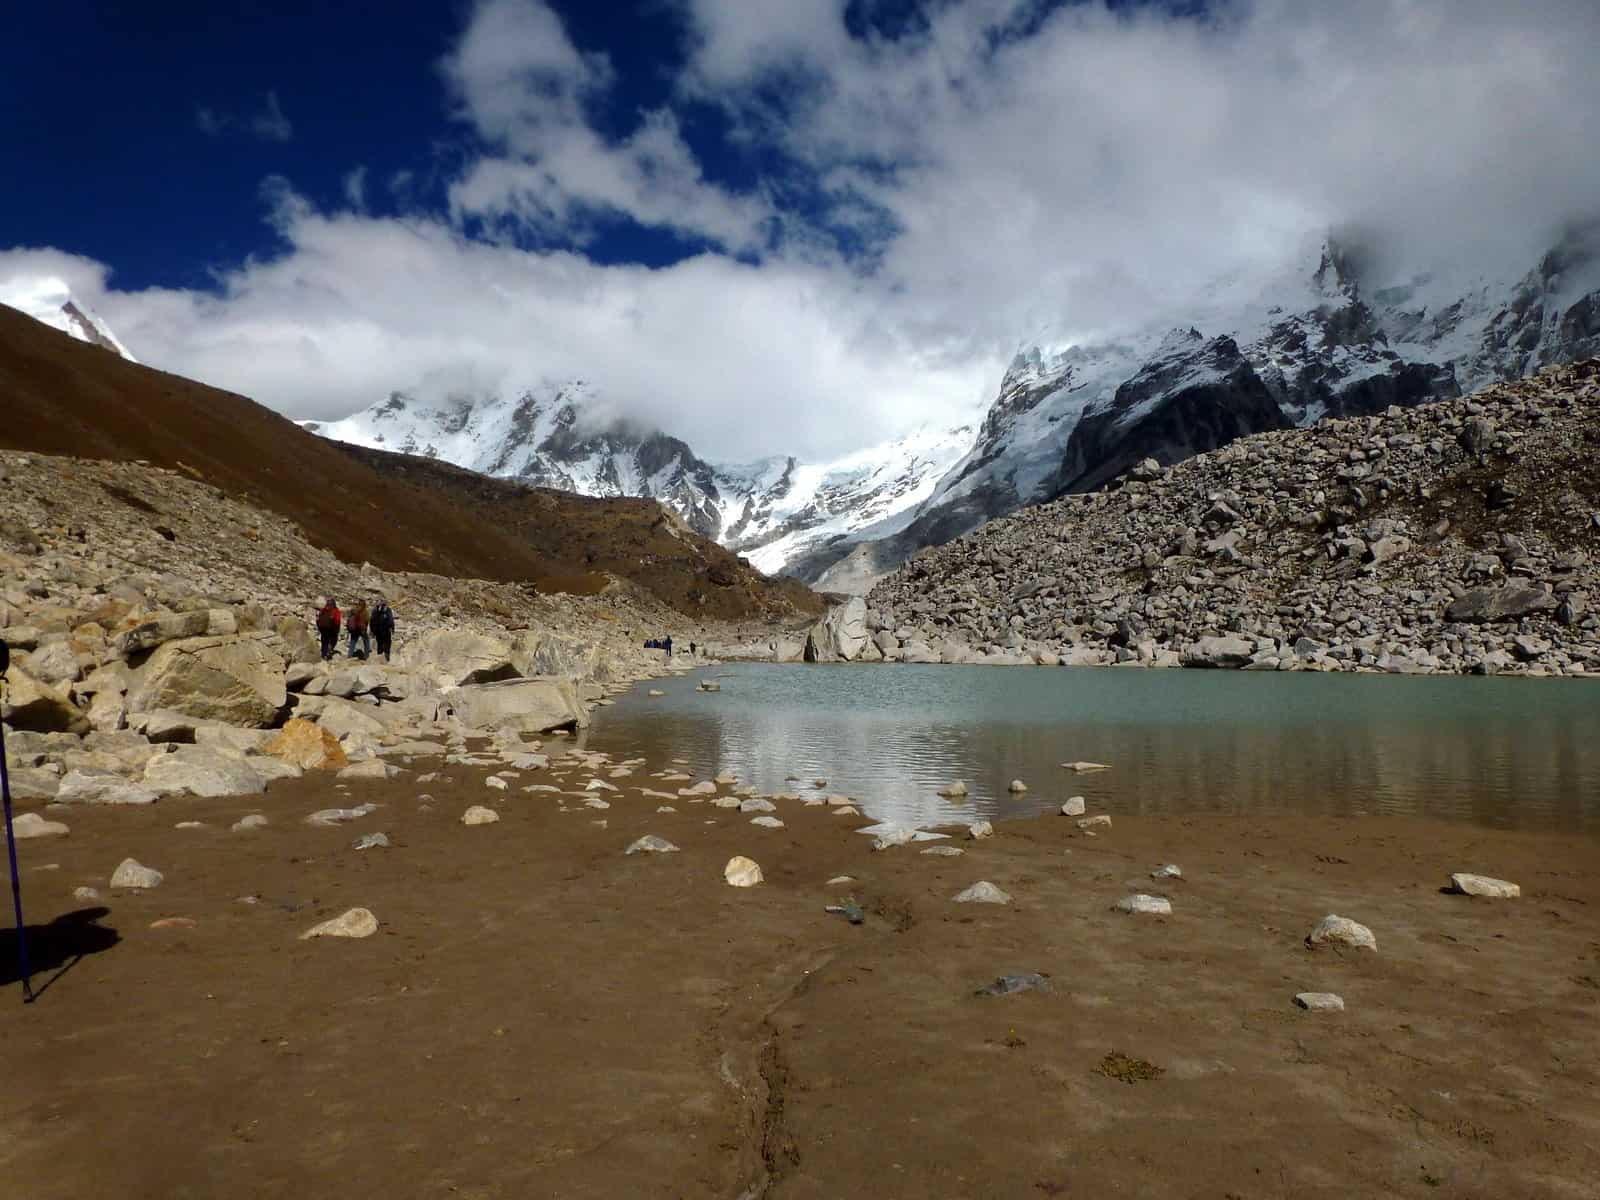
Everest Base Camp Trek

Everyone wonders what it would feel like to climb Everest, a well-known mountain worldwide. It is also called “steps to heaven” which suits its name. The view from there is like nothing seen on any other trek, which also makes it one of the most challenging treks. On this trek, you could visit many villages at the very top and understand how they live their lives there. The tour starts from Lukla and reaches Mt. Everest, the trek is 50 km long and at an altitude of 18,200 ft. On this trek, you can enjoy the beautiful sunrise and sunset from Kala Patthar. You will trek among the biggest mountains of the Himalayas and see the legacy left behind by the greatest mountaineers. The temperature is extremely low so you should prepare for the trek accordingly. The temperature in the hills ranges from the highest 20oC and lowest up to -20oC to -300C.
Trek Cost
- $1500 plus 5% GST for Foreigners & OCI card holders
Fix Departure Dates
Everest Base Camp Trek Videos
Videos by experts watch these videos to prepare well for a Successful Trek

Want To Trek Like Pro?
Basically, watch these videos if you want to trek the same way professional trekkers do and make your skills better. These videos contain useful tips and techniques to further improve your trekking skills itself. These videos actually help both new and experienced trekkers improve their trekking skills. These videos definitely provide useful tips that make your trek better. We are seeing that these videos by Trekup India experts will only help you make your trekking skills better.


Know Everything About Acute Mountain Sickness
Acute Mountain Sickness occurs when people trek to high altitudes above 8,000 feet. This condition itself develops further due to reduced oxygen levels at such heights. Basically, as you go higher up, the air pressure and oxygen levels decrease, which causes the same problem. Acute Mountain Sickness surely causes headache, nausea, vomiting, and dizziness in affected persons. Moreover, peoples also experience difficulty in sleeping during this condition. To avoid mountain sickness, you should actually trek up slowly to higher altitudes. To learn further about this condition itself, watch the videos by Trekup India.


Day Wise Detailed Itinerary of Everest Base Camp Trek
Day 01: Arival at Kathmandu, Nepal
- Stay: Overnight at 3 star hotel on sharing basis with breakfast only.
- Today on arrival at Kathmandu Airport, take a taxi on direct booking to booked hotel.
- On Arrival at the Hotel meet and be greeted by our company representative Check into your rooms
- Thereafter we gather at said time and have an introduction session followed by a trek briefing.
- Overnight stay at the hotel
- No Meals on this day by company, all meals will directly be payable by trekkers.
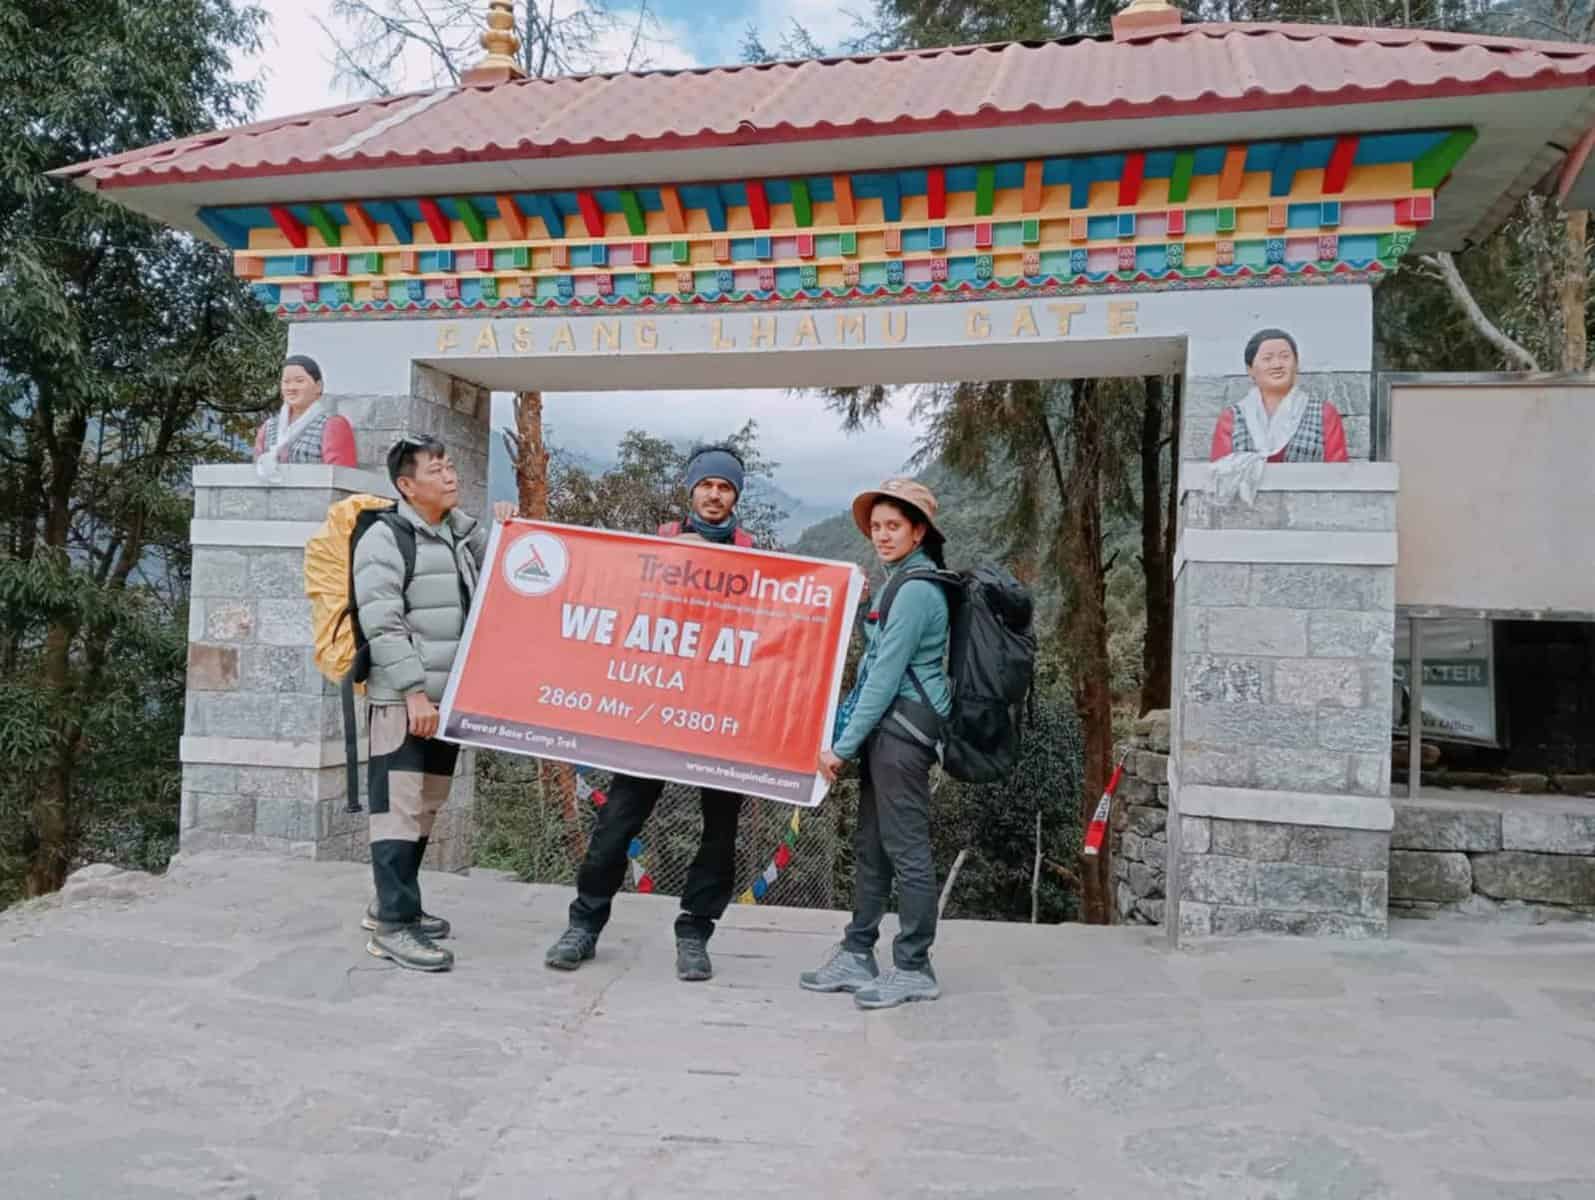
Day 02: Kathmandu to Lukla / Ramechap Via Flight – Trek to Phakding
- Meal: B/L/D
- Trek Distance: 9 Kms; Time Taken: approx 3-4 Hrs
- Altitude: Lukla (9380 ft / 2860 Mtrs.), Phakding (8714 ft / 2656 Mtrs.)
- Altitude difference: Approx 666 Ft / 204 Mtrs.
- Trek Grade: Gradual – Moderate
In the morning after a healthy breakfast, our Trekup India team will escort you to the airport. From Kathmandu, you will fly to Lukla via flight. Upon arriving at the airport with our team you will be taken to Lukla Village. Once you have reached Lukla you will meet the rest of the members and the trek will commence heading up to Dudh Koshi Valley. The trail ascends gradually with some ups and downs, after a short climb of one and a half hours of gradual walking you will reach Phakding. At Phakding base camp, you will spend the night.
Note: During peak time flights to Lukla are operated from Remechap Airport, hence depending on its operation we will need to drive from Kathmandu to Ramechap and then board a flight to Lukla.
Day 3: Trek from Phakding – Namche
- Meal: B/L/D
- Trek Distance: 15 Kms;
- Time Taken: approx 5-6 Hrs
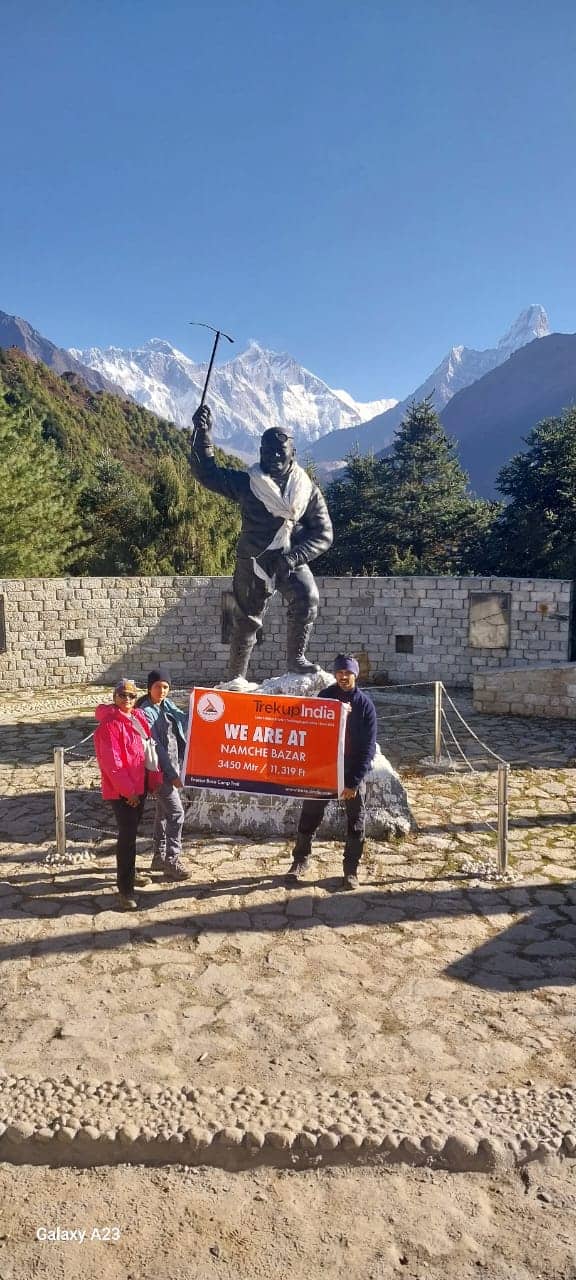
- Altitude: Phakding (8714 ft / 2656 Mtrs.), Namche (11,319 ft / 3450 Mtrs.)
- Altitude gain: Approx 2650 Ft / 794 Mtrs.
- Trek Grade: Gradual – Moderate
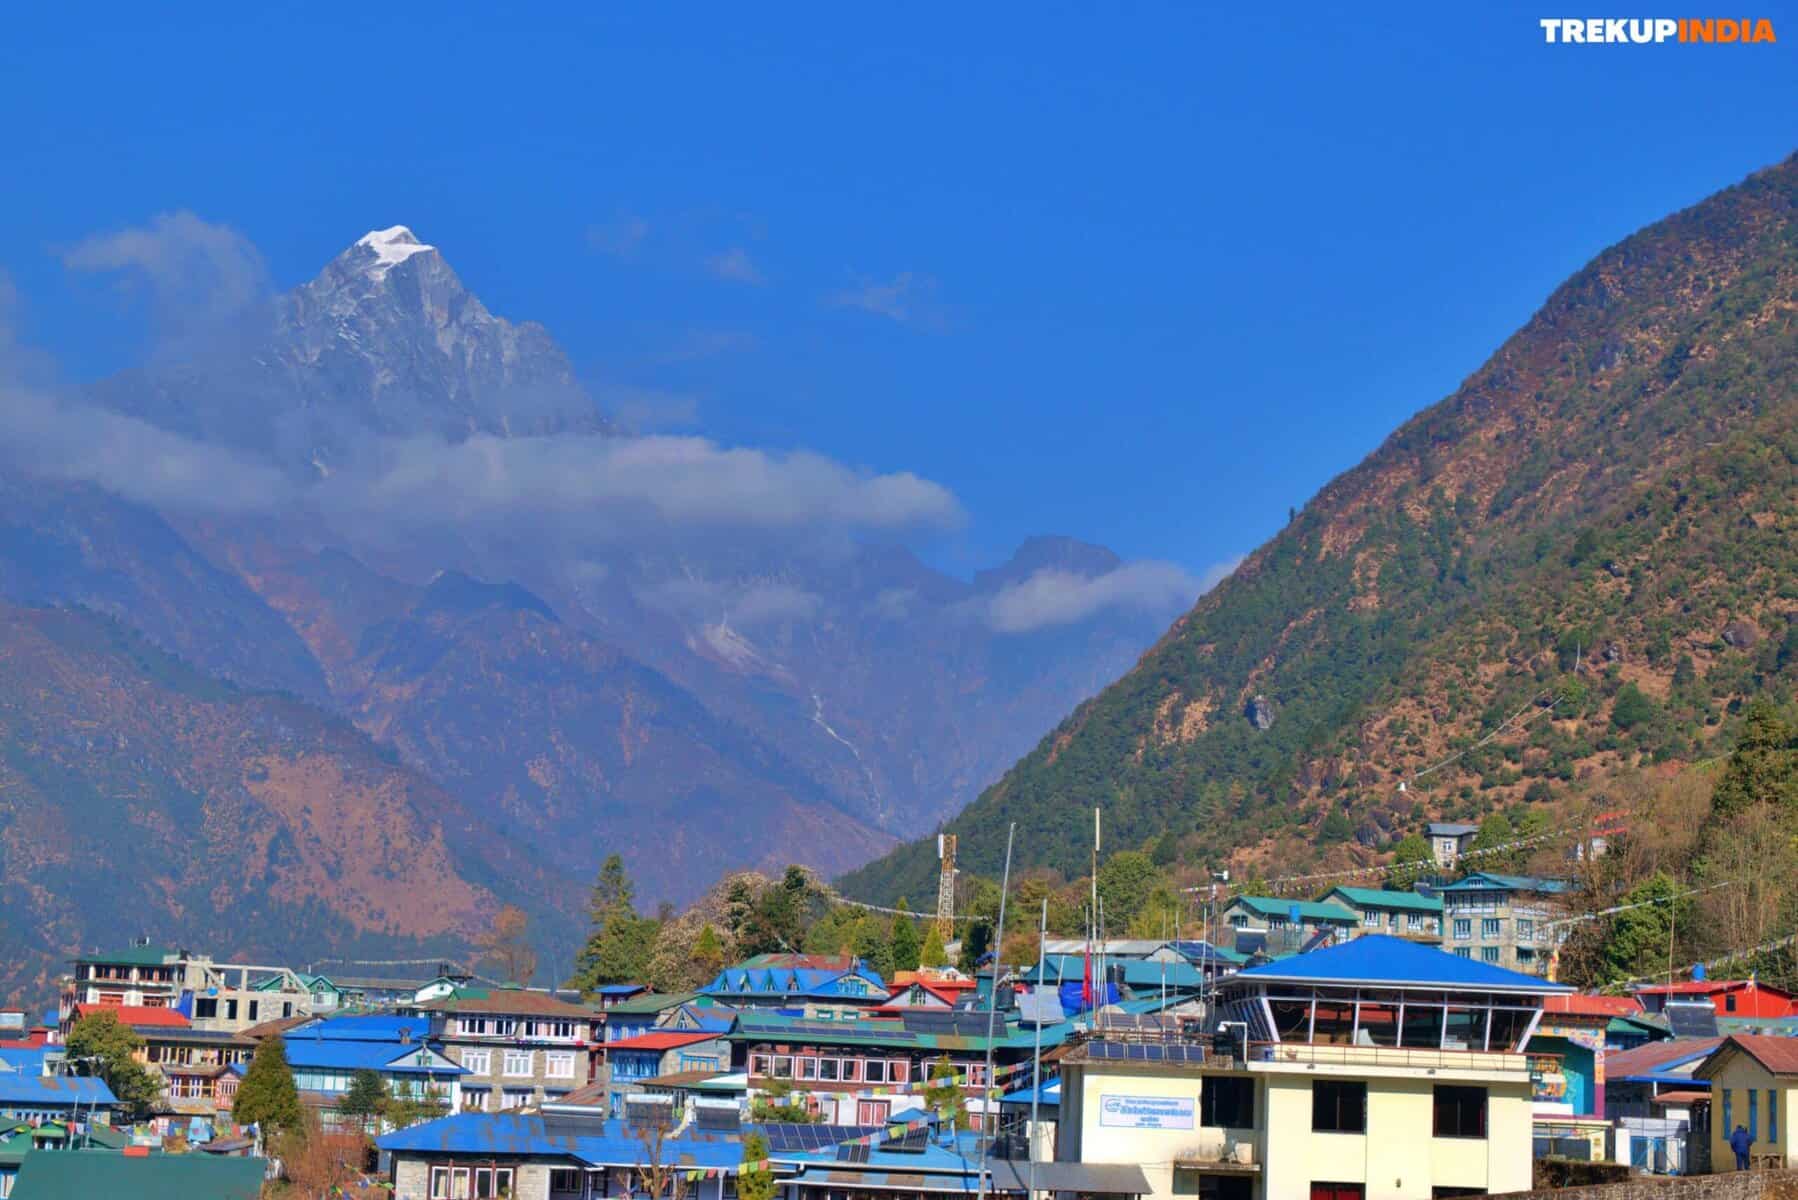
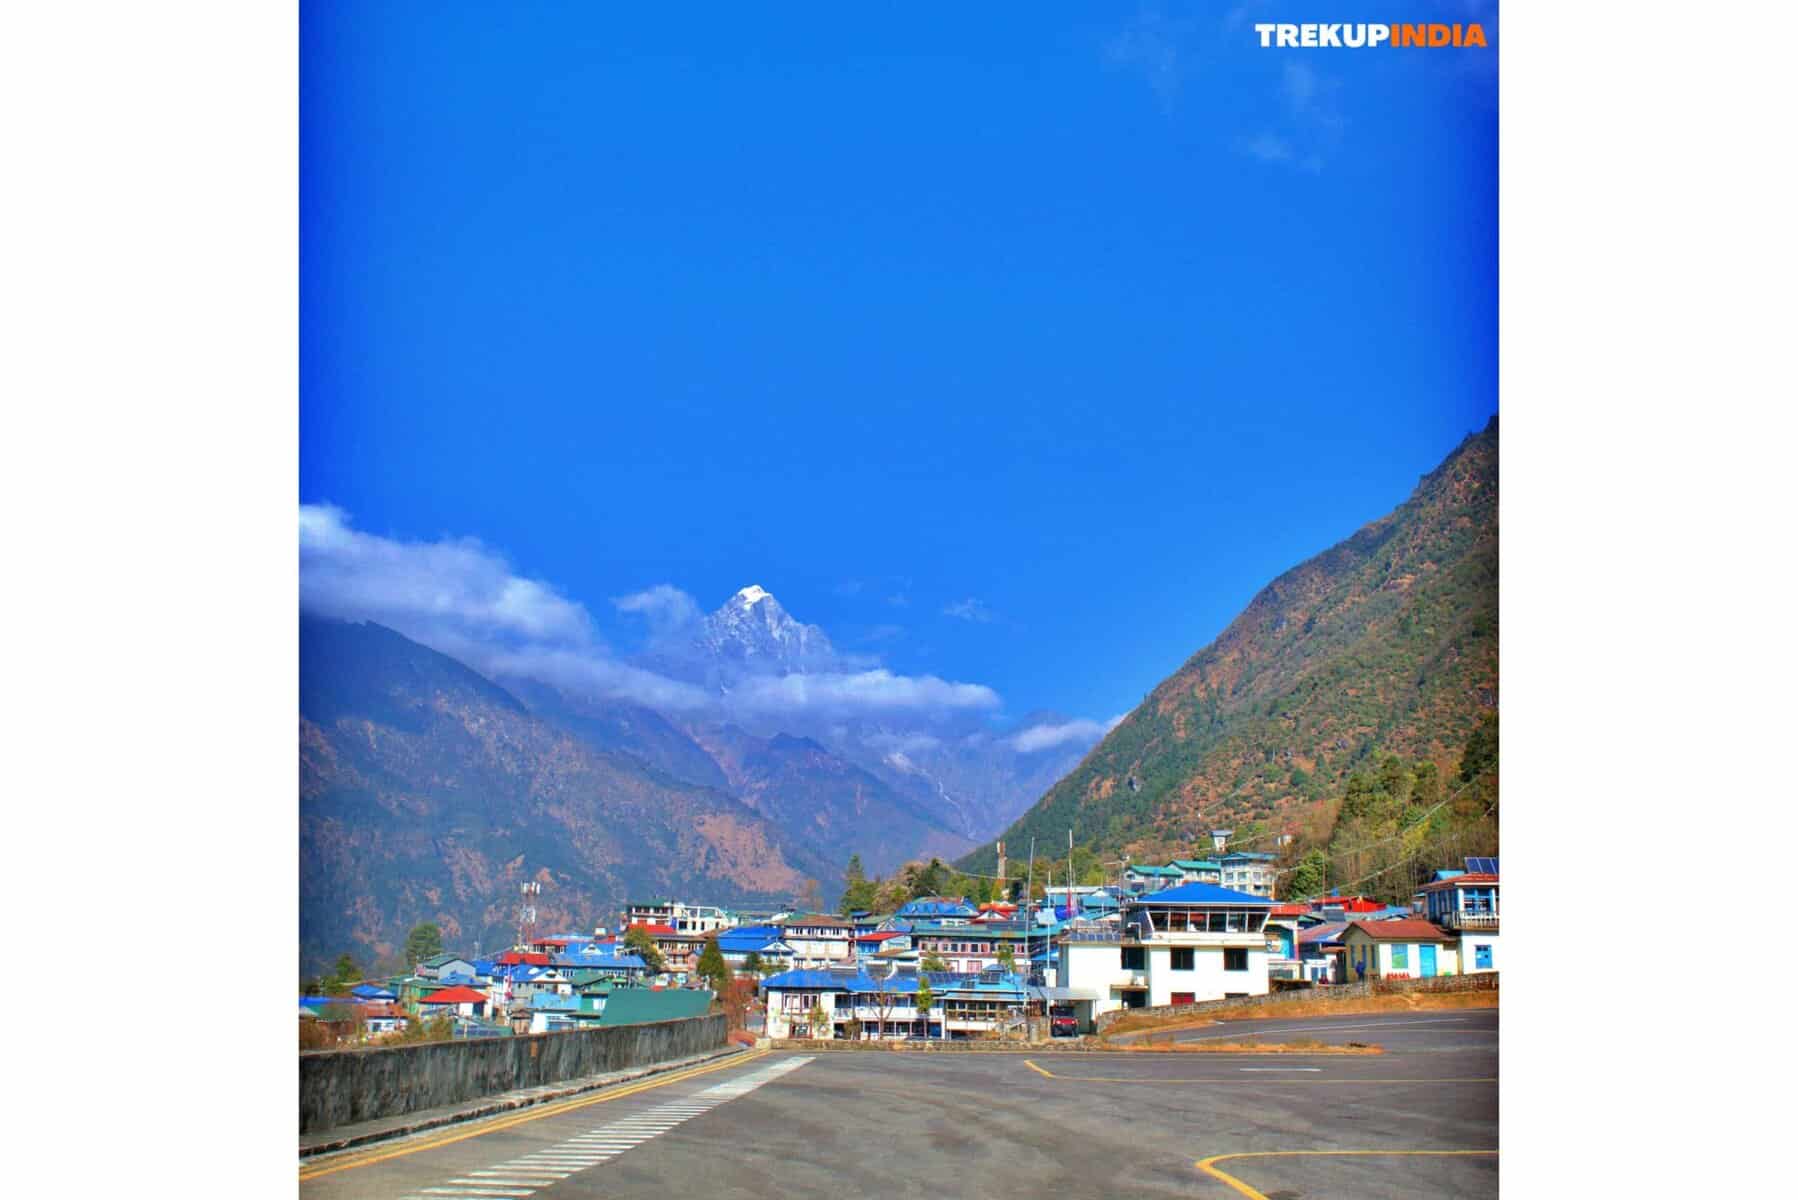
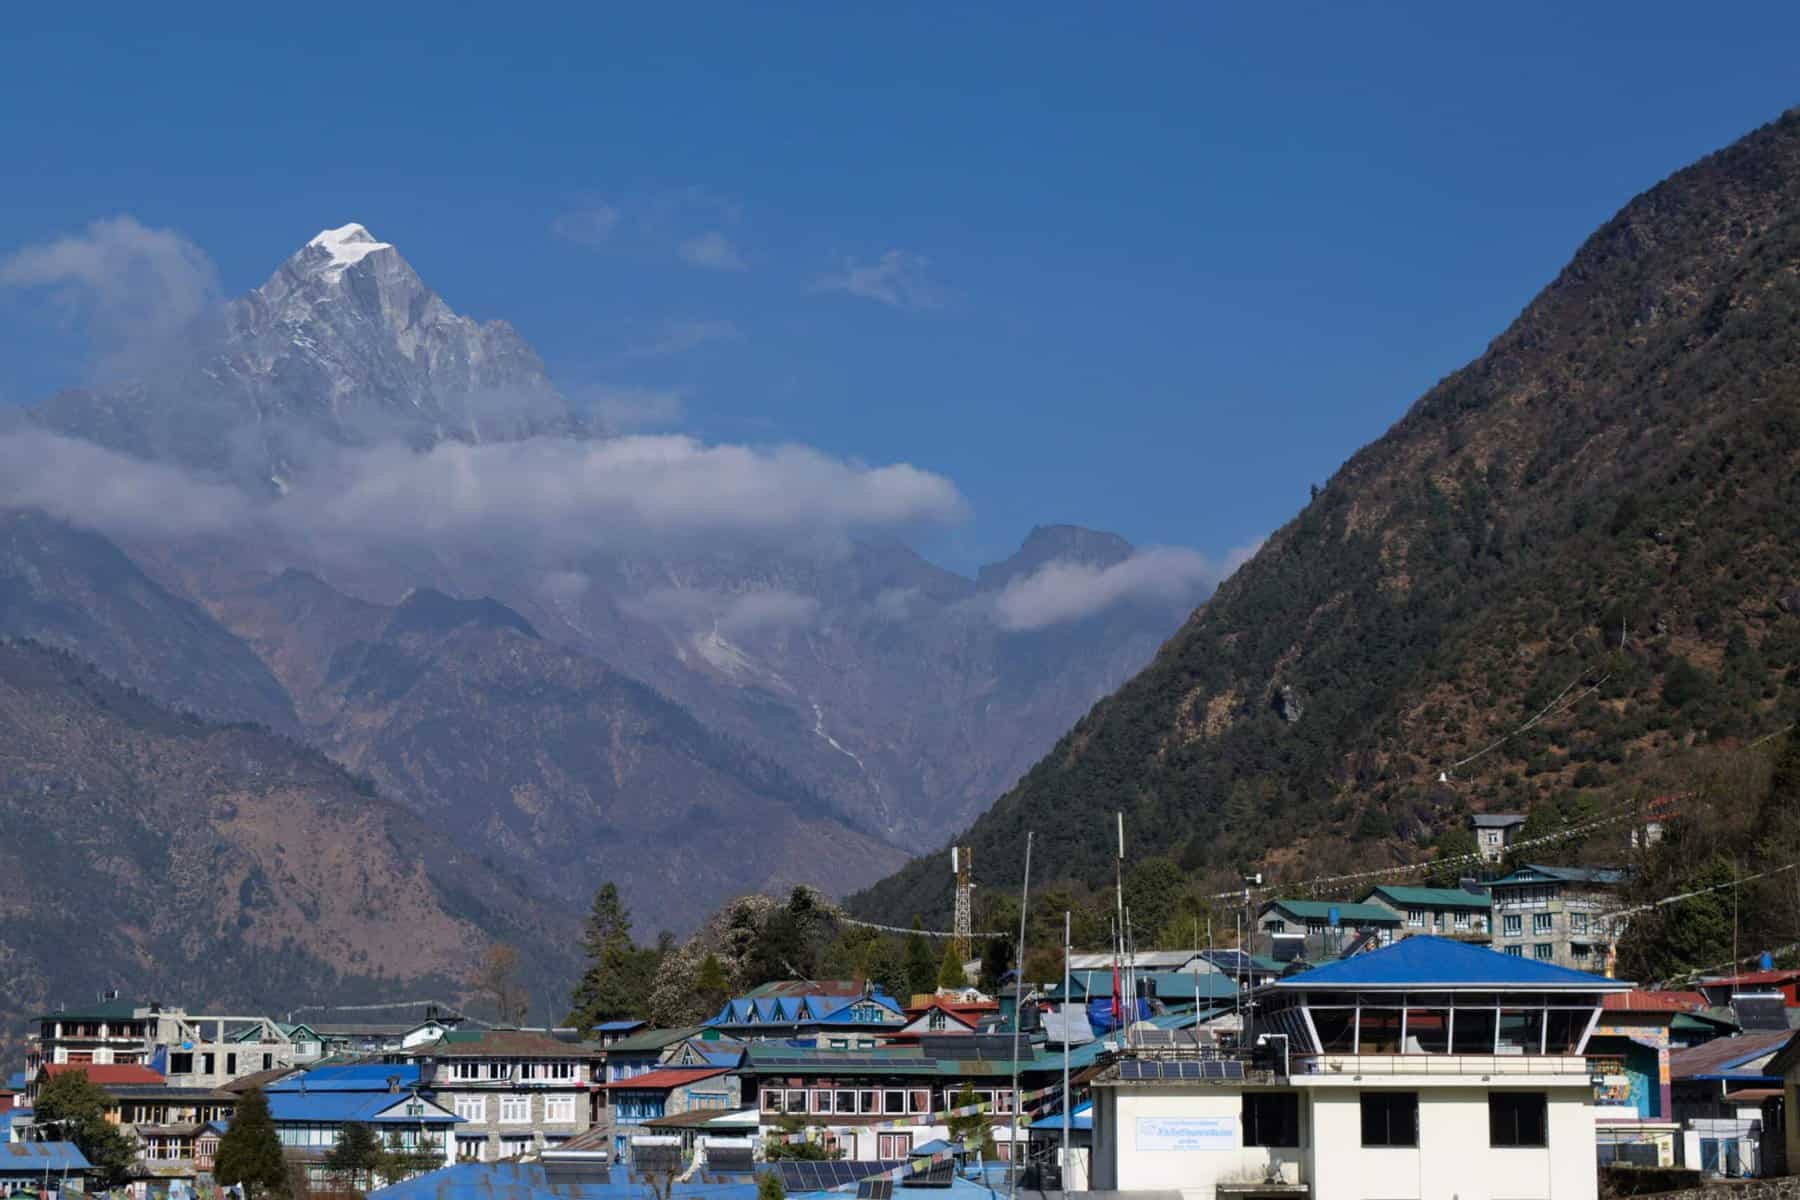
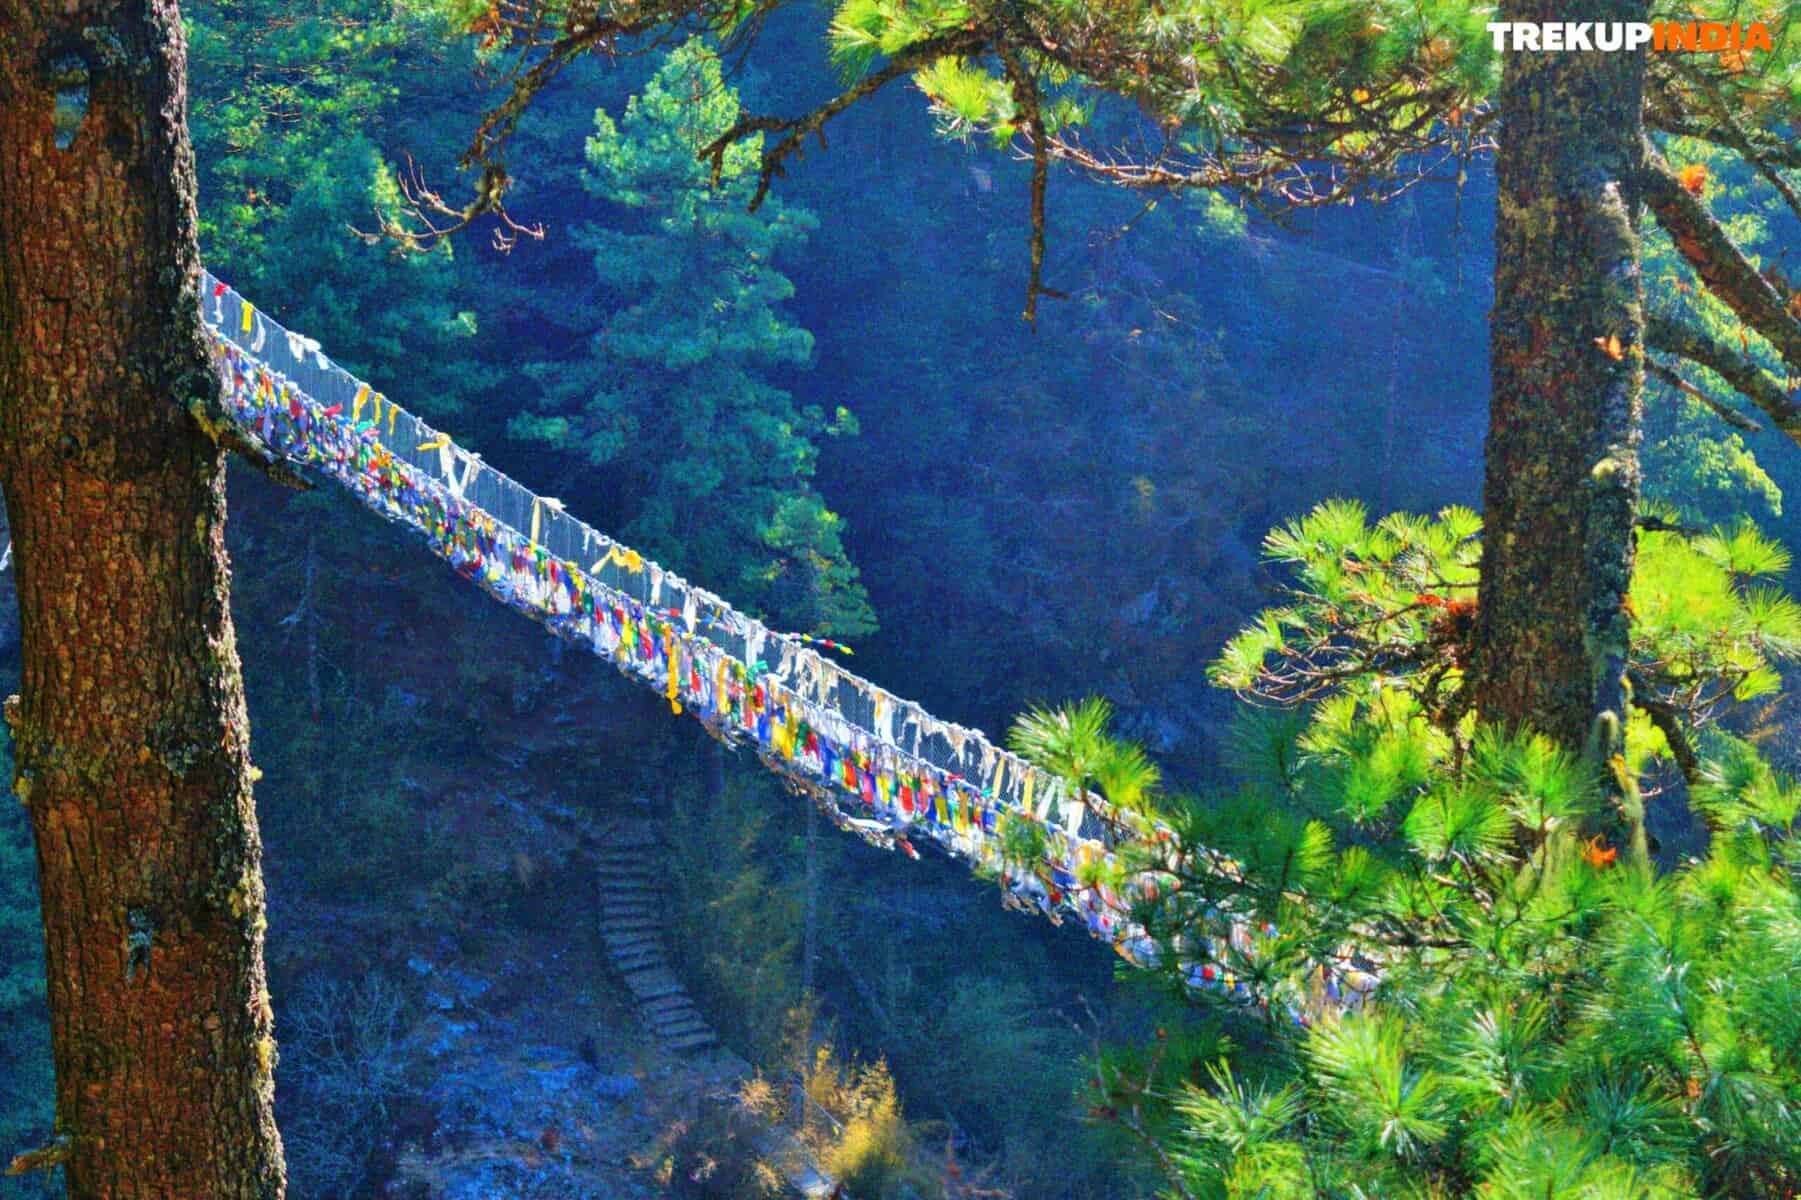
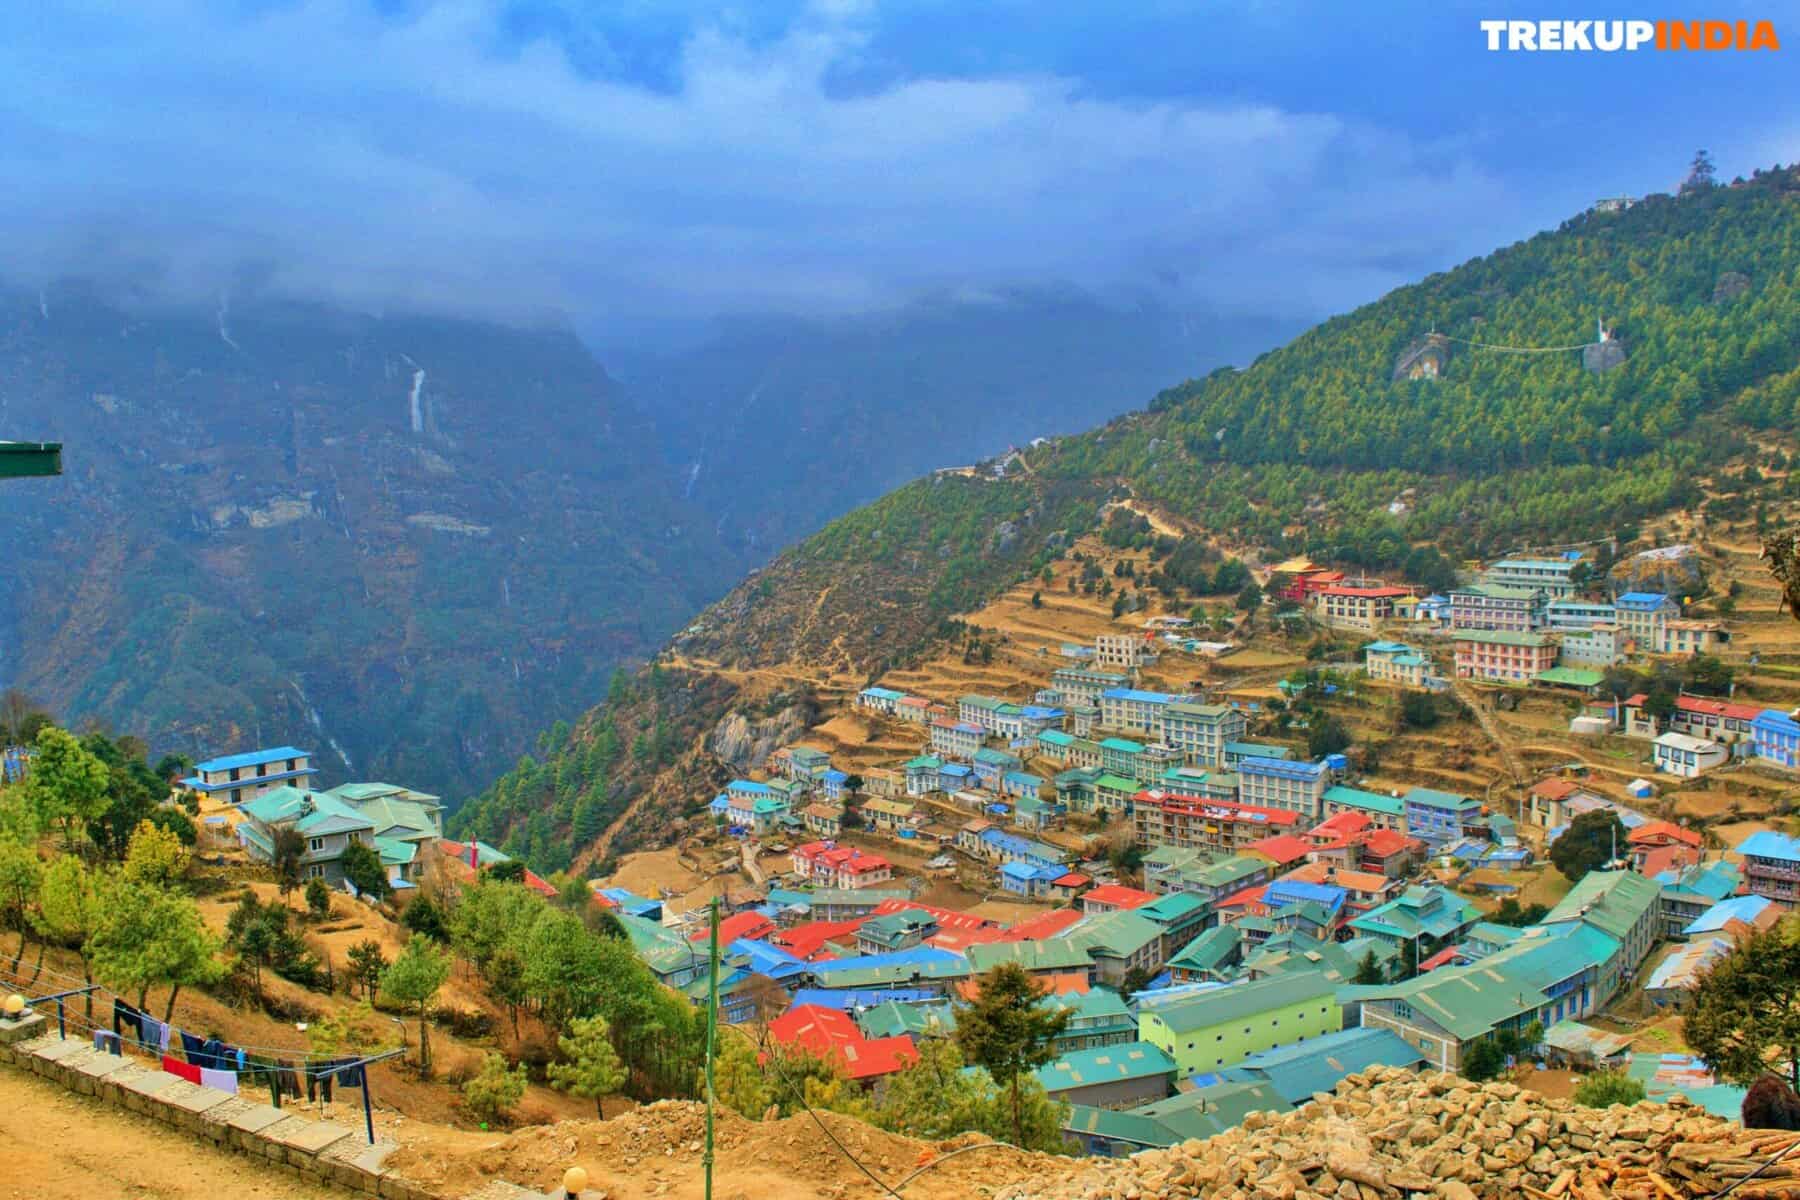
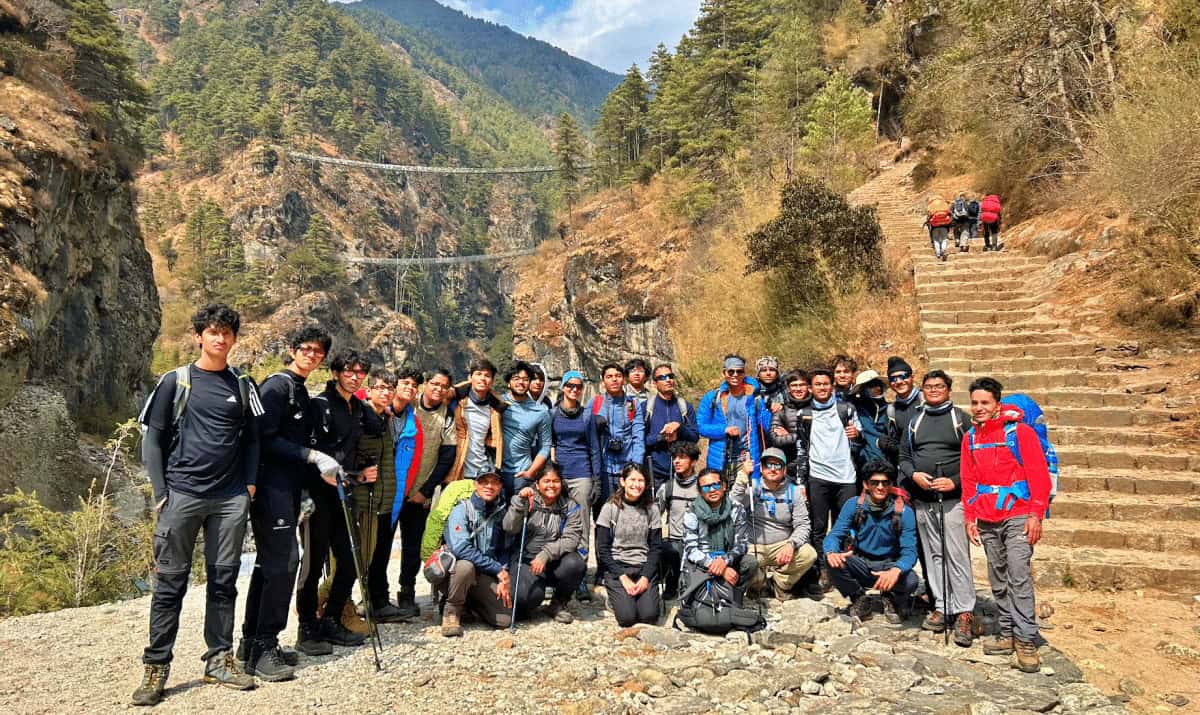
Once you are awake in the morning you will have tea and breakfast at Phakding. You will get ready with our Trekup India Team leader by exercising and doing other activities to prepare for the trek. It is a spectacular experience because you will exercise in the middle of green hills and the beautiful blue Dudh Kosi River. At the beginning of the trek, you will cross various suspension bridges over Dudh Kosi and Bhote Koshi. Beyond Monjo you will enter Sgarmatha National Park which protects the mountains. From there on there is a steep hike to Namche, and when you reach there, you can see Mount Everest. Namche is also known as the Khumbu trading village.
Day 4: Rest & acclimatization day in Namche
Stay: Overnight at guesthouse
Meal: B/L/D
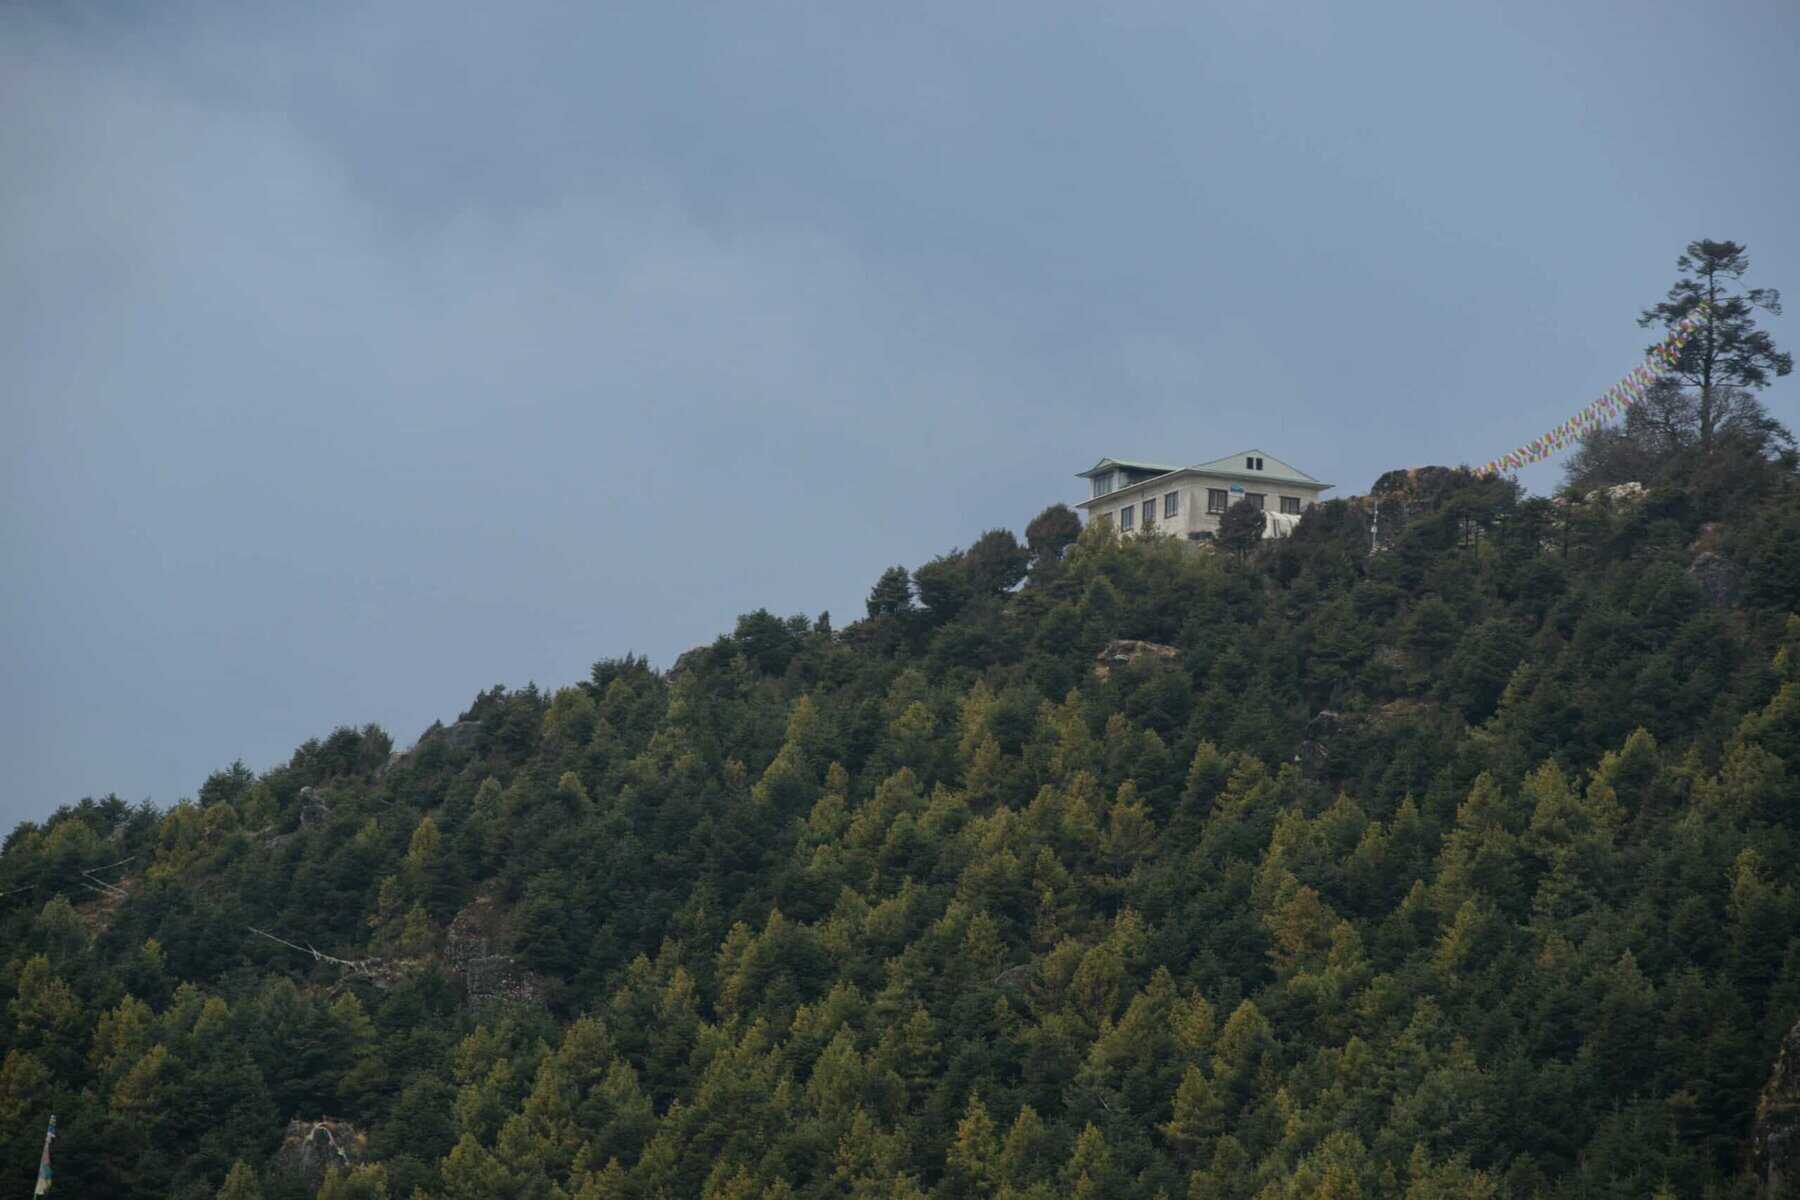
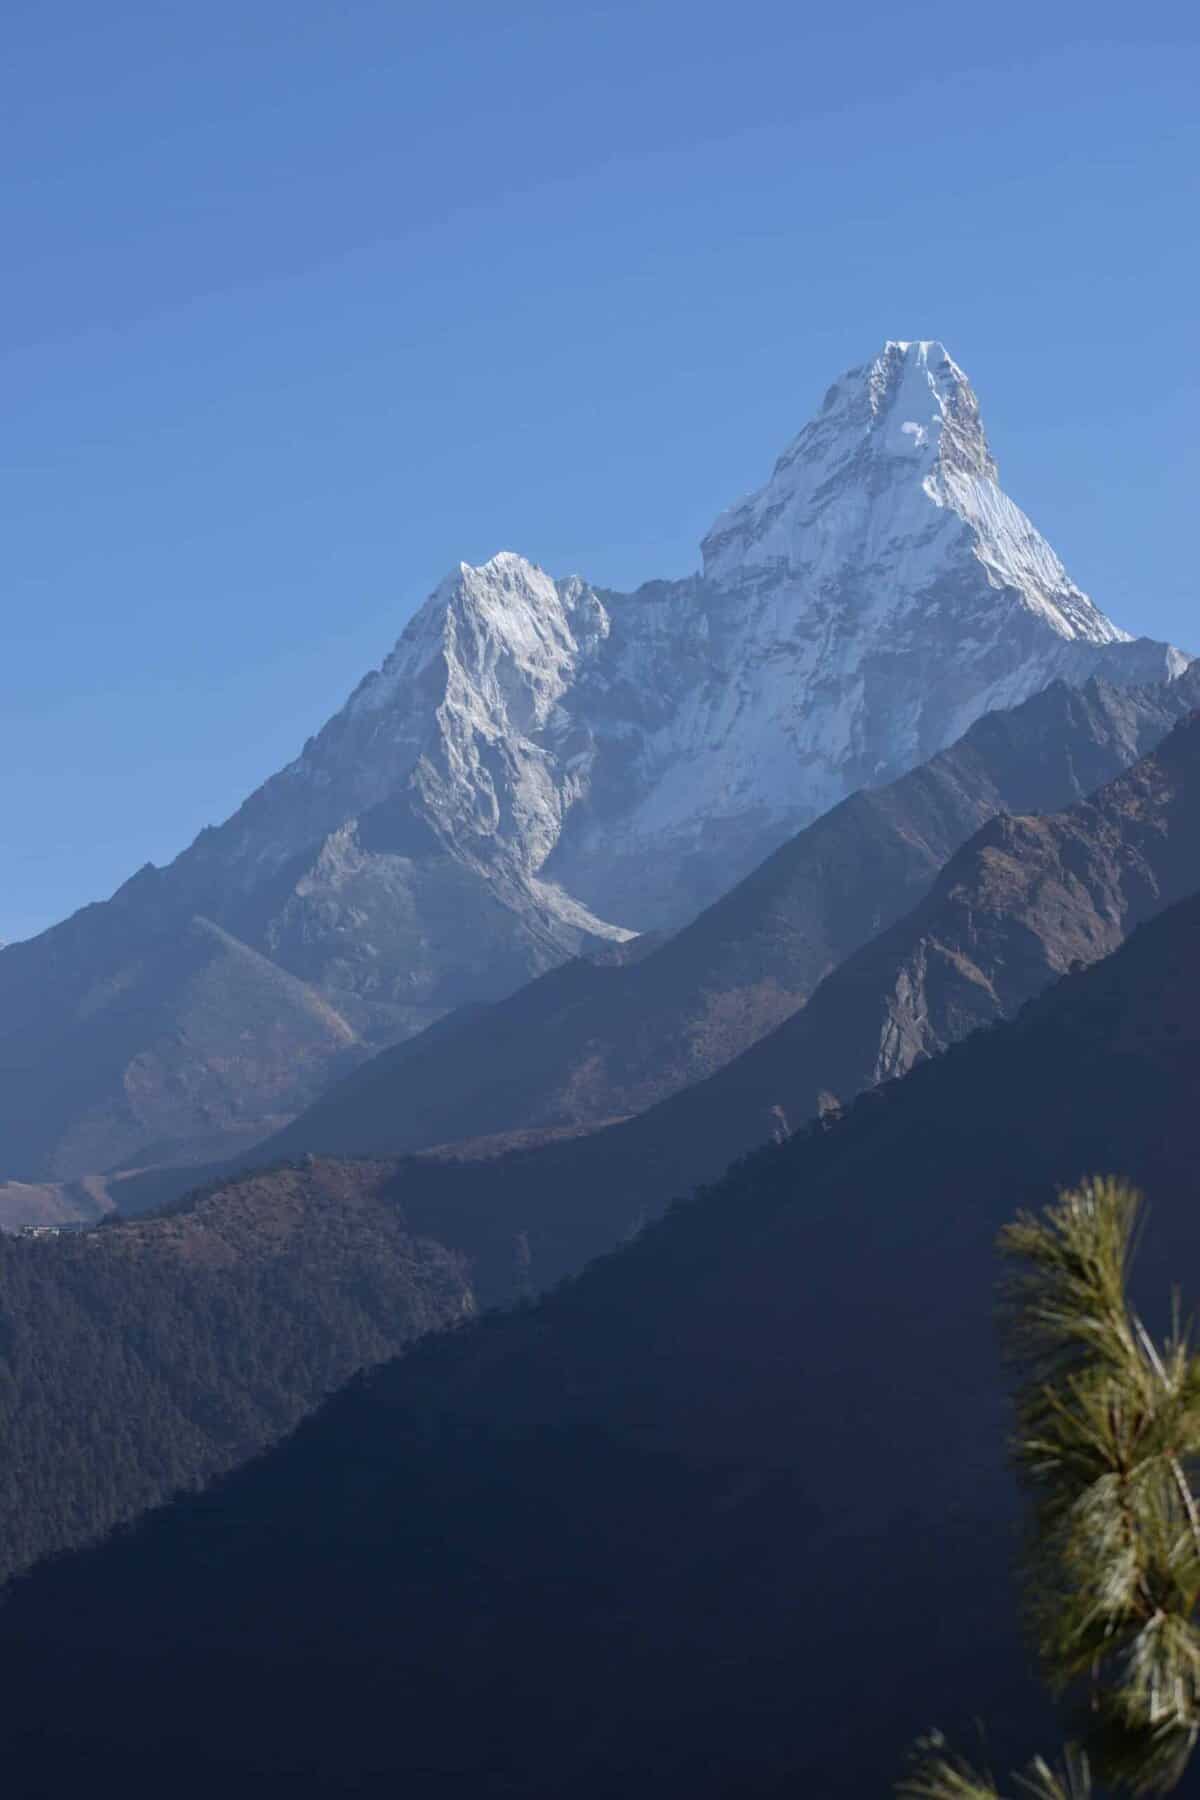
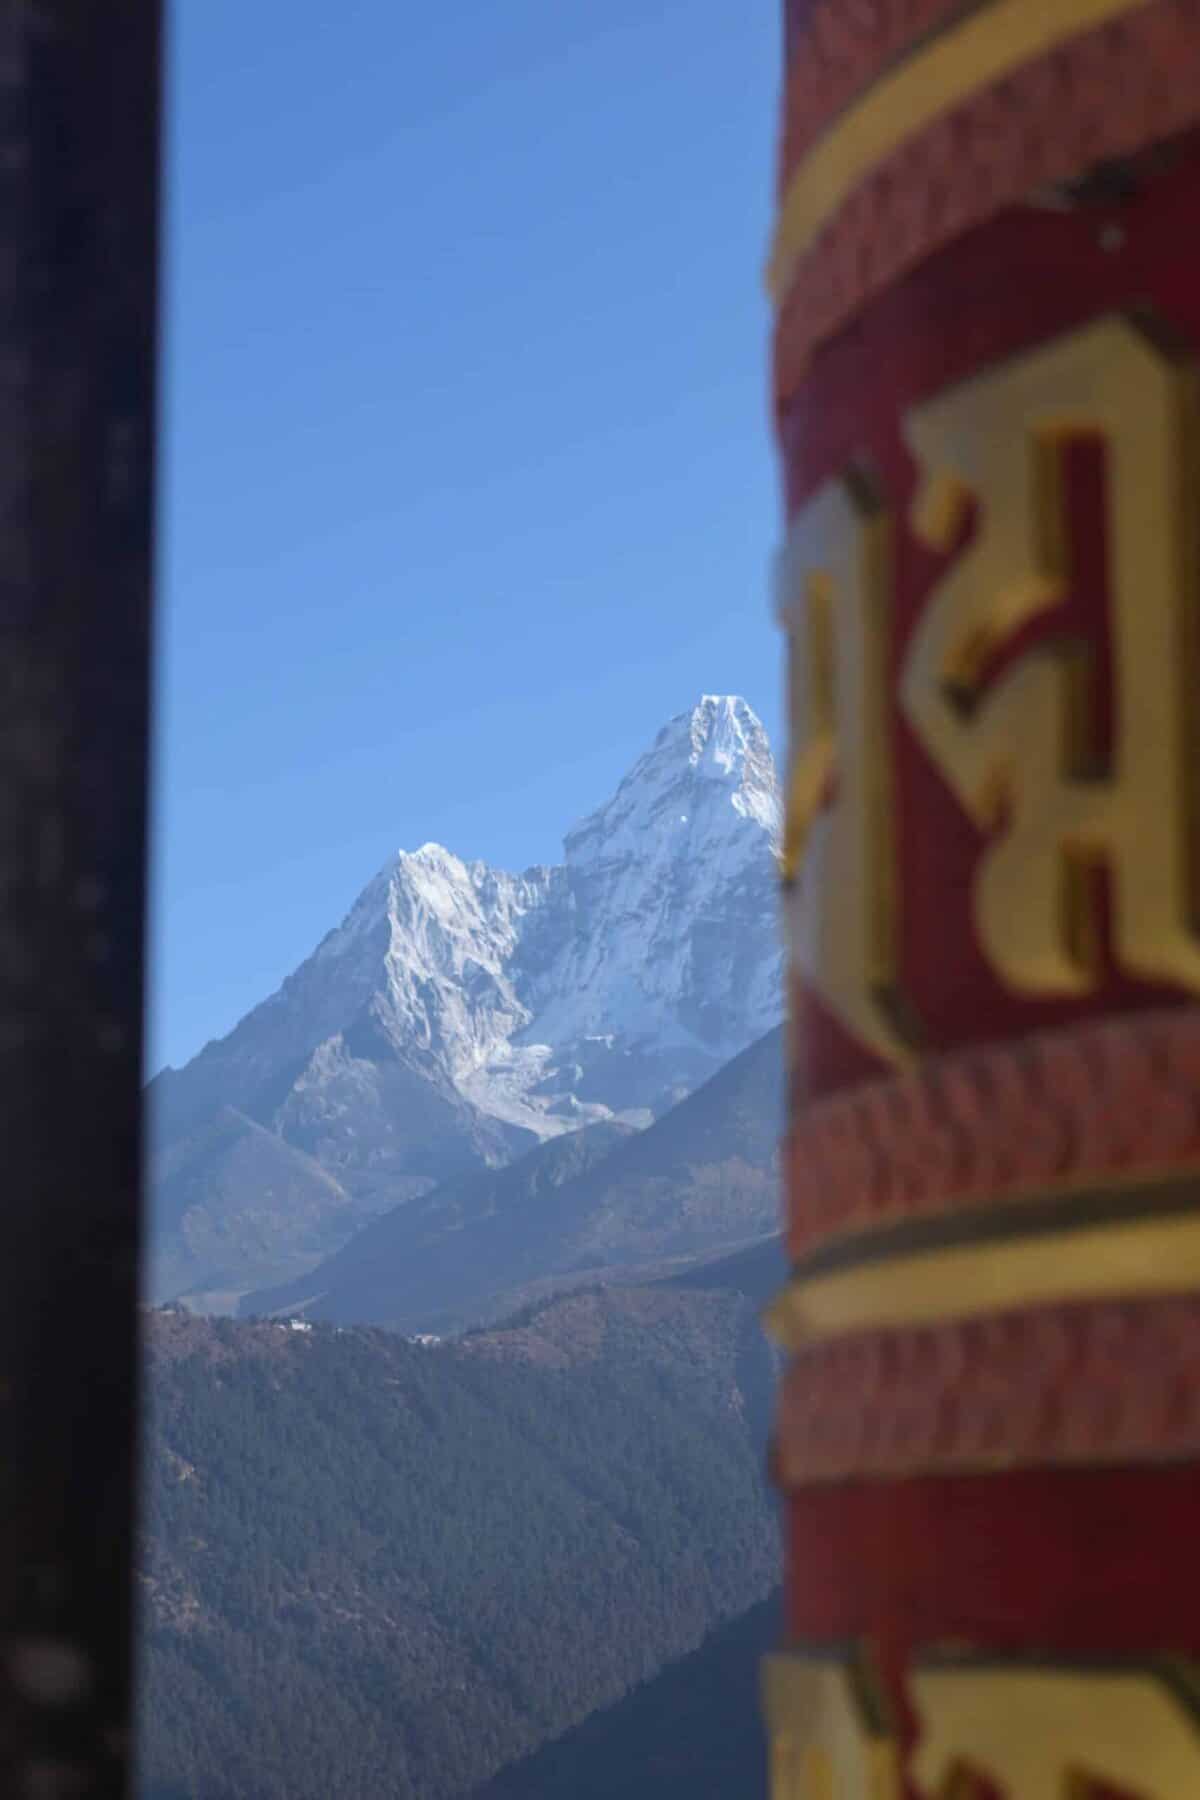
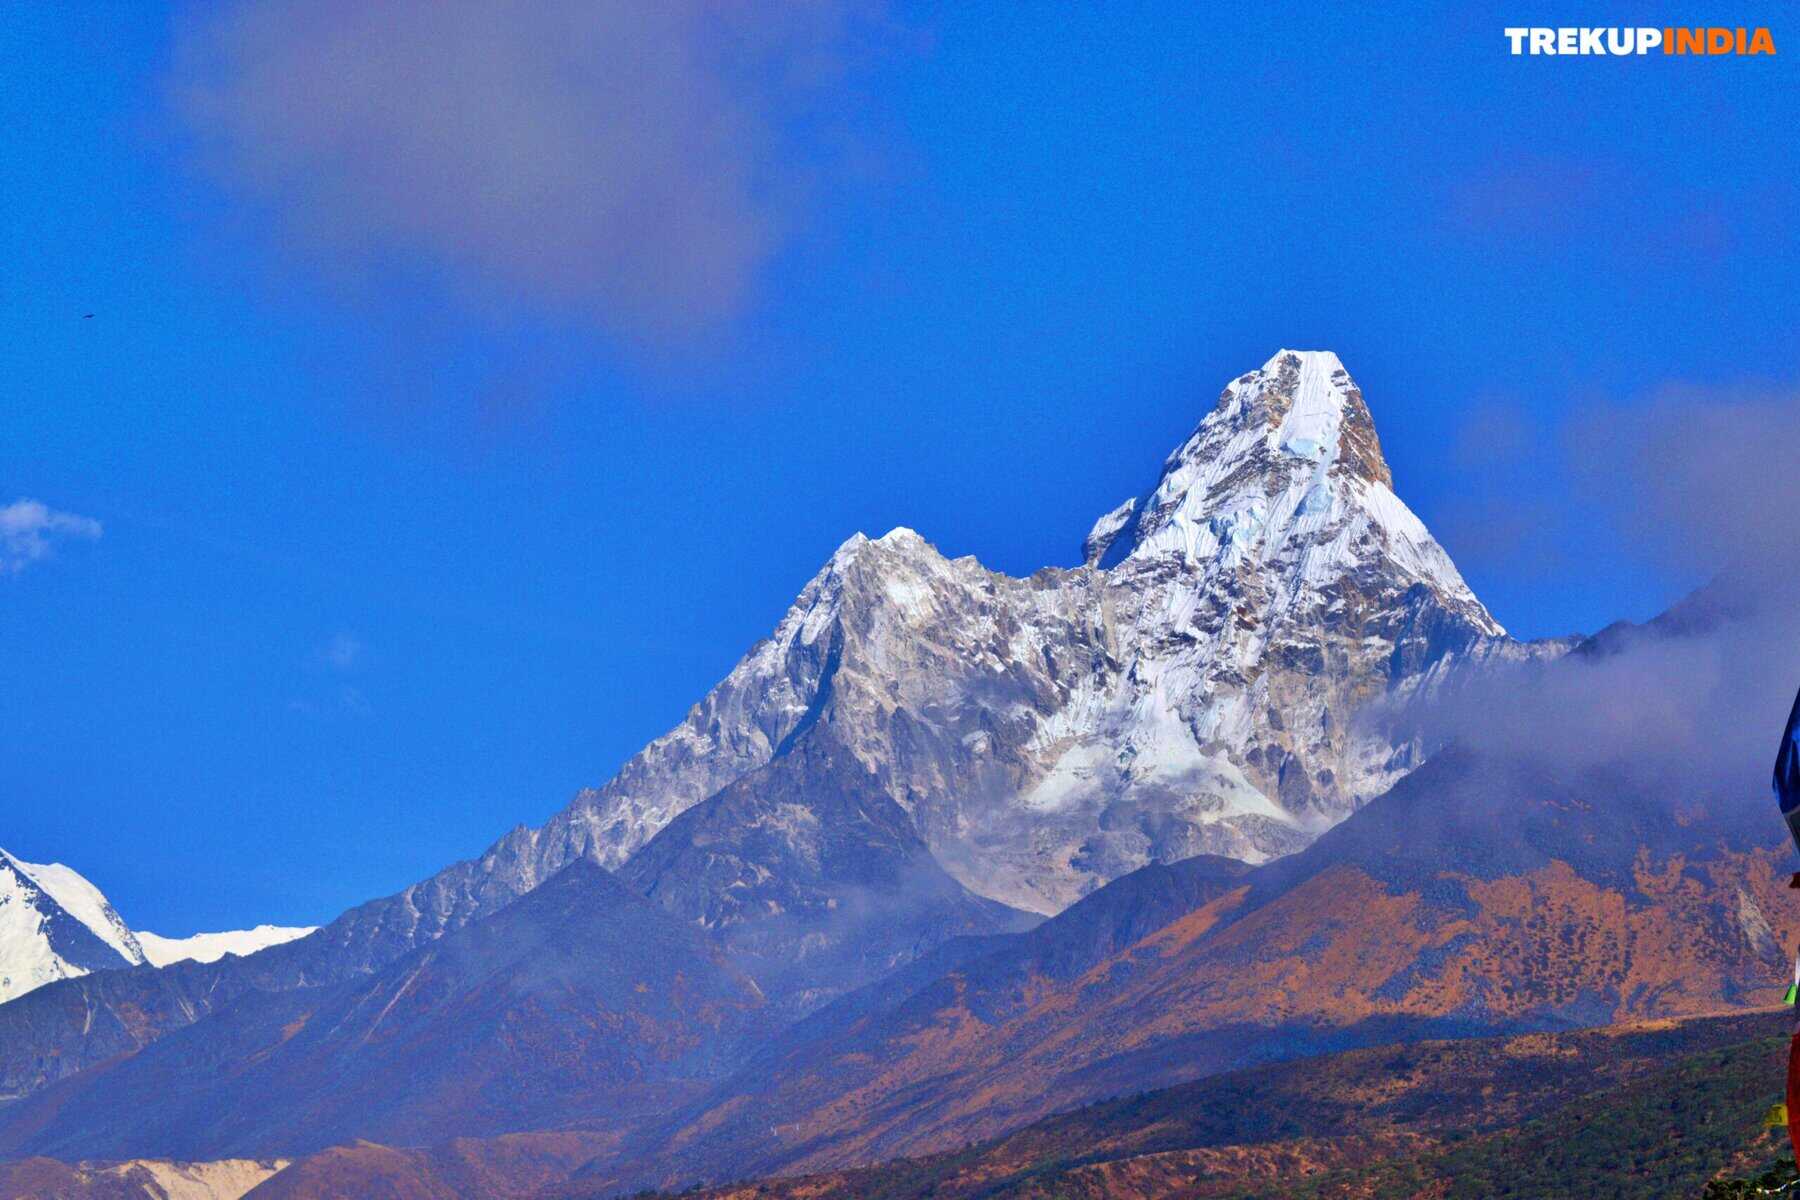
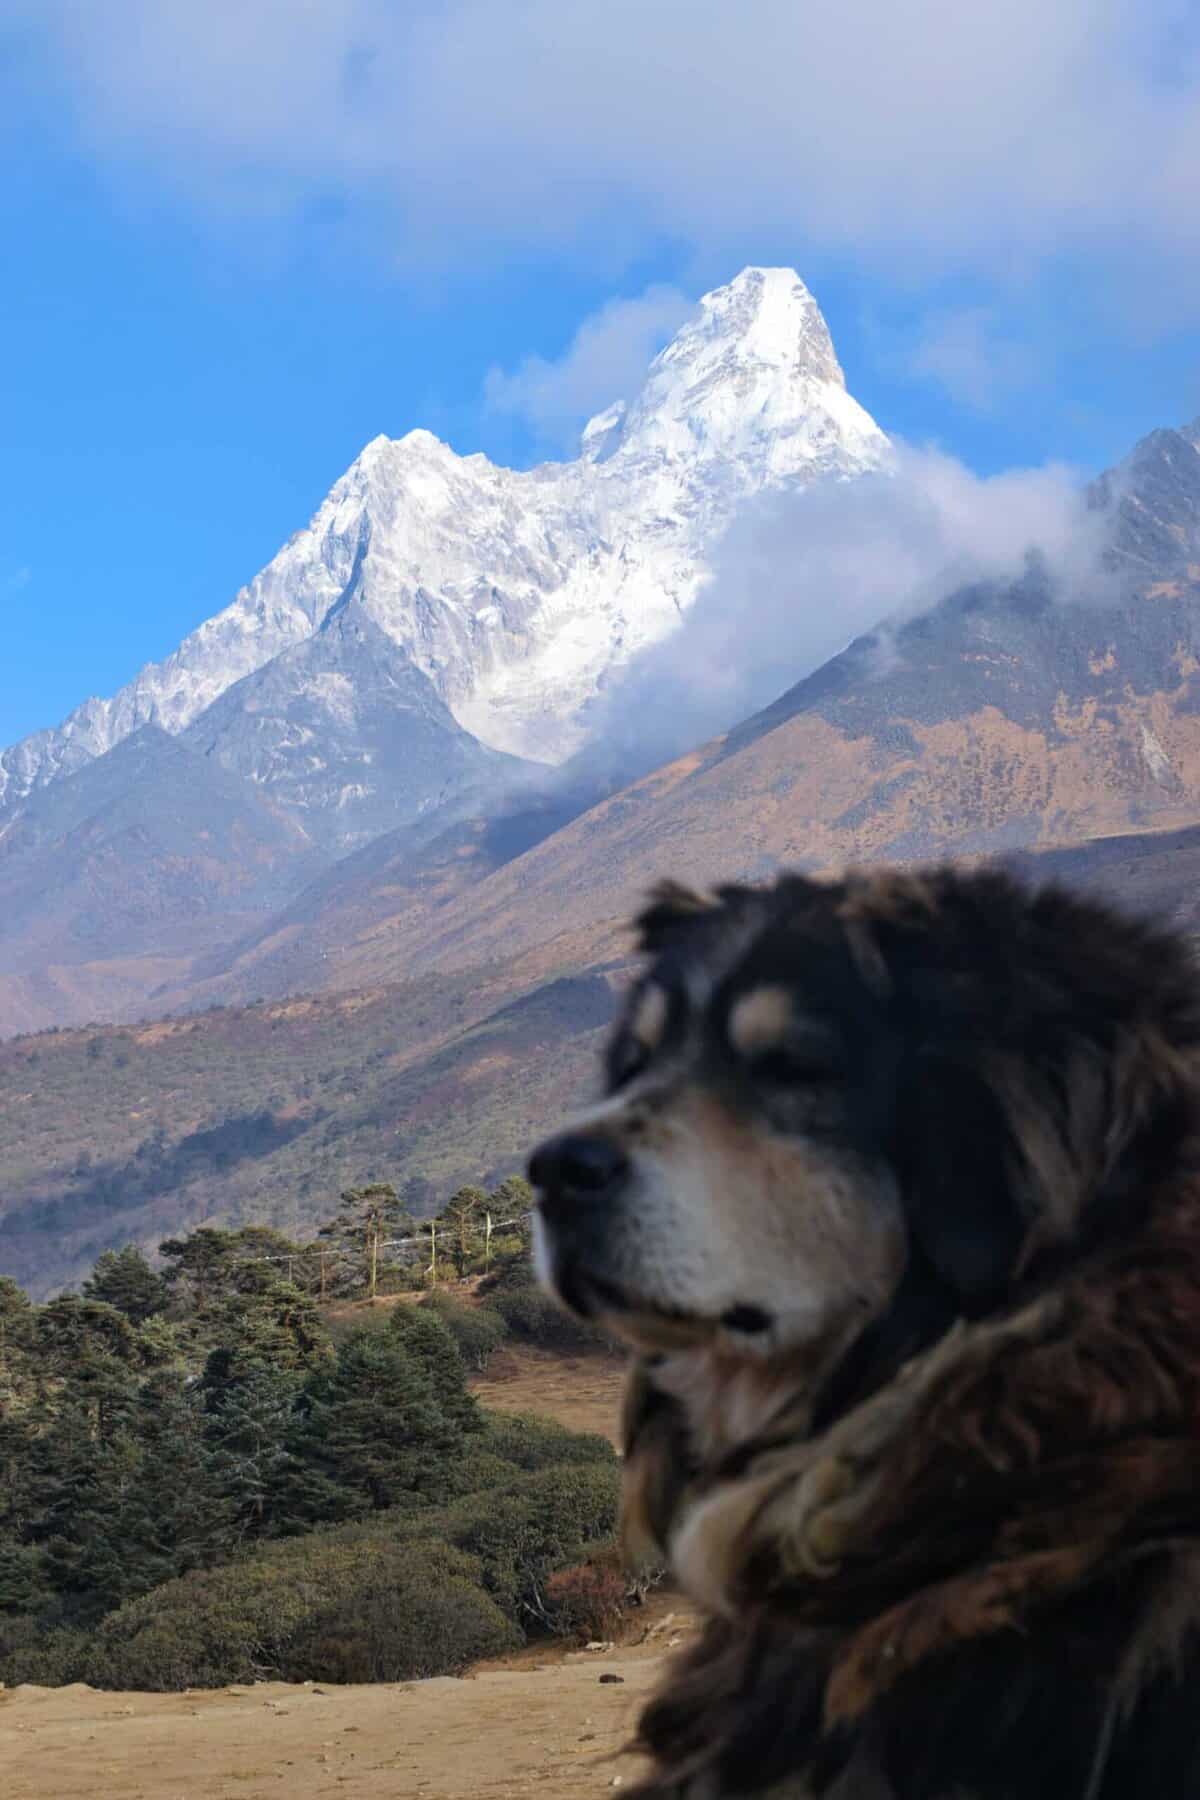
You will wake up with the sun’s rays falling from between the giant peaks of the Khumbu. Here you will find many tea shops and souvenir shops. You will take this to let your body acclimatize to high altitude by taking a one-hour walk up to the Everest View Hotel. Here you can explore the Namche bazar along with Nepal’s culture and hospitality. While you are here you can enjoy the scenic view of Ama Dablam, Mt. Everest, and other Khumbu peaks. If you want to learn about the flora and fauna, geography, and mountain history of the Himalayas you can visit the Sherpa Cultural Museum also.
Day 5: Trek from Namche – Trek to Tengboche
- Meal: B/L/D
- Trek Distance: 9 Kms; Time Taken: approx 6-7 Hrs
- Altitude: Namche (11,319 ft / 3450 Mtrs.), Tengboche (12,687 ft / 3867 Mtrs.)
- Altitude gain: Approx 1368 Ft / 417 Mtrs.
- Trek Grade: Moderate – Difficult
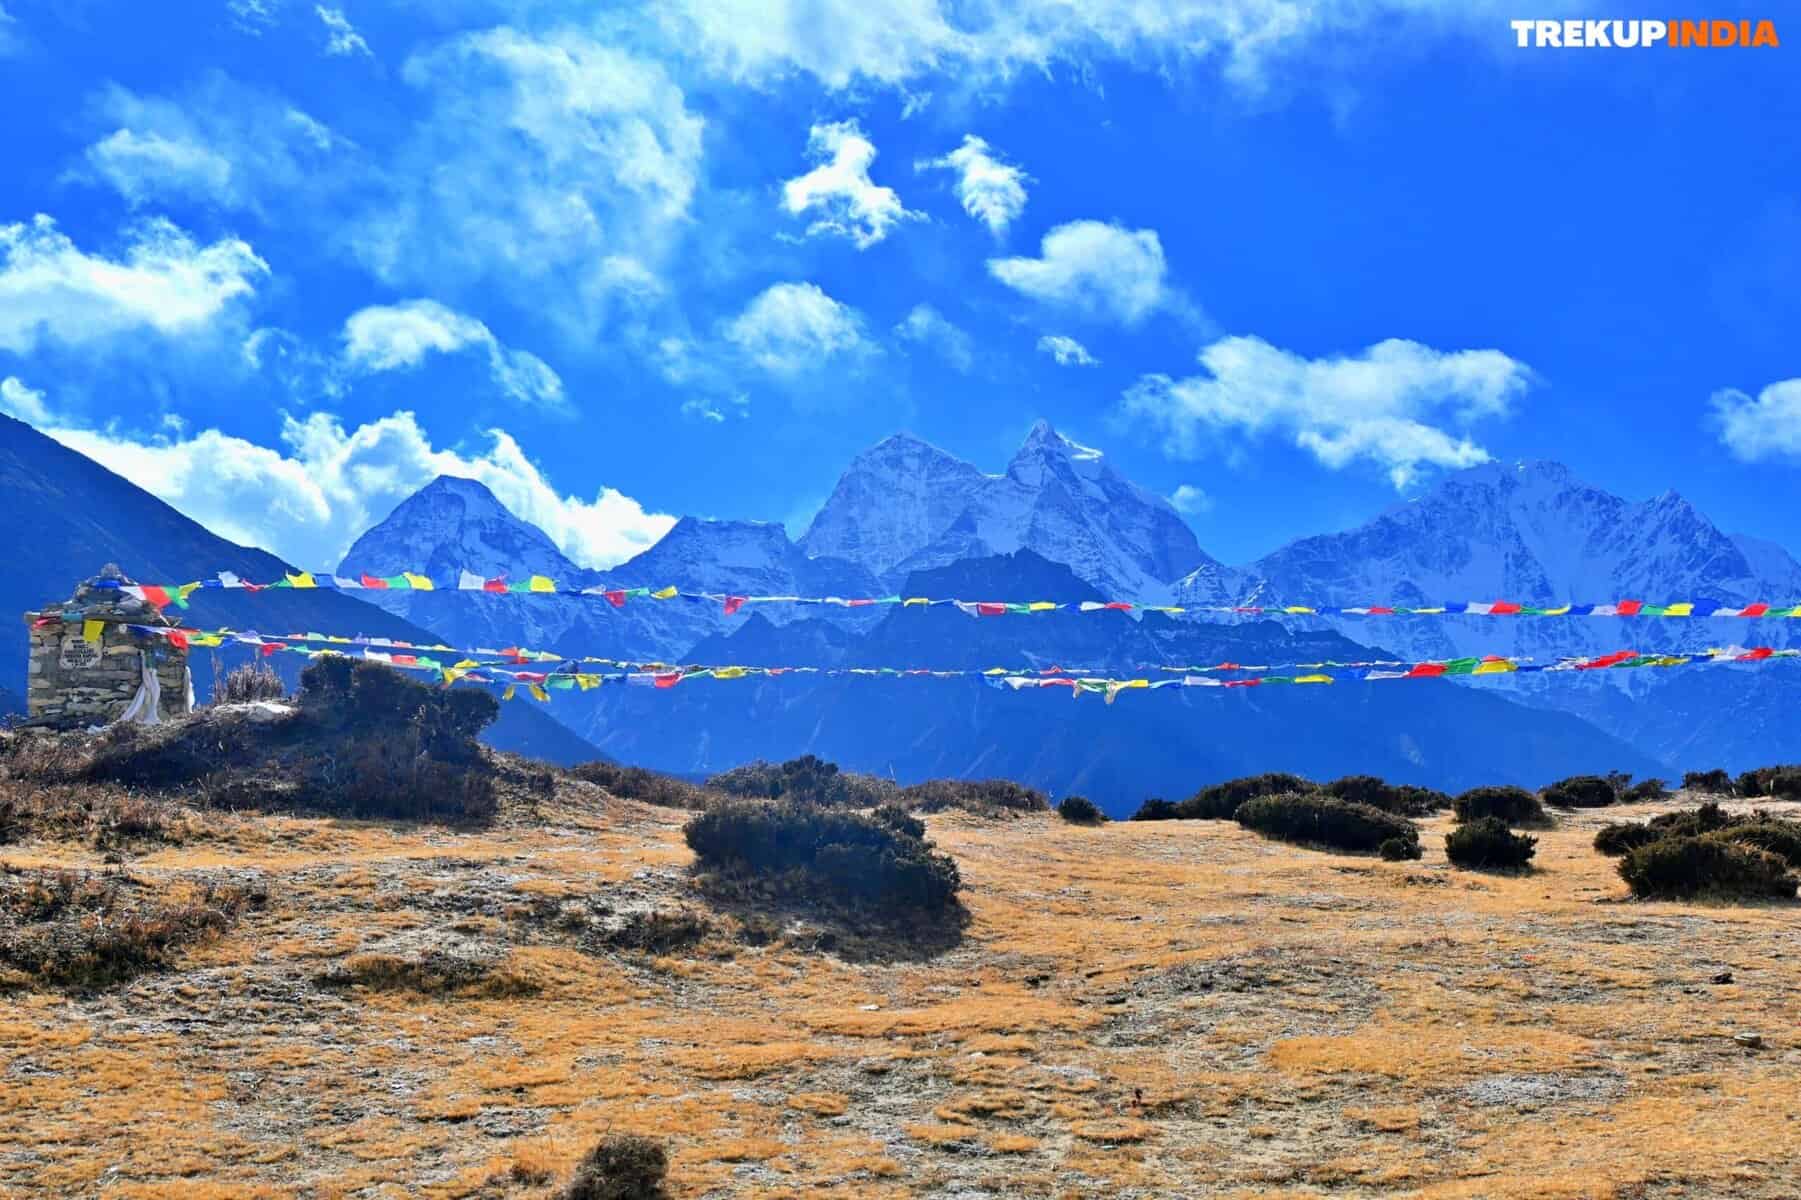
The morning will start with a light breakfast and tea which you will enjoy under the scenic view. The trek from Namche to Tengboche is easy, as from Namche there is a 20 min walk to the top and then the trek descends to Khumjung and Sherpa village. After that, you need to climb up the stairs to reach Everest Highway in Sanasa. You reach Gorakshep when you ascend to Kala Patthar by following the zig-zag trail. You will see great views of Mt Everest, Lhotse, Nuptse, and Ama Dablam. You pass through several tea stalls and then descend to Phungi Thenga, which has a bridge over the Imajtse River. From Phungi Thenga the climb down is rocky and uneven on a trough. After crossing this difficult terrain, you will pass through various Buddhist monasteries before you reach Tengboche.
Day 6: Trek from Tengboche – Dingboche - A scenic journey
- Meal: B/L/D
- Trek Distance: approx 10 – 11 Kms;
- Time Taken: approx 5-6 Hrs
- Altitude: Tengboche stands at an impressive height of 12,664 feet, equivalent to 3,860 meters.
- Altitude gain: Approx 1,800 Ft / 545 Mtrs.
- Trek Grade: Gradual – Moderate
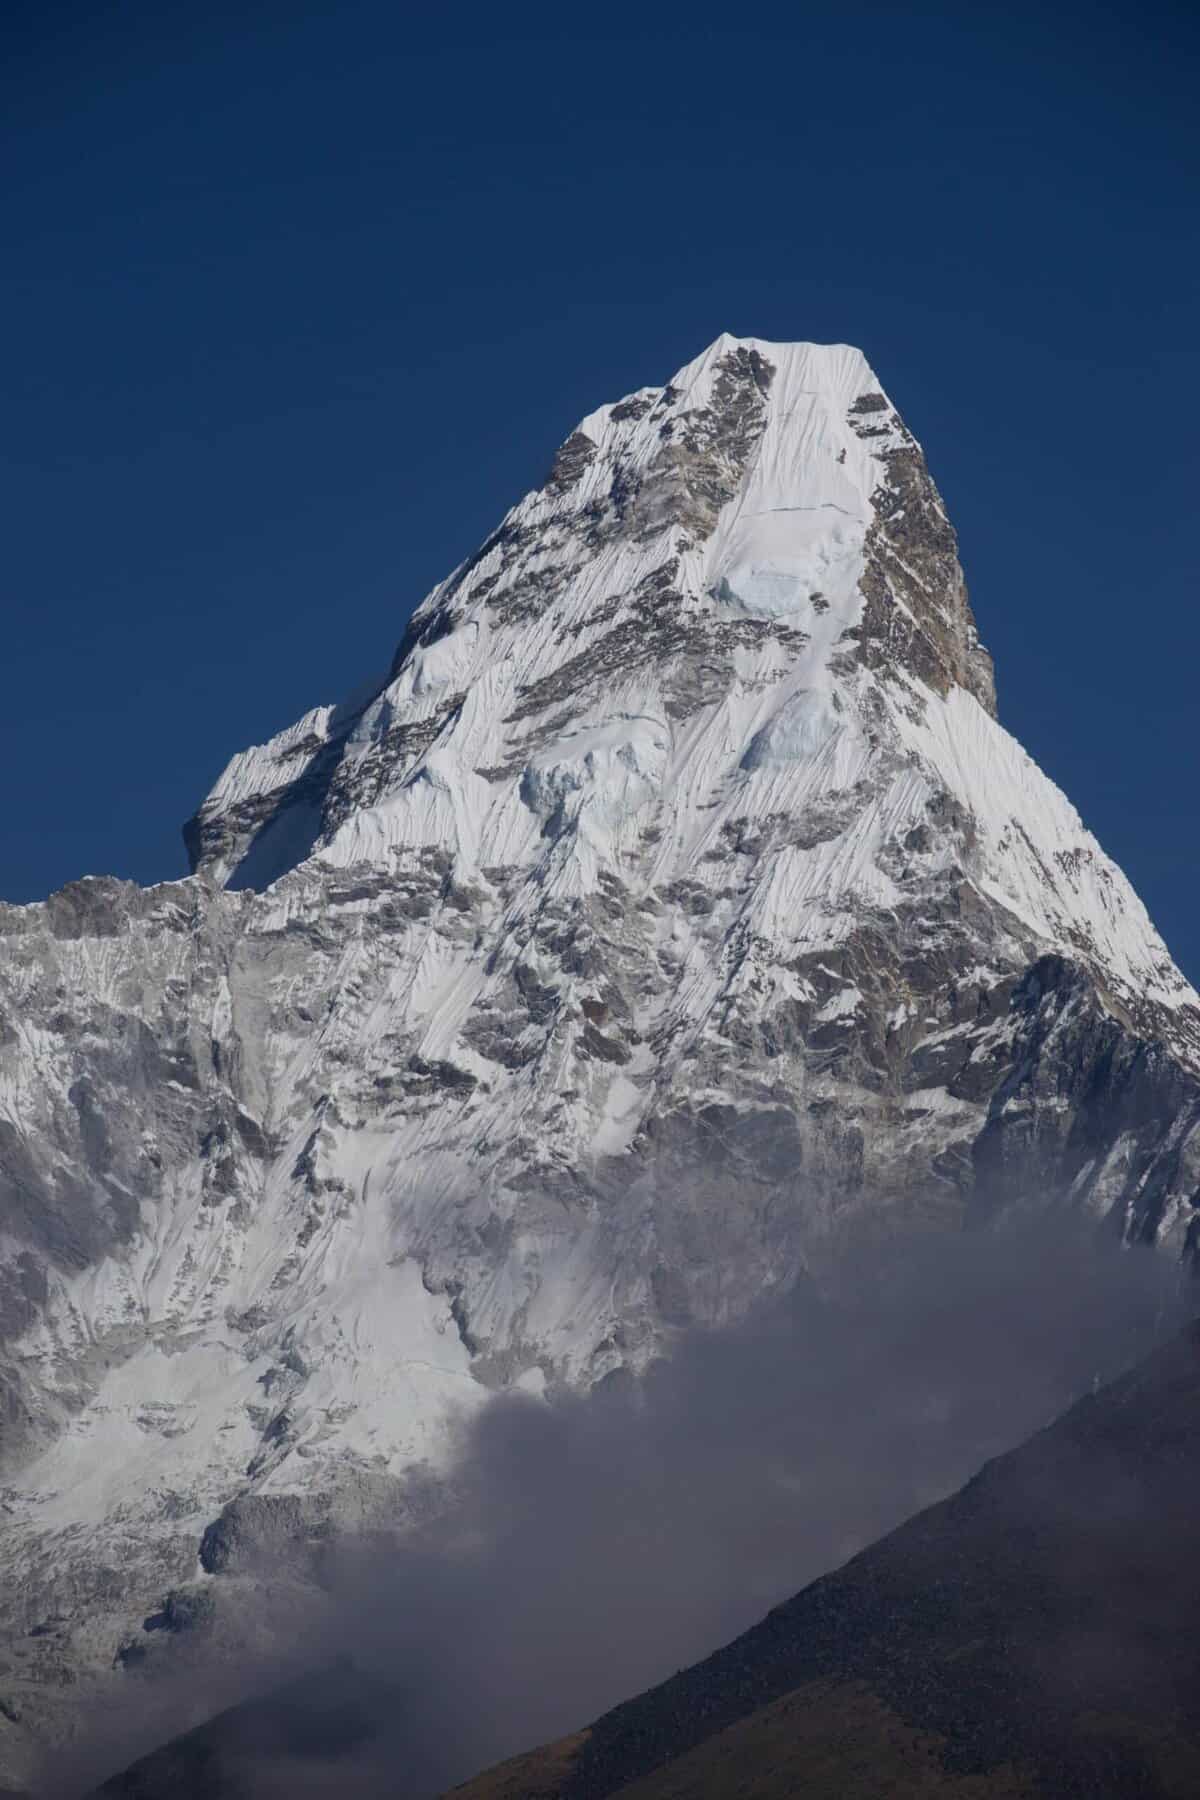
On the 6th day of your Everest Base Camp adventure, you’ll embark on a scenic journey from Tengboche to Dingboche, surrounded by breathtaking Himalayan landscapes. The glacier river flows beneath you as you traverse the valley while snow-capped peaks stretch before you, creating an unforgettable experience. En route, you’ll pass through the charming village of Pangboche and catch a glimpse of the iconic Ama Dablam mountain, further enriching your Nepal trekking experience.
After departing Tengboche, your journey will commence with a downward trek through the woods, passing by the petite community of Deboche.
After Deboche, you will keep going while gradually ascending and eventually come across a line of engraved stones. As you proceed, you’ll encounter a suspension bridge leading you to the valley’s left side. Once you’ve crossed, you’ll be treated to breathtaking views of the majestic Ama Dablam and the surrounding mountains.
After leaving Tengboche, you’ll make your way towards Pangboche, where you’ll take a moment to appreciate the breathtaking views of the Everest Mountain Range. Following a brief break, you’ll continue your journey, gradually gaining elevation as you move up the valley. Although it’s uphill, the slope is generally easy, with no steep inclines.
The stunning views of Ama Dablam and the Everest Mountain Range will remain in your line of sight, with Lhotse and Nuptse visible in the distance. As you press on, you’ll pass through the village of Shomare, the last settlement before reaching Dingboche.
The path will curve around the valley side, offering different perspectives of Ama Dablam, before you cross a river and approach Dingboche. Once you arrive, you’ll head to a teahouse for the next two nights.
Day 7: Rest Day at Dingboche
- Stay: Overnight at guesthouse
- Meal: B/L/D
- Dingboche Altitude: 14,464 Ft & 4,408 meters
On the 7th day of the Everest Base Camp trek, there is a designated day for acclimatization. On this day, you can climb Nangkartshang Peak, which is situated behind the town. Climbing Nangkartshang Peak on the sixth day of the trek allows you to ascend above the valley and savor exceptional views along the multi-day trail.
Before starting the hike, I will briefly discuss acclimatization, what an acclimatization hike entails, and why it is crucial to include it in a trek such as the one to Everest Base Camp. For most individuals, being at an altitude of 10,000 – 20,000 feet above sea level is not something their bodies are accustomed to daily. At 10,000 feet, for instance, oxygen levels are already at 70% of normal levels (for reference, Lukla is at 9,318 feet, and Dingboche, which has 60% oxygen, is at 14,469 feet). Since you will be expending significant energy during the hikes, your body needs to adapt to the reduced oxygen levels at higher elevations. Ascending too quickly can lead to altitude sickness, characterized by symptoms like dizziness, headaches, and nausea, and potentially more severe complications like cerebral and pulmonary edema. To prevent altitude sickness during the Everest Base Camp trek, it is customary to begin acclimatization around the 11,500-foot mark. As Namche Bazaar is slightly below this elevation, most people spend two or even three nights in the village to allow their bodies to adjust before continuing the journey.
As Namche Bazaar is situated at an elevation of 11,286 feet and Dingboche at 14,469 feet (with a difference of 3,183 feet), it is necessary to take an additional day here once you surpass the 3,000-foot mark.
On the sixth day of your journey, you can take an acclimatization hike in Dingboche. This hike allows your body to adapt to the higher altitude ahead without the risk of sleeping at an elevated height. You’ll climb to a maximum altitude of 16,677 feet at Nangkartshang Peak, while Dingboche sits at 14,469 feet. By doing this hike, your body will be better prepared for the upcoming days at higher elevations, and you’ll be able to rest comfortably in Dingboche overnight.
After enjoying a satisfying breakfast at your teahouse in Dingboche on the morning of the sixth day, it is time to embark on a day hike up Nangkartshang Peak. In contrast to previous days on the trail, you can leave most of your belongings at the teahouse instead of carrying them all with you. Grab a day pack and prepare for your ascent. To reach the trail’s starting point, make your way behind the town towards Lobuche. There, you will notice a collection of Sherpa flags and a winding sandy trail that leads up the ridge of the mountain. What I find particularly captivating about this hike is that you will have the opportunity to rise above the valley and witness expansive new vistas of the surrounding landscape.
From one side of the ridge, you will have a view of the Imja valley leading to Chhukung, while on the other side, you will see the valley extending towards Lobuche. Nangkartshang serves as the dividing mountain that splits the valley into two.
Glaciers, rivers, and peaks will be covered in snow on both sides of your path as you gradually make your way up the mountain, following its zigzagging ascent.
If you turn around, you will see Dingboche below and parts of the trail you followed from Tengboche.
As you continue to ascend Nangkartshang, the views become increasingly remarkable, particularly as you reach higher elevations.
Given that this is predominantly an uphill climb, taking frequent breaks and maintaining a steady pace is essential.
Trust me, you should allocate some time to appreciate the breathtaking scenery surrounding you.
During the hike, you can admire magnificent peaks such as Makalu, Lhotse, Cho Oyu, Island Peak, Ama Dablam, and the Imja glacier below. As you ascend, the terrain becomes rougher, with larger rocks forming the mountain’s ridge. The higher you go, the more stunning the scenery becomes, with alpine lakes and glaciers coming into sight.
Before long, you will notice the Sherpa flags marking the summit of Nangkartshang. Make that final effort to reach the top, where you can soak in the most breathtaking views of the entire Everest Base Camp trek.
While most of the trek involves uphill movement and requires significant energy expenditure, causing your body temperature to rise, it’s important to note that once you reach the summit, the temperature can quickly drop, so be prepared for the cold.
Day 8: Trek from Dingboche – Trek to Lobuche
- Stay: Overnight at Trekking Lodge; Meal: B/L/D
- Trek Distance: 8 Kms; Time Taken: approx 5-6 Hrs
- Altitude: Periche (13,950 ft / 4252 Mtrs.), Lobuche (16,207 ft / 4940 Mtrs.)
- Altitude gain: Approx 2257 Ft / 688 Mtrs.
- Trek Grade: Difficult – Moderate
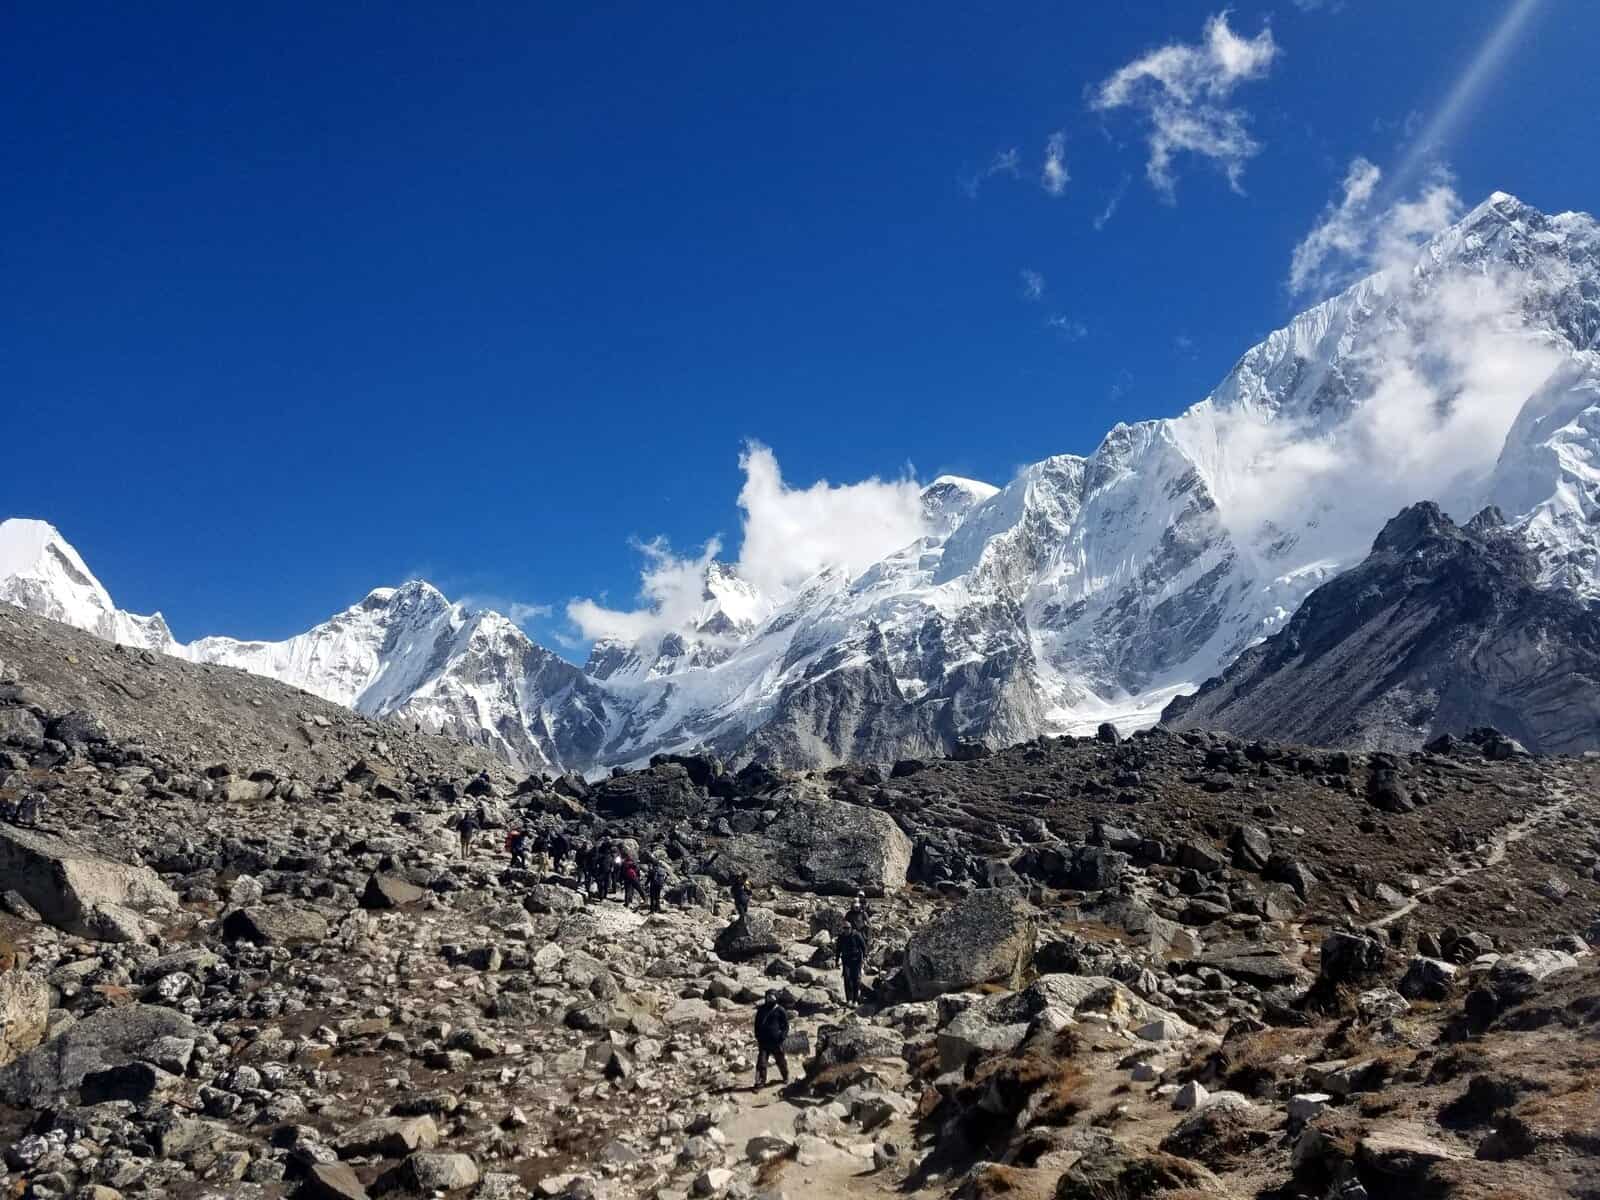
On the 8th day of the trek to Everest Base Camp, you will travel from Dingboche to Lobuche, the second-highest village along the trail. During this day, you will have the opportunity to witness the renowned Khumbu Glacier as you walk alongside it for a significant portion of the journey. To begin the trek to Lobuche, you will follow the path behind Dingboche village, on the left side of town, which is the same route as the previous day’s ascent to Nangkartshang Peak if you choose to take that path.
As you journey, you’ll veer away from the steep incline leading up to the peak and follow a gentler path alongside the mountain’s wall, further into the valley. Located directly below you as you make this turn is the village of Pheriche, where you’ll spend a night on your return journey to Lukla.
For 2-2.5 hours, you’ll continue along the path as it winds more profoundly into the valley. Remember that while the incline isn’t too steep, the high altitude (around 15,000 feet) may still affect your energy levels, so be sure to pace yourself and take breaks as needed. As you walk, you’ll notice a small town across the river known as Thukla. Follow the trail as it leads you towards the village, crossing the river and entering the town. Thukla offers an excellent opportunity to rest, recharge, and refuel before continuing your journey.
The challenging portion of the Dingboche to Lobuche trek lies ahead as you embark on a steep, zigzagging climb that lasts approximately one hour. This arduous ascent leads you to the Thukla Pass, where you’ll be greeted by the Everest Memorial and a breathtaking view of the Khumbu Glacier stretching out. The remaining quarter of the hike takes you along the glacier’s left flank, with some gentle elevation gains as you approach the quaint town of Lobuche. As you continue, the majestic Nuptse peak will come into view, and you’ll eventually reach the last village on the EBC trek, Gorak Shep, on day 9.
Once you have taken adequate rest, you must have a good amount of breakfast to be ready for the trek. Our trek starts by continuing up to the wide valley beneath Cholatse and Tawache peaks on the left side. The trail then turns to the right, from there on you must trek onto the steep climb towards the base of the Khumbu Glacier. From there you will reach Dulgha which is an excellent spot to have lunch at tea houses there. After that, you need to go up and down a zigzag path between the boulders of the glacier’s terminal moraine. Upon reaching the site, you will see stone cairns built in memory of the many Sherpas who died while climbing Mount Everest. Besides the information above, the Trekup team guide will tell you more about that place. Then you must climb along the glacier to arrive at Lobuche. When you arrive there, you will be seeing a cluster of houses.
Day 9: Trek from Lobuche – Trek to Gorak Shep & Trek to Everest Base Camp
- Stay: Overnight at Trekking Lodge; Meal: B/L/D
- Trek Distance: 13 Kms; Time Taken: approx 6-7 Hrs
- Altitude: Lobuche (16,207 ft / 4940 Mtrs.), Gorak Shep (17,008 ft / 5184 Mtrs.), Everest Base Camp (17,596 feet / 5,363 meters)
- Altitude gain: Approx 801 Ft / 244 Mtrs.
- Trek Grade: Gradual – Moderate
On the trail to Everest Base Camp, the highest village where you will rest for the night is Gorak Shep. Gorak Shep is also the village closest to Everest Base Camp itself. Day 9 of this trek can be divided into two main parts. The first part is the journey from Lobuche to Gorak Shep, and the second is the stretch from Gorak Shep to Everest Base Camp.
Wake up to the smell of fried eggs and toast and gear up to trek the most exciting part of the trail. To get to Kala Pattar, the next stop follows along the highest Khumbu Glacier. The view from the trail is awe-inspiring as you see snow-capped mountains all around, and it gets even better when you cross the tributary glacier. Once you have reached the last village of the trek Gorak Shep, our Trekup India Chief, will prepare a mouth-watering lunch for you after the tiring trek.
After arriving at Gorak Shep, you can check-in at your teahouse, drop off your belongings, enjoy a meal, and recharge before continuing your activities. Following breakfast in Lobuche and checking out of your teahouse there, it is time to commence the 2.8-mile / 4.5-kilometer hike to Gorak Shep.
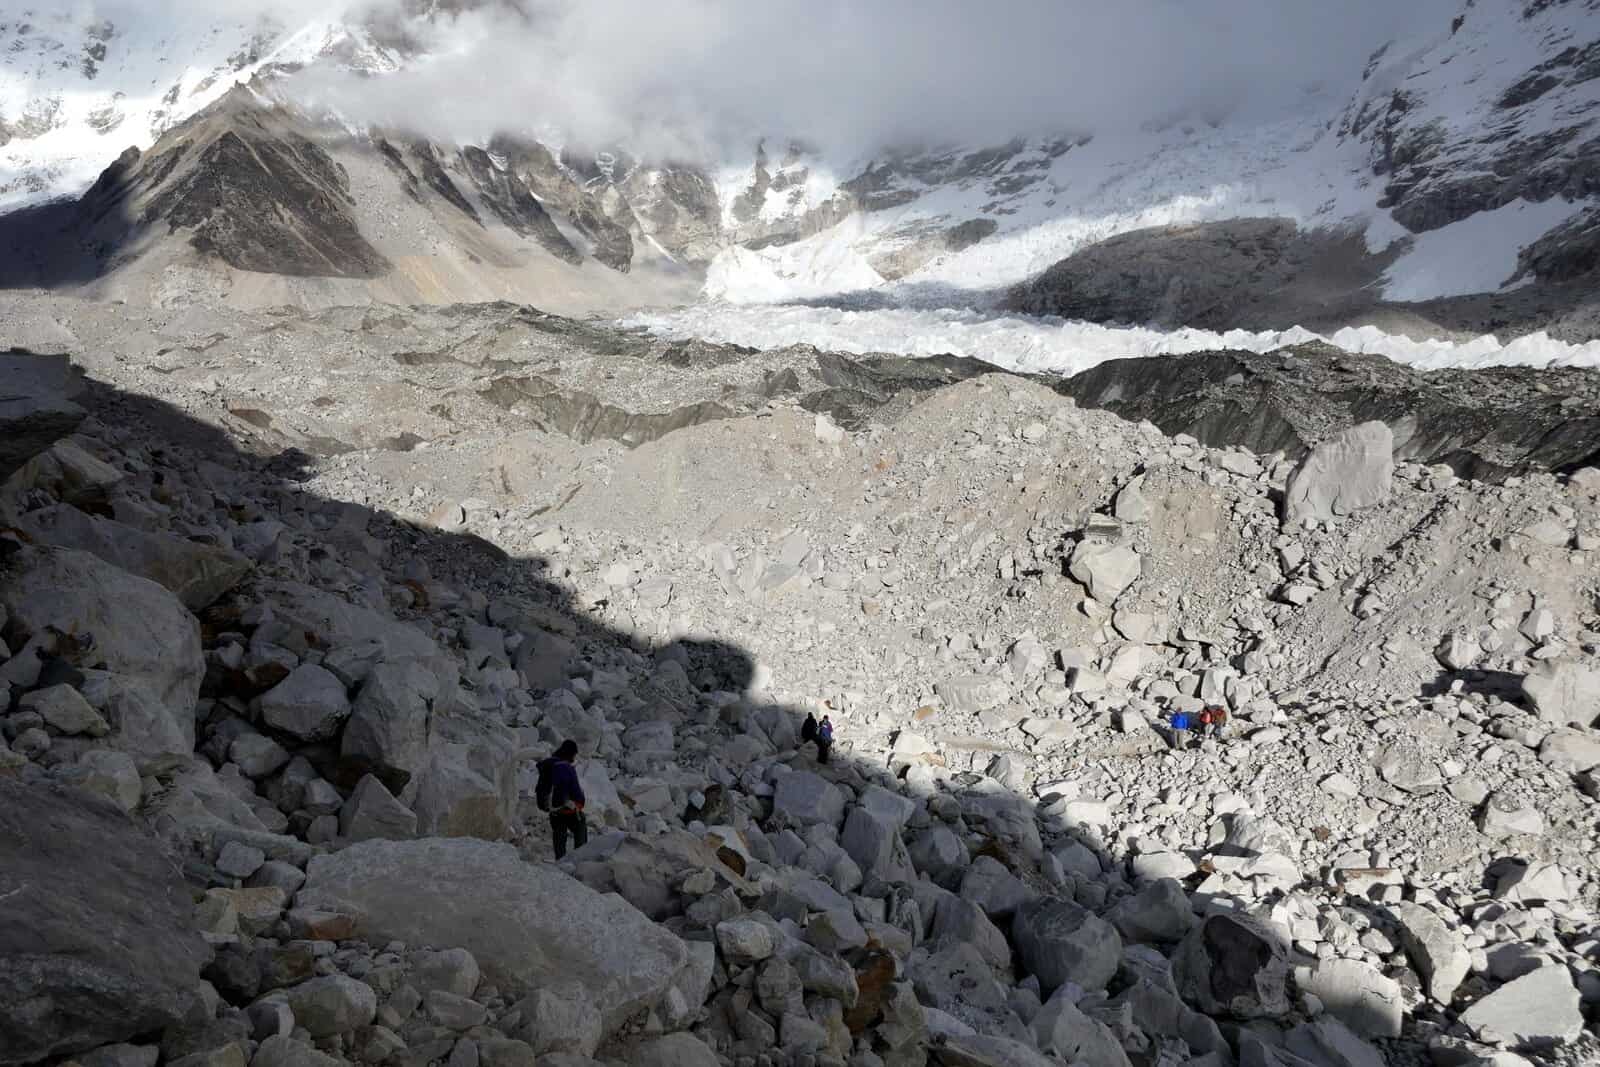
The path, which is sandy and rocky, gradually ascends as you walk alongside the Khumbu Glacier, with the Nupste face in front of you. Certain parts of the trail will require a slightly steeper incline as you transition between sections. As you ascend, you will be rewarded with increasingly stunning views of the Khumbu Glacier below and the surrounding mountainous landscape. Along the way, you will also come across several Sherpa flag monuments, indicating that you are drawing nearer to Everest Base Camp.
As you continue your journey, you’ll soon transition onto the glacier, which marks the final stretch before reaching Gorak Shep. This section of the trail features additional inclines and declines on a more rugged and uneven path, so be sure to exercise extra caution to avoid injury. As you cross, you’ll be rewarded with a glimpse of Mount Everest’s summit, visible just beyond Nupste. Before long, Gorak Shep will come into view, with Kala Patthar and Pumori towering behind the village.
You will begin your journey on day 9th by trekking Lobuche to the last village, Gorak Shep. The trek will take approximately 3 hours. Once you arrive in Gorak Shep, you can go to your teahouse, drop off your bags, and have lunch.
Afterwards, it is time to complete the final stretch to Everest Base Camp. This part of the trail is about 2.5 miles long and should take 2 hours. I recommend leaving Lobuche early in the morning to avoid the crowds for the rest of the day.
Doing so will give you a better chance of securing a spot in a teahouse in Gorak Shep and enjoying Everest Base Camp with fewer people around.
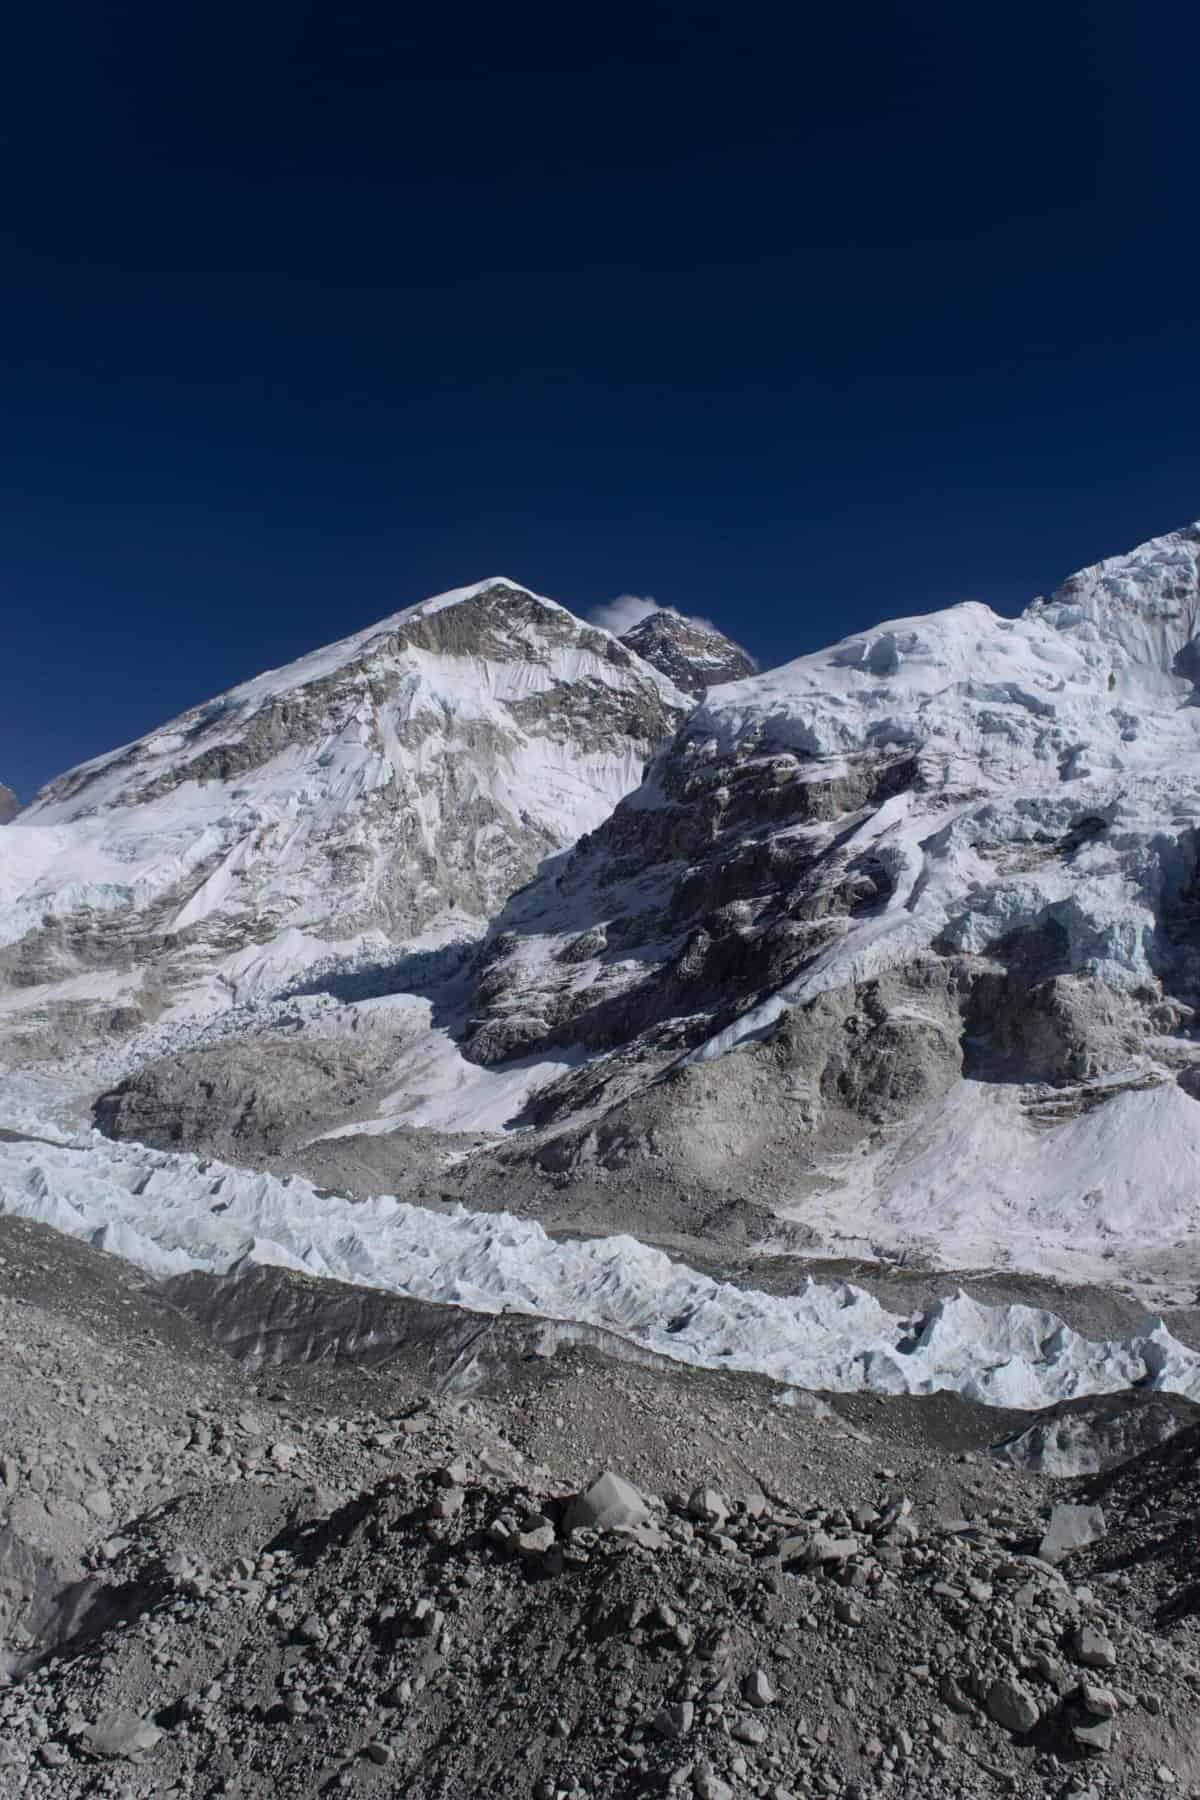
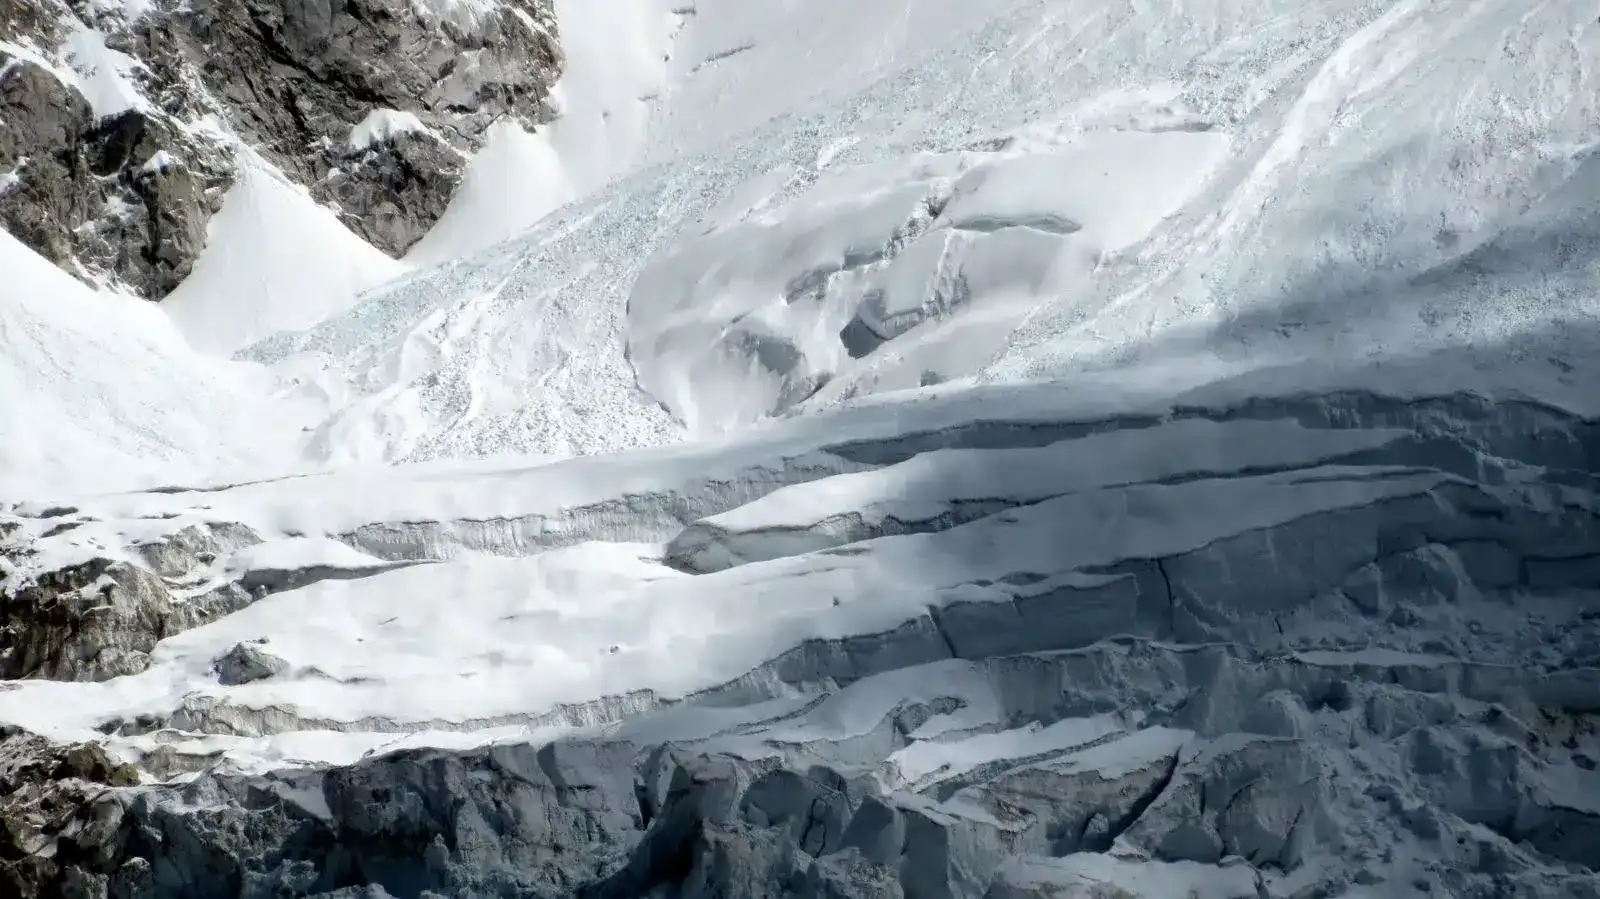
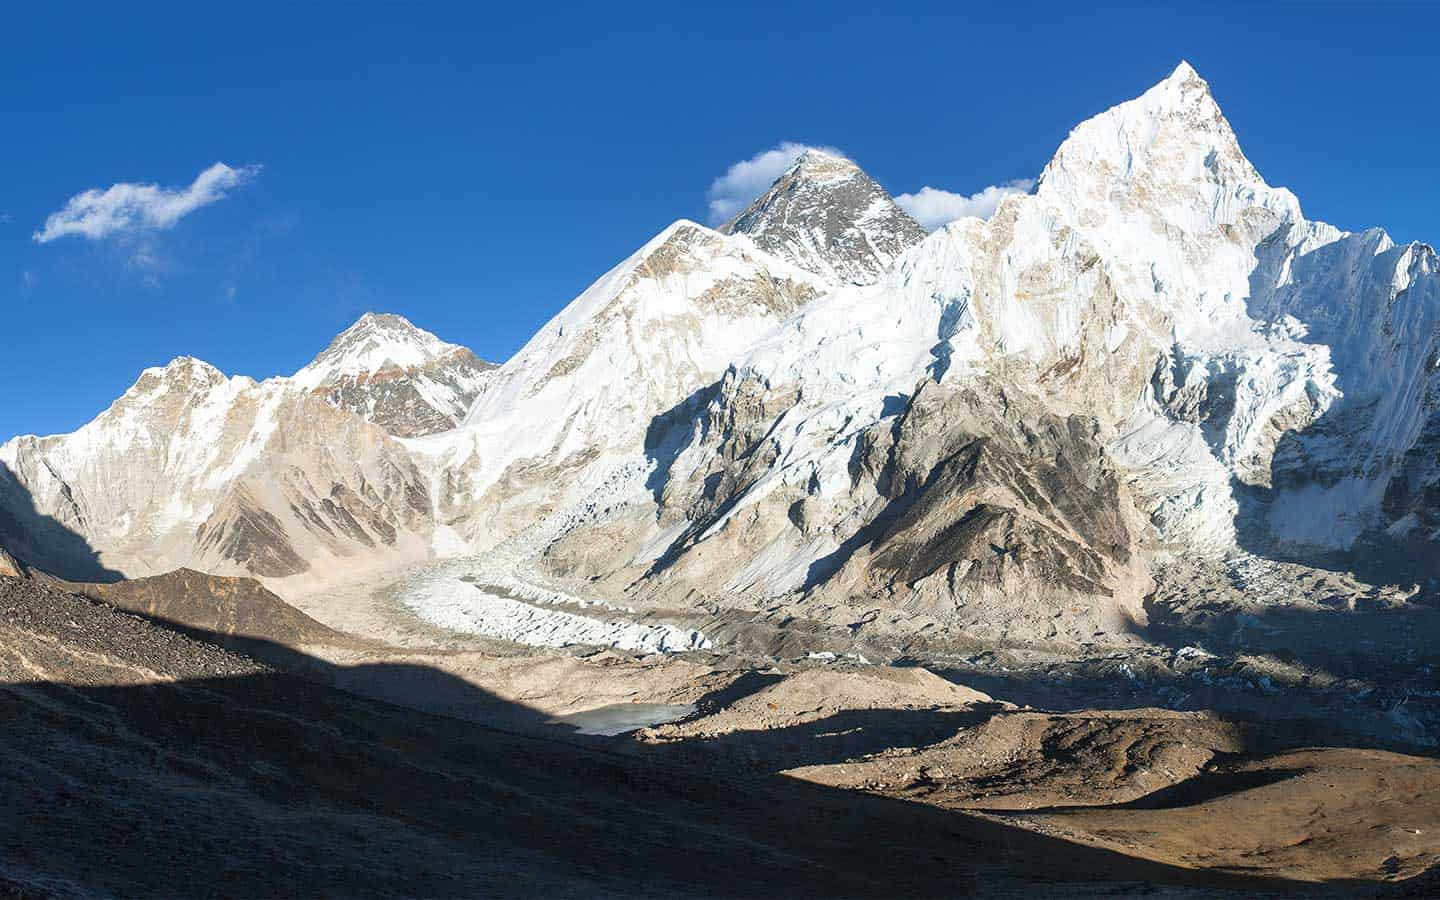
Upon departing Gorak Shep, you will immediately strolling beside the Khumbu Glacier, positioned just behind the Everest Mountain Range. This colossal glacier is visibly filled with dirt and rocks, as sediment from the surrounding peaks has gradually accumulated on its surface over the years. Nevertheless, amidst all the sediment, you can still observe the white ice underneath and comprehend its immense expanse. As you continue your journey alongside the glacier, you will steadily ascend in elevation until you reach base camp.
The ascent is moderately inclined, but, as previously mentioned, there are no excessively steep sections to traverse. It is crucial to be cautious of the technical terrain that lies ahead. The path will consist of sand and rocks, with specific areas being slippery. By attentively watching your step and refraining from hurrying, you should be able to navigate the terrain successfully.
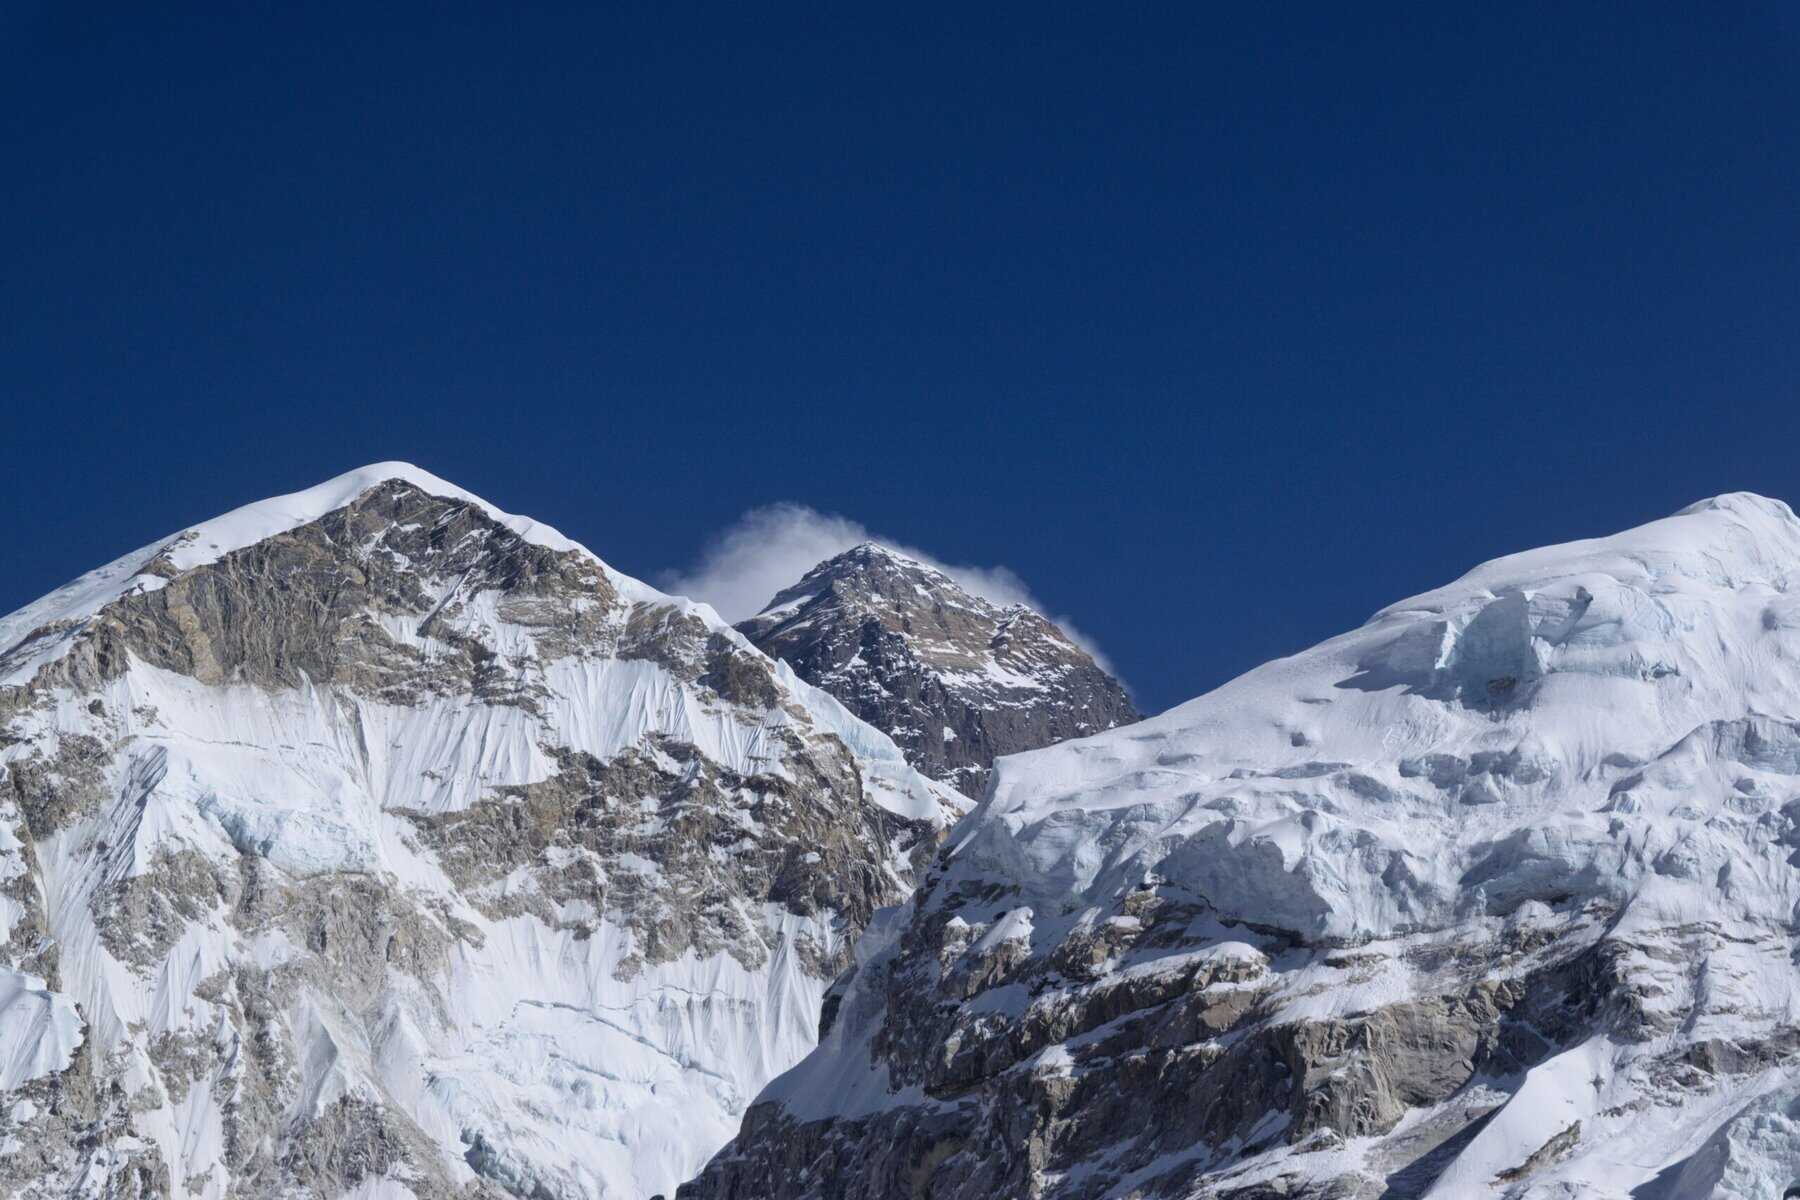
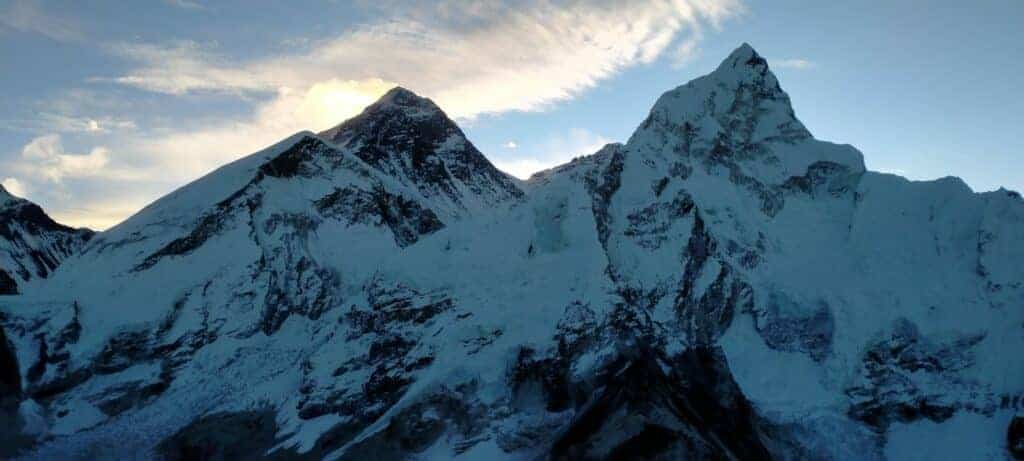
Along the path to base camp, Mount Everest is visible for most of the journey. The peak is only a small part of the mountain, but it can be seen above the clouds on a clear day. As you progress up the trail, the Khumbu Icefall comes into view, marking the beginning of the Khumbu Glacier.
Unlike the lower parts of the trail, the icefall is not covered in dirt, rock, and sediment, but instead features sharp white ice that winds its way down the mountain and into the valley. For those unfamiliar with the climb up Mount Everest, the initial section of the trail involves ascending the Khumbu Icefall using a series of vertical and horizontal ladders to access the next part of the trail.
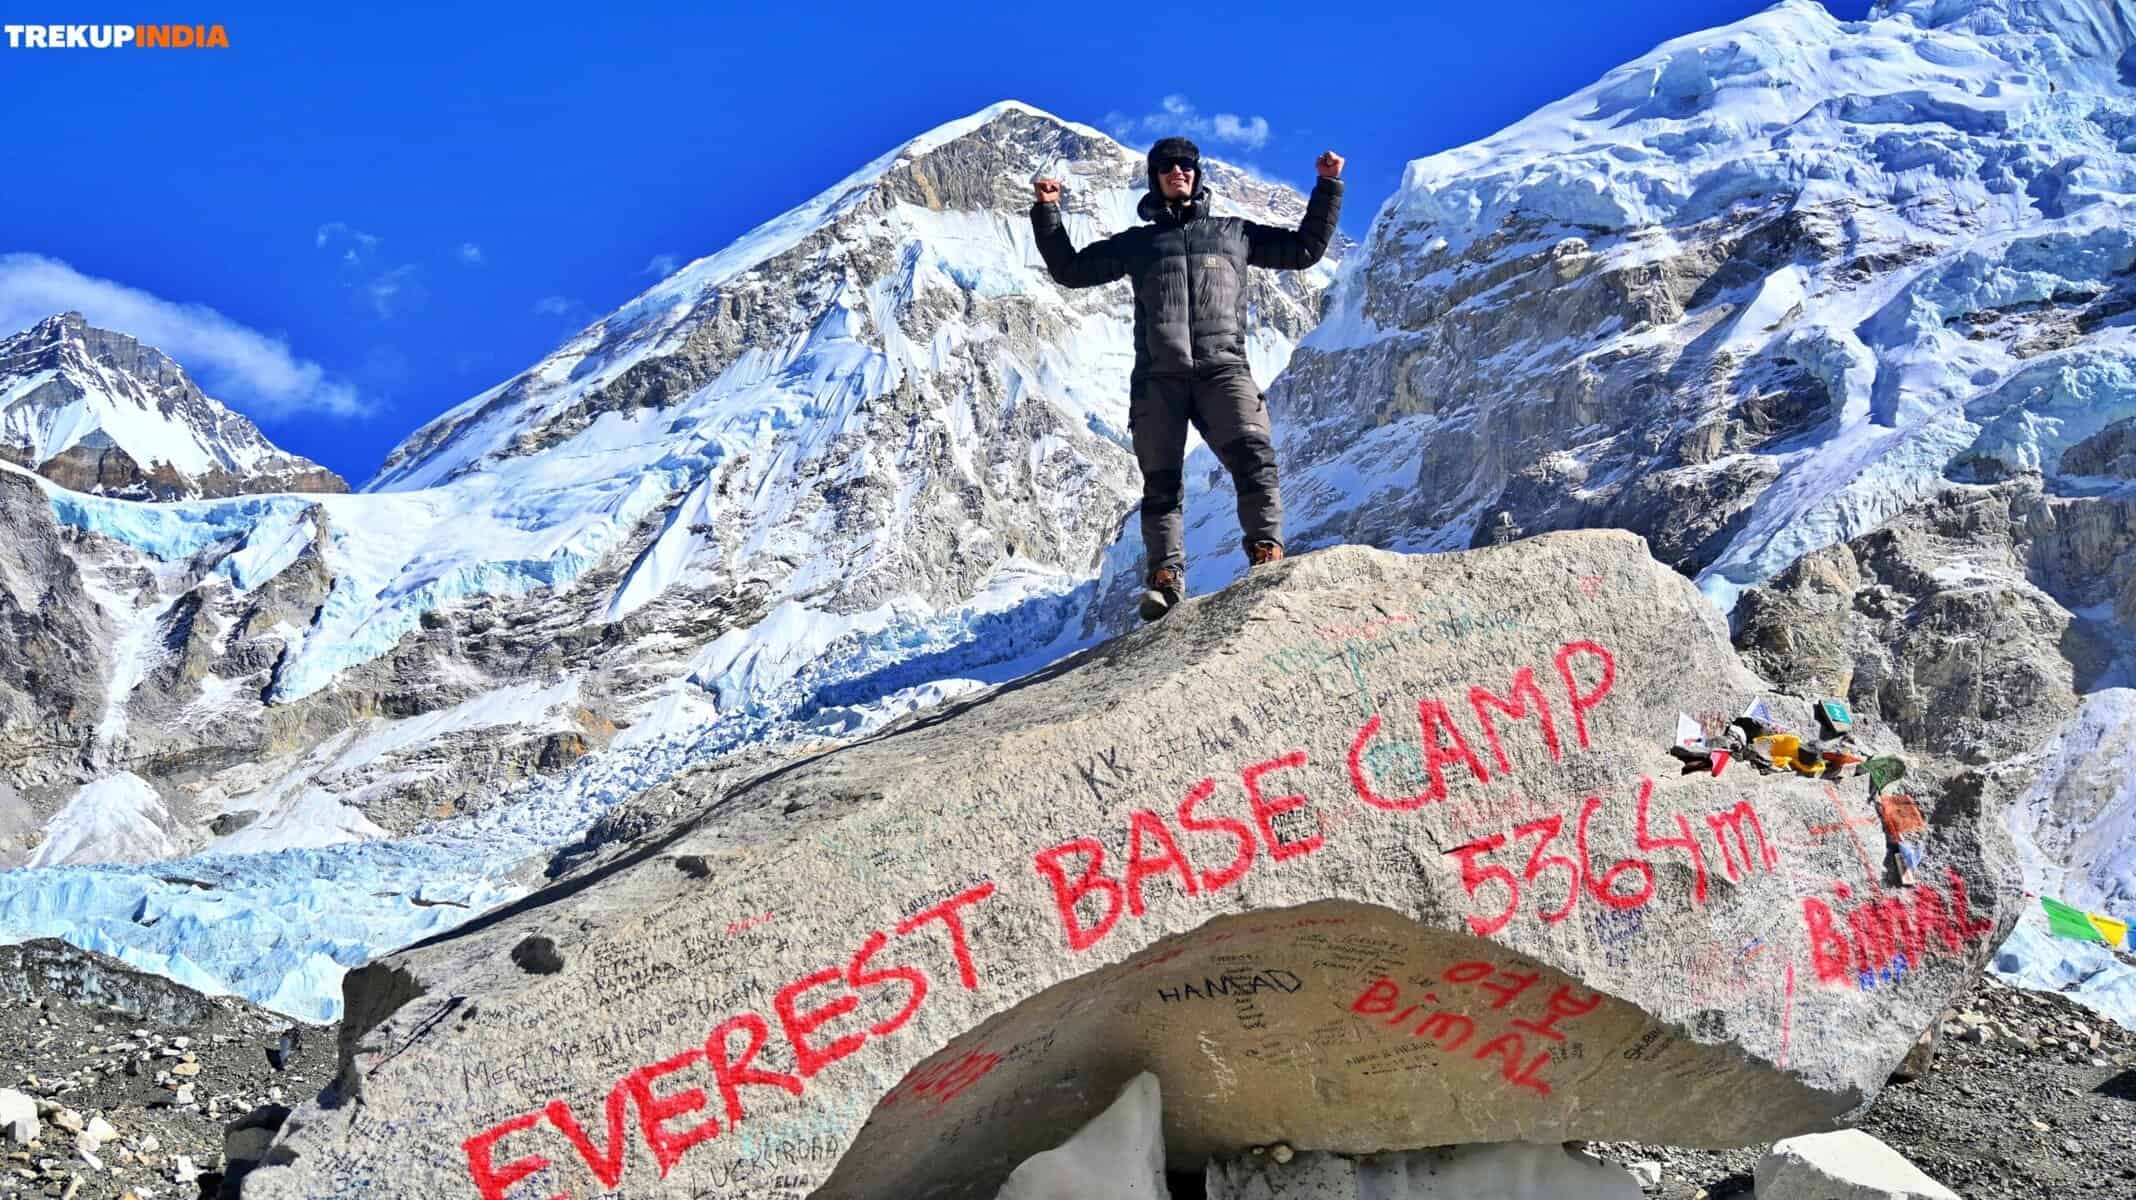
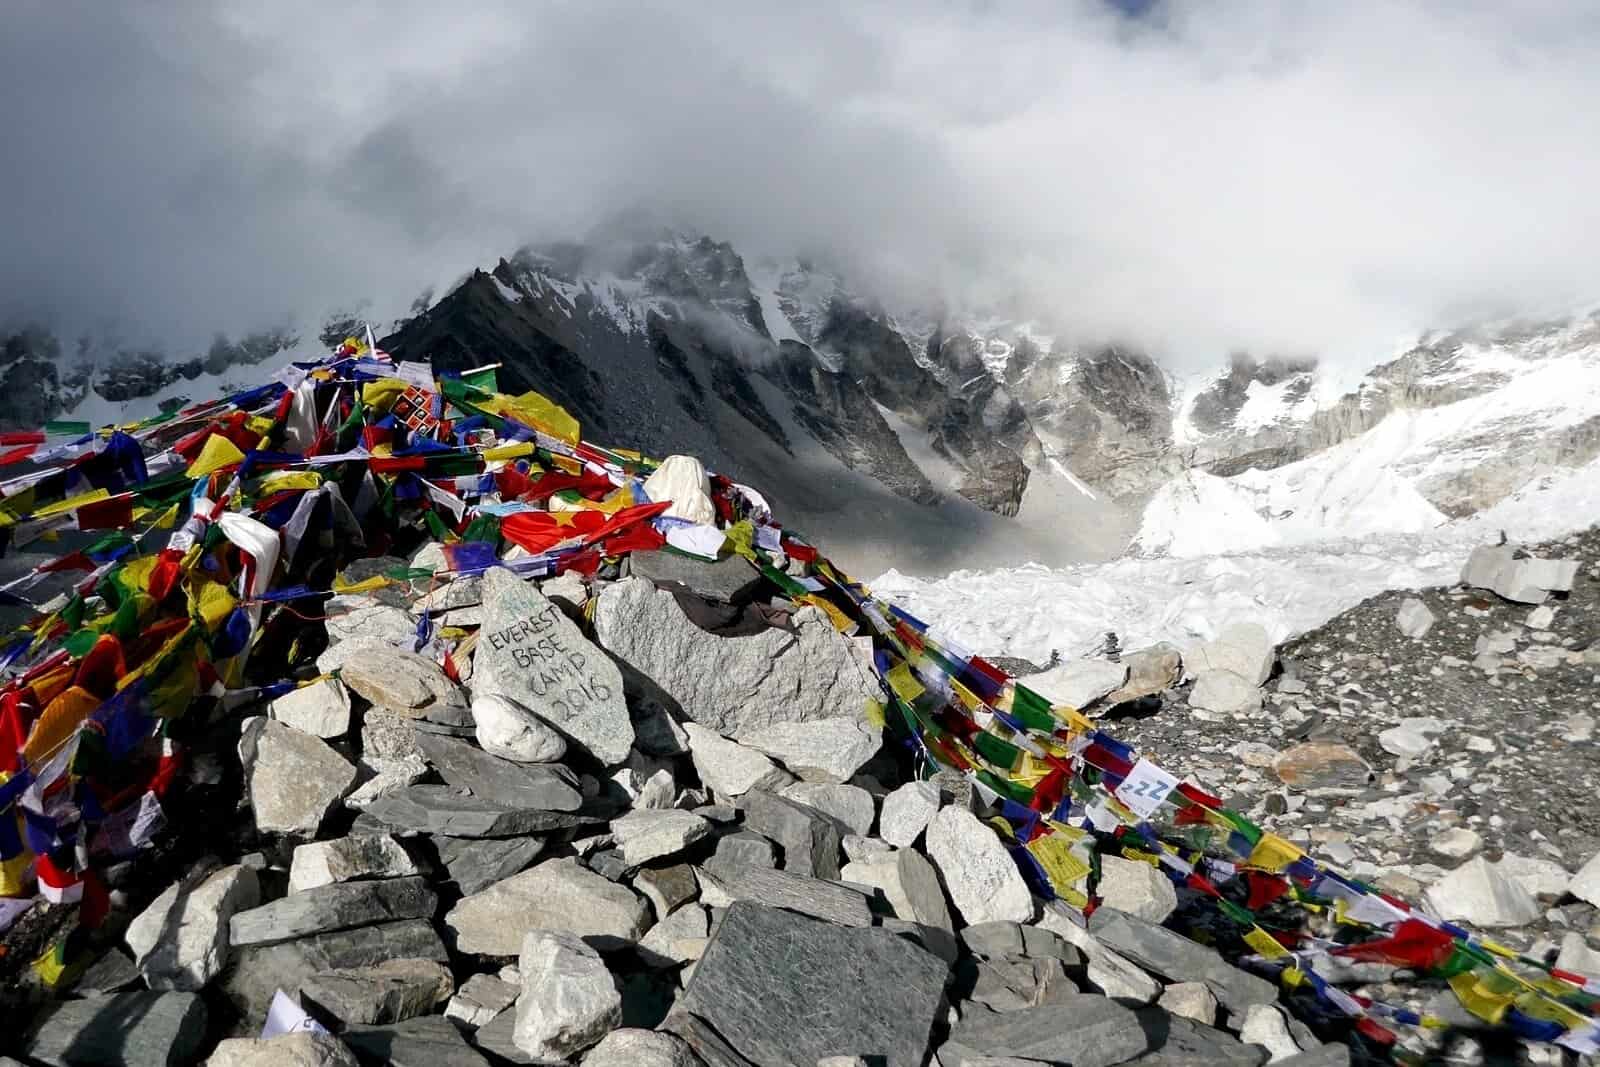
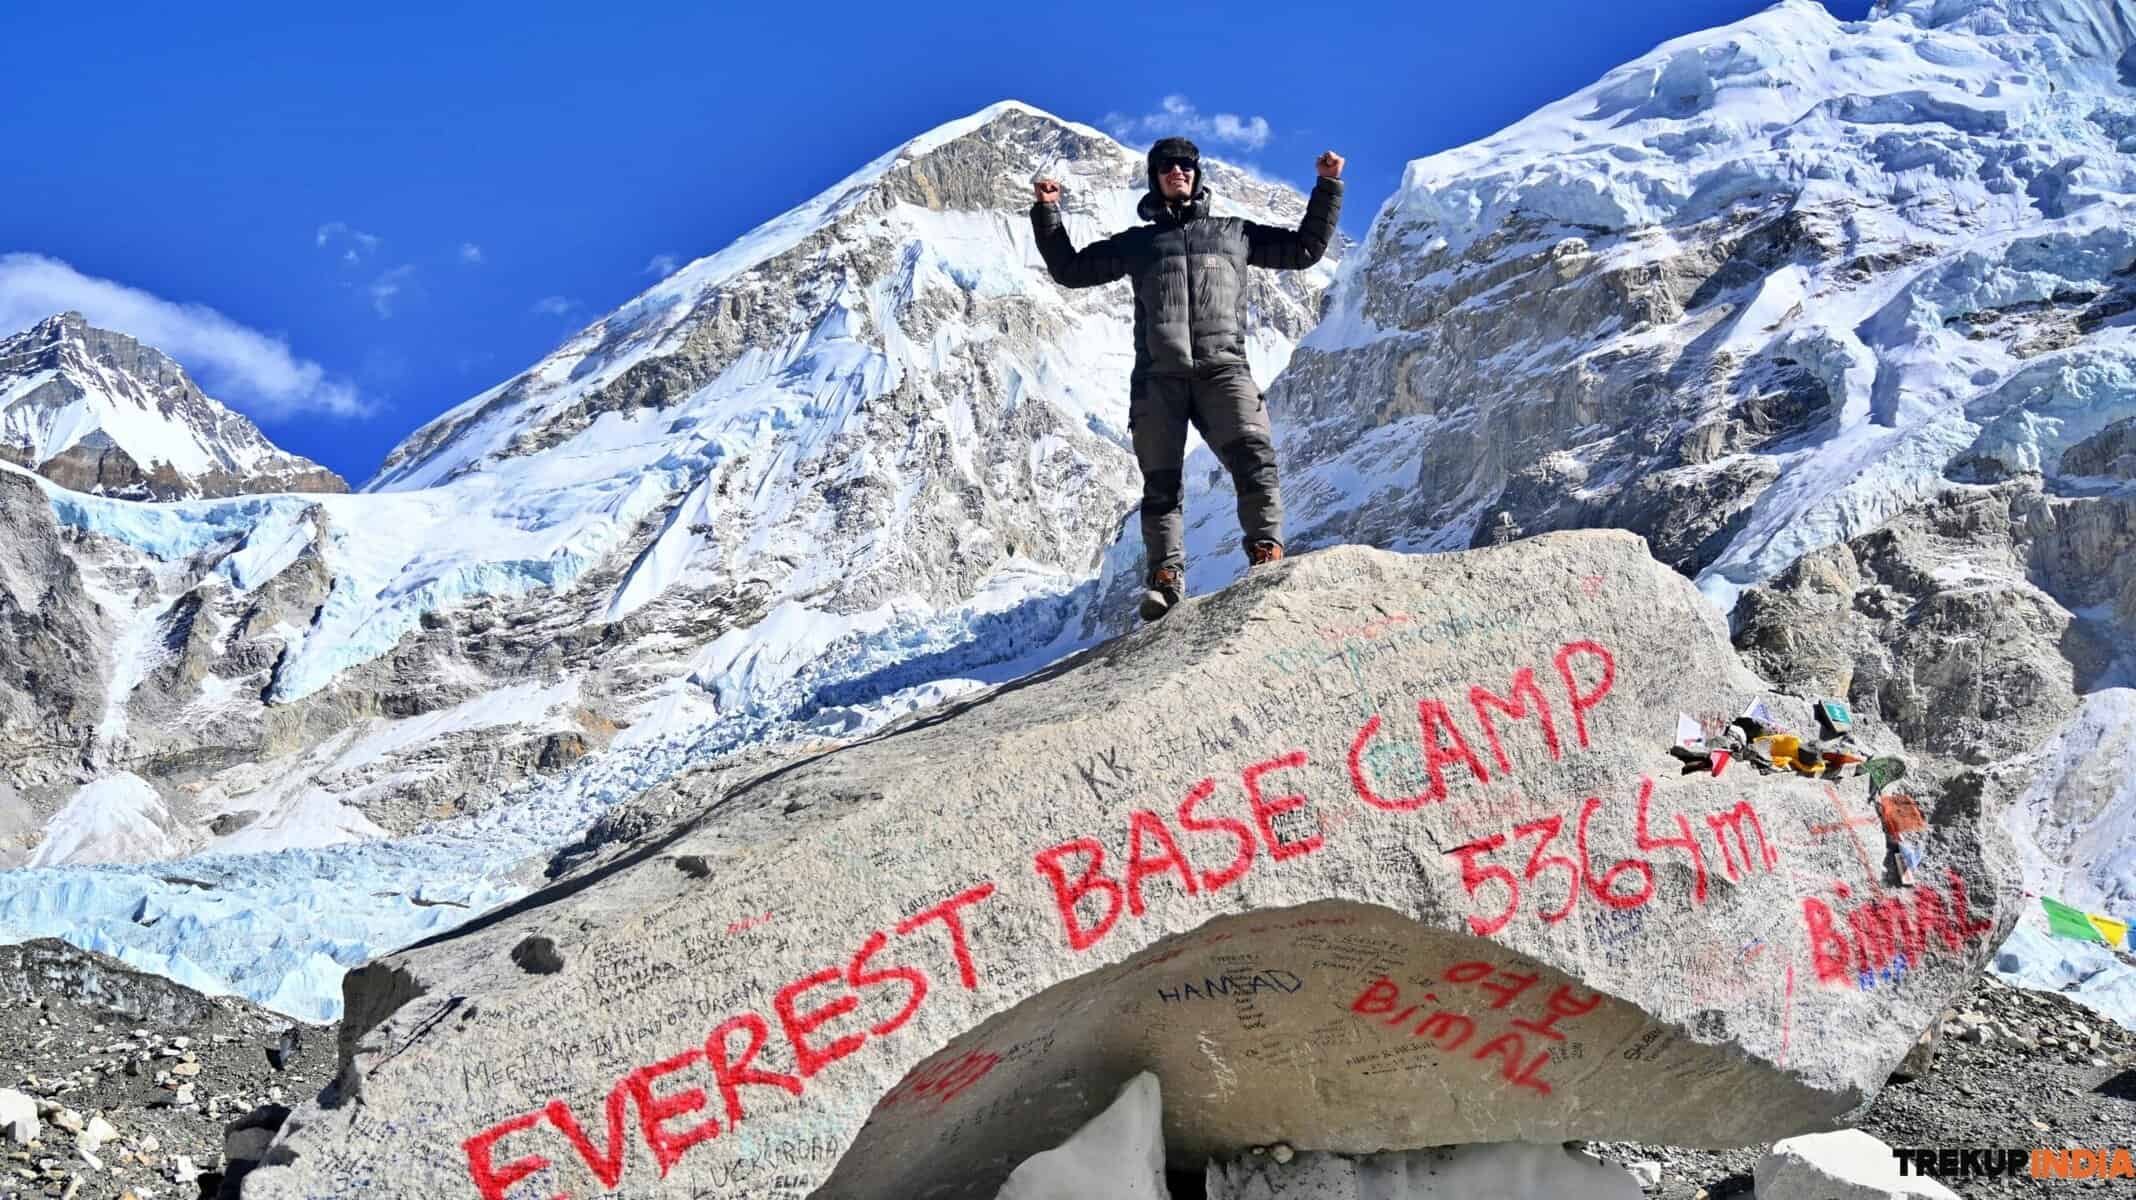
As you approach the icefall, you’ll pass by additional Sherpa prayer flags dotting the rugged landscape. The path will briefly veer inward, leading you to the iconic Everest Base Camp rock and a sea of colourful prayer flags, marking the final stretch of your journey to the base of the world’s highest peak.
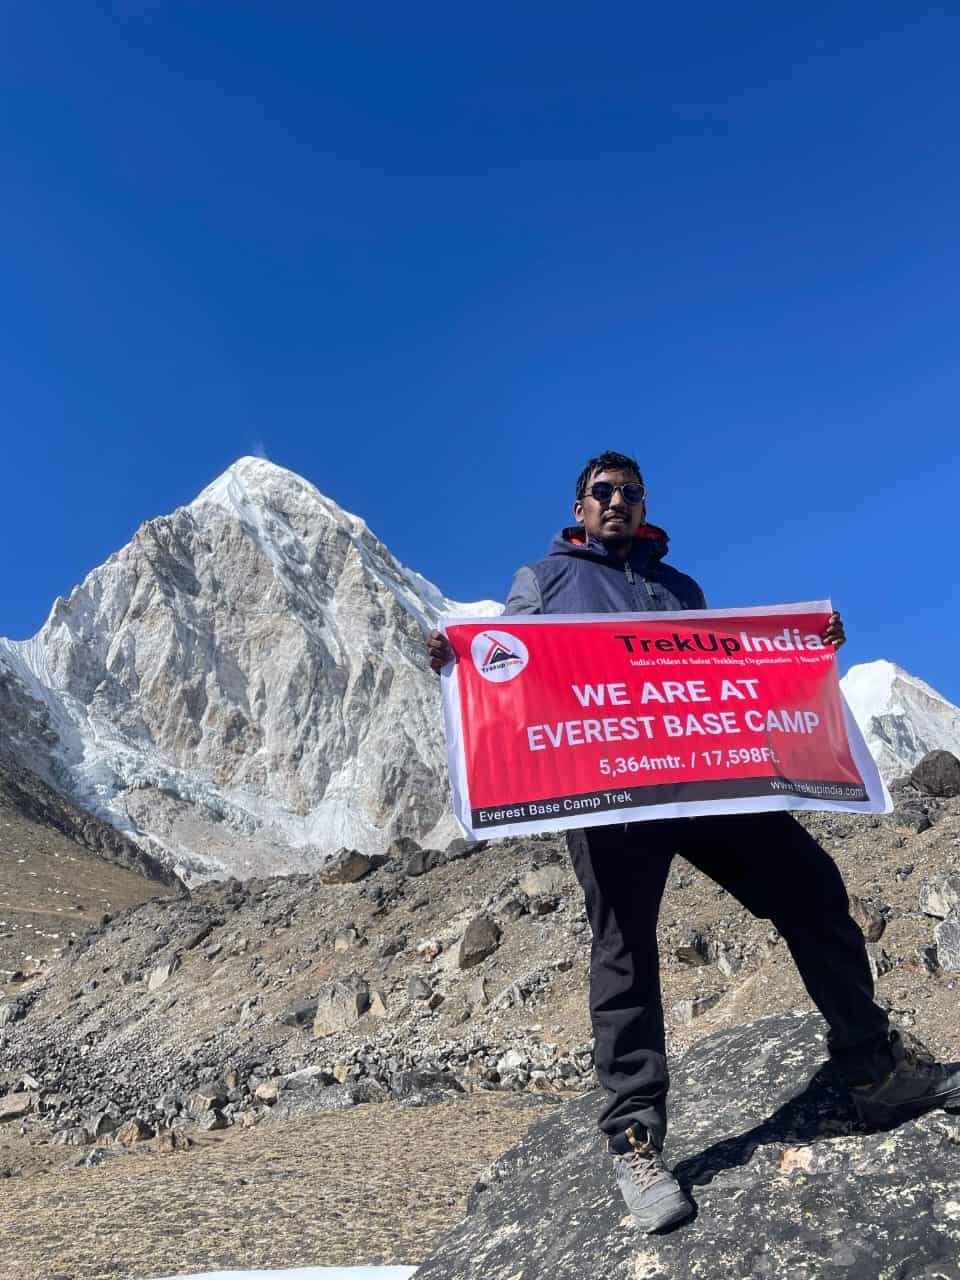
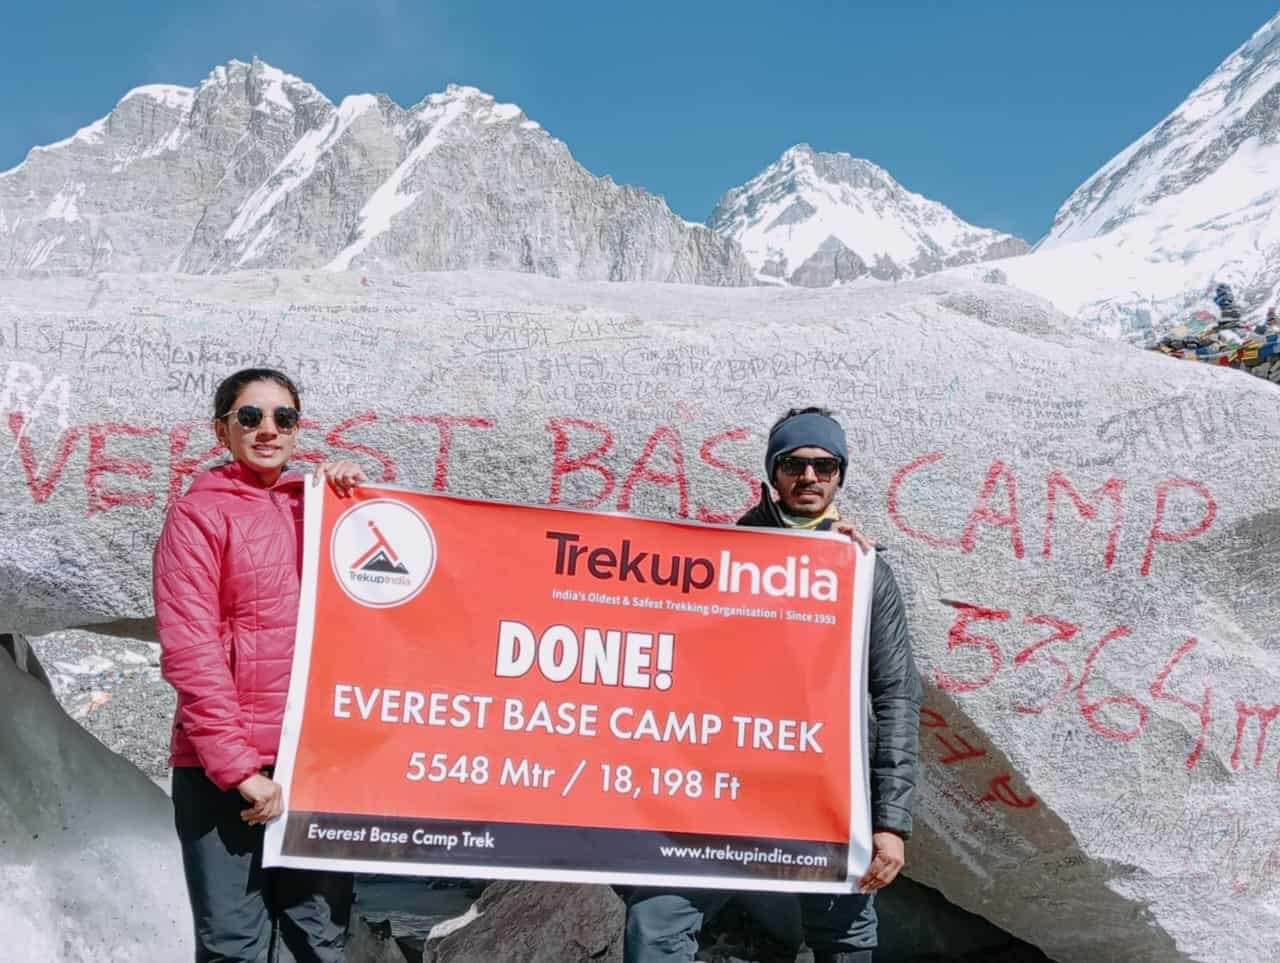
Well done! You’ve reached an impressive milestone – Mount Everest Base Camp, which sits at an altitude of 17,598 feet or 5,364 meters. To clarify, this base camp, where you’ll find the painted rock, isn’t considered the “official” Everest Base Camp. Instead, it’s known as the trekkers’ Everest Base Camp.
Mount Everest climbers typically establish their base camp around 45-60 minutes from the glacier, closer to where the Khumbu Icefall intersects with the valley. If you embark on your trek between March and May, you will come across numerous tents in the distance where climbers are getting ready for their ascent. Understanding that the climbers and their support team require uninterrupted focus and concentration during their resting and preparation periods is crucial. Should you choose to visit the active base camp, please be mindful of your surroundings and act considerately.
Day 10: A small trek to Kalapathar / Kala Pattar & then trek to Pangboche or Pheriche (4260m) 7 to 8 hrs Trek.
- Meal: B/L/D
- Trek Distance: 29 Kms;
- Time Taken: approx 7-8 Hrs
- Altitude: Kalapatthar (18,198 ft / 5548 Mtrs.), Pangboche (4260 Mtrs.)
- Trek Grade: Moderate – Difficult
To fully experience the Everest Base Camp trek, it is essential to include a visit to Kala Patthar (also known as Kalapathar). Standing at a height of 18,176 feet / 5,540 meters, this peak looms above the quaint village of Gorak Shep and offers unparalleled panoramic views of Mount Everest within Sagarmatha National Park.
Just beyond the hamlet of Gorak Shep, a serpentine path ascends the rugged mountain known as Kala Patthar, or “black rock” in translation. This mountain offers one of the most breathtaking vistas in the entire Mount Everest Base Camp trek.
As this is just a mountain ascent, you will notice that it consists mainly of uphill and more steeply inclined parts compared to most other sections on the Everest Base Camp journey. While a few areas may level out slightly, it is essential to be ready for an upward climb throughout the entire experience.
You’ll have the luxury of traveling light on this trek, leaving your bulky gear behind and carrying only a daypack. From Gorak Shep, you’ll descend to the sandy area below Kala Patthar, where the trail begins. The route up the mountain is well-defined and relatively easy to navigate, winding its way up the slope with Pumori mountain looming in the background. As you climb, the village of Gorak Shep, the Khumbu Glacier, and distant peaks like Ama Dablam will be visible behind you. The higher you go, the more of Mount Everest will come into view, until it’s fully visible above the surrounding mountains.
The hike up Kala Patthar offers a unique experience, as the breathtaking views of the surrounding landscape are accessible throughout the entire trek. Unlike other treks where the summit is the only point with notable views, the Everest Mountain Range and Sagarmatha National Park provide a stunning backdrop for the entire journey. While the peak may not be visible for most of the trail, the Sherpa prayer flags and wind/weather reading device signal the approach to the summit. The final portion of the trail becomes increasingly rocky, and it’s important to take your time and avoid rushing through the challenging terrain to ensure a safe and enjoyable experience.
The view from the top of Kala Patthar is unmatched when appreciating nature’s beauty. Once you have spent sufficient time at the summit, you will descend the same way you ascended. This descent will be more effortless and faster than the upward trek, but regardless, please exercise caution as you make your way down the mountain.
Following a rejuvenating morning hike up Kalapathar, where you were treated to breathtaking views of Mount Everest, it’s time to gather your belongings and begin your descent down the Everest Base Camp trekking route. Your next stop will be the village of Lobuche, where you spent the night on day 7. As you go through the trail, you’ll have the Khumbu Glacier on your right and enjoy stunning views of the glacier and surrounding peaks. While most of the terrain is relatively easy to navigate, there are a few more challenging sections to watch. However, since you’ve already covered this section on your way up, you should understand what to expect.
From Gorak Shep, you’ll encounter a brief, rugged stretch as you traverse a portion of the glacier before transitioning to a more accessible path. Be mindful of the numerous large and small rocks while crossing this section. Once you’ve navigated this area, the trail becomes easier as you gradually descend into the valley, with the breathtaking Sagarmatha National Park landscape unfolding. The remainder of the journey to Lobuche is relatively straightforward, with a few brief, rocky sections as you walk alongside the Khumbu Glacier. After a couple of hours of hiking, you’ll reach Lobuche, where you can take a break and refresh yourself with food and drinks before continuing to Pheriche.
After departing from Lobuche, you will proceed along the same path until you reach an intersection. On your right, you will find the route leading to the village of Dzonglha, the Cho La Pass, and the Gokyo Lakes. On your left, you will find the path that takes you back to Pheriche and Dingboche. Going left at this point is recommended, as you will encounter the second, more demanding section of the trail. This section involves descending the Khumbu Glacier’s moraine wall and passing through the Thukla Pass. Along the way, you will pass by the Everest Memorial once again. From there, you will begin the challenging descent towards the river. Although not as arduous as the uphill climb a few days prior, taking your time and being cautious as you navigate the difficult terrain is essential. Eventually, you will reach the small village of Thukla. After crossing the river, you will continue towards Pheriche.
During this last stretch of the trail, which spans 4 kilometres, you can trek alongside the river fed by the glacier. The trail continues until you reach Pheriche, located further away in the distance. You will have the option to stay overnight in a teahouse.
Day 11: Trek from Pangpoche – Trek to Namche
- Stay: Overnight at Trekking Lodge
- Meal: B/L/D
- Trek Distance: approx 14 Kms; Time Taken: approx 5-6 Hrs
- Altitude: Pangboche (13,074 ft / 3985 Mtrs.), Namche (11,319 ft / 3450 Mtrs.)
- Altitude gain: Approx 1755 Ft / 535 Mtrs.
- Trek Grade: Gradual – Moderate
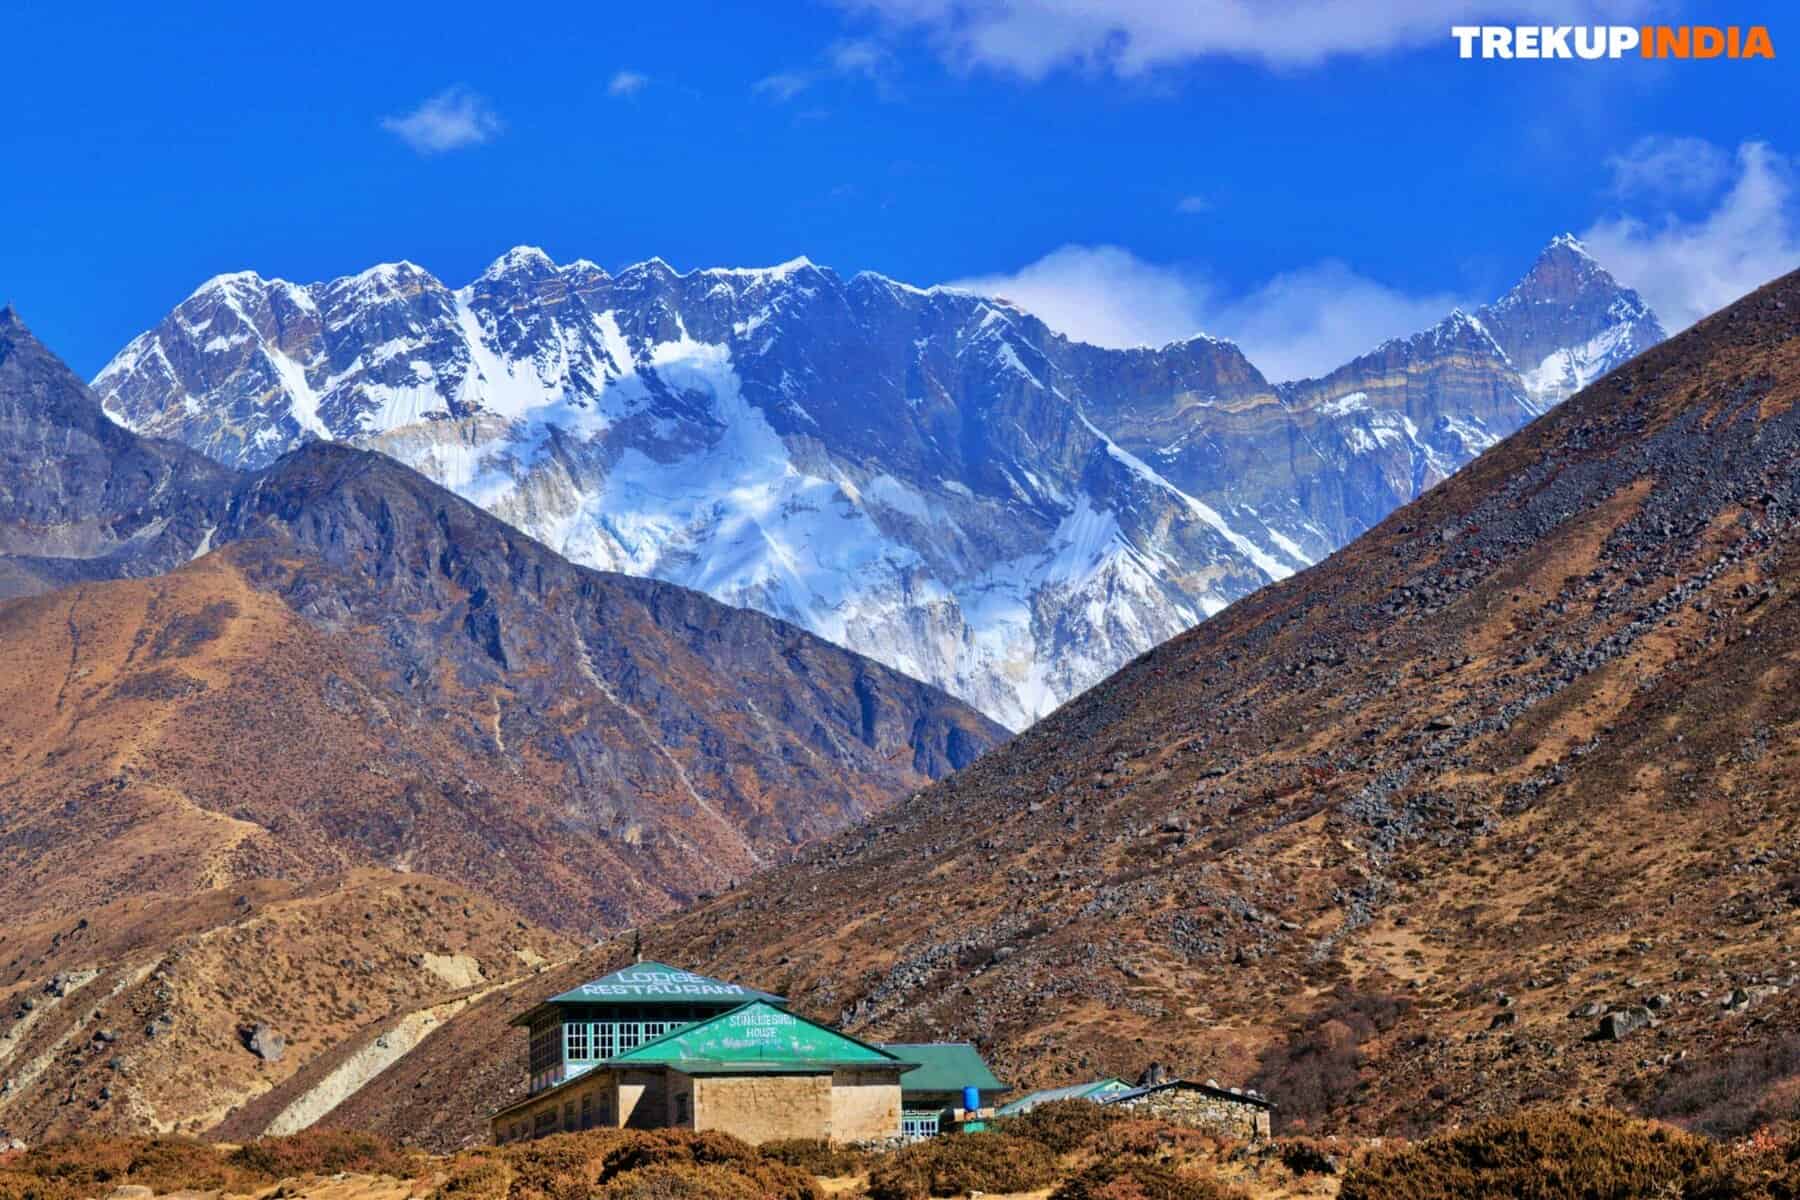
This morning the trail will pass through river, birch, and rhododendron forests to Tengboche. As you trek down the trail, you will see majestic mountain ranges. Everest, Lhotse, Kantege, Kwangde, Nuputse, Tawache, Ama Dablam, and Thamserku are a few of the Himalayan giants to be seen on the way. The trek will be downwards from Tengboche to the Dudh Kosi bridge. When you reach Phunki Tenga, you will witness water-driven prayer wheels before reaching Namche camp.
Day 12: Trek from Namche – Trek to Lukla
- Stay: Overnight at Trekking Lodge
- Meal: B/L/D
- Trek Distance: approx 18 Kms; Time Taken: approx 7-8 Hrs
- Altitude: Namche (11,319 ft / 3450 Mtrs.), Lukla (9380 ft / 2860 Mtrs.)
- Altitude gain: Approx 1939 Ft / 590 Mtrs.
- Trek Grade: Gradual
On the last day of the trek, the trail will follow from Dudh Kosi down to Lukla. And through Phkading and passing through the lush green forest, you will reach Lukla. In the evening, the Trekup India team plans a celebration to celebrate the trek with the trekker. You will get to party with sherpa guides and porters who will show some steps of the Sherpa dance, and you can also try chang (local beer). It will be the most fitting way to end an adventurous and fantastic trip.
Day 13: From Lukla to Ramechap / Kathmandu via Flight
Today well in time as per the flight schedule we will drive to airport and board the same to Ramechap/Kathmandu. Arrival meets and receives by company representative and drives to booked hotel. Evening followed by a farewell Dinner and certificate ceremony.
Day 14: Fly to home town from Kathmandu via Flight
Today as per your flight schedule, take a taxi to Kathmandu airport to board your flight to next destination.
Everest Base Camp Trek Route Map
We’ve prepared a comprehensive Trek Route Map for your upcoming adventure to Everest Base Camp Trek, which outlines the entire journey including all stops and trails. This map provides detailed information on the terrain, distance between points of interest, and estimated travel time to help ensure a safe and enjoyable trek. We’ve carefully curated the map to ensure that you have all the necessary information at your fingertips. Please take a moment to review it thoroughly, and don’t hesitate to reach out if you have any questions or concerns.

Everest Base Camp Trek Altitude Chart
The Trek Altitude Chart is a useful tool for Trekkers to monitor their altitude changes during their rides, allowing them to plan their routes more efficiently and track their progress over time. This Everest Base Camp Trek chart is beneficial for both casual and experienced Trekkers, helping them make the most out of their Trek experience.
Trek Cost Inclusions
1. Stay: (On Sharing Basis)
- Two nights’ accommodation in a twin-sharing room with breakfast included at a 3-star hotel in Kathmandu, bed and breakfast plan. ( on Day 1 & day 13 )
- During the trek, the stay will be in the twin-sharing lodge and tea house. ( from day 2 to day 12 )
2. Meals: ( Tea, Breakfast, Lunch, Dinner, Juice at night )
- Trekup India provided cooked meals during the trek (breakfast, lunch, dinner), starting with lunch on Day 02 and continuing with breakfast on Day 13.
- Daily Dessert Delights: Fresh Fruit for a Healthy Finish
3. Flights & Transports: ( All According To Itinerary )
- Domestic flight from Kathmandu to Lukla / Ramecchap and back to Kathmandu.
- Airport to Trekking point on sharing jeeps.
4. Health & Safety: First Aid Box, Oxygen Cylinders, Stretchers, Oxi meters, BP Machines, health.
5. Permits: We’ll handle all the required fees, permits, and paperwork for your visit to Sagarmatha National Park, including the necessary TIMS (Trekkers’ Information Management System) permits. & Camping Permission Fee.
6. Trek Crew: High Altitude Chef, Helpers, Trek Leader & Guides, and other support teams.
7. Complementary Trekking Kit Bag: Potters and Mules to carry your bag if opted for offloading. (For off loading there will be additional charge of Rs. 4500+5% GST)
8. EBC Trek Certificate: Trek Completion
9. EBC map
10. Farewell Dinner at Kathmandu
11. Trek Equipment: Sleeping bag ( High Altitude S.B )
The package includes a 2-night stay at a 3-star hotel in Kathmandu, with twin-sharing accommodation and breakfast included.
Trek Cost Exclusions
- Nepal visa fees are in USD and cash; provide two passport-size photos. ( this is for foreigners, not for Indians )
- The cost of lunch and dinner in Kathmandu is not covered, especially if you return from the trek earlier than planned.
- It will be an extra cost if you have additional nights of accommodation in Kathmandu beyond the predetermined itinerary.
- Any insurance ( Trekup India recommends each trekker get insurance by ASC360 )
- Any Meals/accommodation besides the itinerary or not mentioned in the program.
- Personal Medical expenses: do carry your medication
- Mules or porters charge to carry personal baggage.
- Any emergency evacuation charges
- Any services that are not mentioned in the cost inclusion section.
- Satellite phone, Gamow/PAC HAPO Bag (Portable Hyperbaric Bag), and AEDs (Automated External Defibrillators).
What should you pack for the Everest Base Camp Trek
Everest Base Camp Trek is a high-altitude trek. The trekking gear you have to have for this particular trek differs from normal treks. Thus, read this whole segment. There is an important question that the trekker who is doing trek asks, like what all things to carry while trekking. Below, we have provided the details on everything you should take; an easy way to remember is by Head to foot or foot to head. We have prepared from Head to foot.


Head Gears
When trekking it's important to carry headgear to protect your head and face.
Heading out for a trek? Don’t forget to carry headgear to protect your beautiful face and head from the sun, wind, and dust! It’s an essential accessory that keeps you safe and comfortable throughout your adventurous journey. So, make sure you pack it before you step out into nature!
- Head Lamps – When trekking at night, headlamps are essential to illuminate your path while keeping your hands free. Headlamps come in different sizes and lumens, so it is essential to choose one that suits your needs.
- Hats or Cap – Caps or hats are also necessary when trekking in different weather conditions. Caps protect your head from the wind and freezing temperatures at night, while hats provide shade and protection from the sun during the day. It’s essential to ensure that your hat has a strap to prevent it from being blown away by the wind.
- Sunglasses – Sunglasses are also essential for trekking. Your sunglasses should protect your eyes from harmful UV rays and fit your face perfectly to avoid falling off while climbing, jumping, or crossing obstacles. The glass of your sunglasses should also be designed for different weather conditions to provide optimal visibility.
- Buff / Balaclava – Lastly, a buff or balaclava is a must-have to protect your mouth or neck from extreme temperatures and keep them warm. Buffs and balaclavas come in different materials, thicknesses, and designs, so it’s important to choose one that suits your needs and preferences. Depending on the weather conditions and your activities, you can wear them as neck warmers, face masks, or headbands.
Clothes
When trekking in high altitudes, prepare for cold weather by wearing layers. Layering traps heat, keeps you warm, and allows you to easily adjust your clothing as temperatures fluctuate.
Layering is important for different seasons when trekking. When planning a high-altitude trek, it is important to prepare for the cold weather. Wearing layers is the best approach as it provides both protection and flexibility when the weather changes frequently in the mountains. Layering helps to trap heat and keep your body warm, while at the same time allowing you to easily adjust your clothing as the temperature fluctuates. By wearing layers, you can enjoy your trek comfortably and stay safe in the unpredictable mountain weather
- For spring, summer, and monsoon treks, consider wearing three layers: a woollen sweater, a fleece, and a padded jacket.
- For autumn treks, add one more fleece layer to make it four layers.
- For winter treks, you may need five layers with thermals, a woollen sweater, two fleeces, and a padded jacket.
- T-shirt/sleeve shirt– Bring three T-shirts and two quick-dry trek pants, wearing one and carrying the others. Long sleeve shirts help to protect from sun UV rays. We recommend synthetic T-shirts as they get dry quickly when they get wet.
- Hiking / Trekking Jacket– down jackets (-5 to-10 C) or two-three-layer jackets.
- Thermals– at least two pairs of thermals help keep the body warm during cold weather.
- Undergarments– you can carry them according to your habitual and hygiene requirements.
- Gloves– 1 pair of gloves will keep your hand warm and nice.
- Trek Pants– Bring 2 to 3 comfortable trekking pants. Trekking pants play a significant role, as they are designed for comfort and mobility, making trekking easier. It should be Synthetic so that it gets dry quickly when wet.
- Rain Wear– you can carry a raincoat or Poncho. During long rains and snowfalls, the waterproof jackets start leaking. Still, the Poncho and raincoats keep you dry, so choose accordingly.
Tip: If you choose a raincoat on your trek, carry a small waterproof cover so things inside your backpack can’t get wet. If you carry a Poncho, you don’t need to worry. It protects both you and your backpack.
Foot Gears
When it comes to planning a trek, one of the most important aspects is to ensure that you have the right kind of foot gear.
- Trekking shoes which are waterproof and have ankle support. Walking / Hiking sandals which can be used off the trek, i.e., in the morning and evening hours when you reach the campsite, basically to get your feet rest from heavy boots, sometimes used for crossing streams and rivers, it’s more comfortable and safer than crossing barefoot or wetting your shoes. Sneakers (Optional) can be worn for normal driving days or used around the camp.
- Socks– you should at least carry 3 to 4 pairs.
- Microspikes & Gaitorswill be provided by Trekup India when required. You don’t have to carry them.
Personal First Aid Kit
Don't forget to pack your personal first aid kit! It's always better to be safe. So, make sure you're prepared for any unforeseen circumstances.
Below are some common medicines generally required/used during your adventure trip; however, please consult your doctors prior.
- Antiseptic towel or water syringe (to clean the wound)
- Butterfly bandage for a small cut
- Cotton and elastic bandages and sterile gauze pad for larger wounds
- Latex gloves are used when the wound bleeds.
- Medicine for Diarrhea (Upset stomach)
- Medicine for cold, flue/fever, headache
- Some pain killers
- ORS pouches
- Quick pain relief spray (External use)
- Any personal medicine prescribed by your doctor
- Dimox / Similar for high altitude sickness
- Bug Repellent
- Carry some nutria/energy bars and drinks (non-alcoholic)
- Note: Kindly consult your doctor before purchasing or taking any medicine.
Gadgets and Other Items
You might also consider bringing a camera, binoculars, portable charger, and snacks. Be well-prepared and tackle any trail with confidence.
- Trekking Poles
- Mobile phone
- Camera
- Spare batteries for phone and camera, power bank
- Lightweight flashlight or headlight
- A waterproof bag made of plastic is used for the camera.
- Plug/converter for electrical items
- 1-litre water bottle
- A journal with a pen would be a good idea to keep your notes.
- Some book of your interest for the ideal time
- Get into the habit of maintaining a Map and guidebook of the region.
Hygiene & Personal toiletry
Remember to pack hygiene and personal toiletry items such as soap, shampoo, toothbrush, toothpaste, deodorant, and toilet paper.
- Sunscreen with UV protection to shield your skin from harmful rays
- 1 or 2 small quick-drying towels to help you dry off quickly in case of rain or sweat
- Toilet paper, tissues or wet wipes for maintaining hygiene while on the trek
- Toothbrush, toothpaste, and mouth freshener to keep your mouth clean and fresh throughout the journey
- Deodorant or talcum powder to help you stay fresh and odor-free, especially during hot and humid climates
- Shampoo to keep your hair clean and healthy
- Sanitary pads or tampons (for female trekkers) to manage menstrual cycles
- Lip-gloss or salve to protect your lips from dryness and chapping
- Bio-degradable soap to keep yourself clean and hygienic while on the trek
- Nail clipper and other personal items that you use daily
Compulsory Documents to Carry
There are certain documents that you should always carry with you. These documents are not only necessary for your safety and security, but they may also be required by local authorities.
These files must be submitted to the Forest Department before your trek. With none of these, you will not be permitted to trek—original and photocopy of government photo identity card. Carry IDs like Aadhaar, voter ID, etc.
How To Plan Your Trek & Reach Kathmandu, Nepal?
Kathmandu, as the capital of Nepal, offers convenient access to travelers from India, thanks to its proximity to major cities and efficient air connectivity. Several airlines operate direct flights from Indian cities such as Kolkata, Mumbai, Delhi, Jaipur, Bangalore, and Varanasi, making it easy to cover the distance of approximately 1010 km in under one and a half hours.
If you want to experience a journey from Patna or Gorakhpur to Kathmandu, you can also take a bus ride. Once you arrive in Kathmandu, you can take the Tribhuvan Highway in the southern direction, the Prithvi Highway in the western direction, or the Araniko Highway in the northern direction. These highways are the primary routes connecting the capital city with other parts of the country for long-distance travel.
“Navigating the Visa Process: A Guide to Success”
According to the 1950 Peace and Friendship Treaty between Nepal and India, Indians can travel to Nepal without needing a visa. Individuals from India can freely cross the borders without needing a passport or visa. The only requirement is to present a valid identification card from their country to prove their Indian citizenship.
If you’re traveling from India to Kathmandu, here’s a guide to help you plan your journey using different transportation modes.
By Air
The most convenient option to get to Kathmandu is to fly from India. The busiest airport in Nepal, Tribhuvan International Airport, is located just 6 km from the city and offers multiple flights from various Indian cities such as Delhi, Mumbai, Kolkata, Lucknow, Pune, and Bangalore. The flight duration is approximately 1 hour and 30 minutes for the 800 km journey. Additionally, the international terminal at Tribhuvan International Airport connects Kathmandu to around 30 cities in Europe and Asia. Air India and Jet Airways are the top airlines operating flights from India to Kathmandu.
By Road
Traveling by road is a standard method of transportation between India and Kathmandu, with multiple routes available for residents of both countries. The Sunaili border crossing near Gorakhpur in Uttar Pradesh is the most heavily used border crossing between India and Nepal. Another frequently used crossing is Raxaul near Patna in Bihar, although the town is not lively. Direct bus services from Delhi, Varanasi, or Raxaul to Kathmandu are also available, with travel times ranging from 7 to 10 hours depending on the starting point. For those residing in the eastern regions of West Bengal, Sikkim, and the northeastern states of India, the Panitanki border is the recommended choice. From Siliguri in West Bengal and Gangtok in Sikkim, there are bus services, jeeps, and hired cars to Kathmandu, typically taking 14 to 16 hours to complete the journey.
By Train
One can take the Delhi-UP route to Kathmandu from India by train. The closest railway station to Kathmandu is Gorakhpur in UP, easily accessible from Delhi. Unfortunately, there is no direct train from India to Kathmandu, but Gorakhpur is the nearest option. Previously, a train ran between Janakpur in Nepal and Jainagar in India, but the line is currently out of service. From Gorakhpur, passengers can take local buses or jeeps to the border at Sunauli in 3 hours and then board overnight buses to Kathmandu from Bhairawa.
Fitness Required & Preparation Guide For Everest Base Camp Trek
If you’re preparing for a Everest Base Camp Trek, Trekup India recommends jogging as part of your fitness routine. Jogging helps work out the same muscle groups that you’ll use during trekking and can help you build endurance. You don’t need any special equipment to get started.
Fitness Target
Trekup India has put the Everest Base Camp Trek into an difficult grade-level trek.

For Difficult – Challenging Treks – In order to be well-prepared for your upcoming trek, it is recommended that you focus on building your endurance by aiming to cover a distance of 5.5 kilometers in less than 45 minutes. This will help you to develop the necessary stamina and strength required to successfully complete your journey.
How to Achieve This Fitness Target?
To start preparing for your trek:
- Try jogging for at least five days every week.
- If you find 5 km too difficult at first, begin with 2 km and gradually increase over 2-3 weeks.
- Once you feel more comfortable running 5 km, focus on improving your speed gradually on a daily basis.
It is important to ensure that you can consistently complete 4.5 km in under 40 minutes for at least two weeks before your planned trek. Allow yourself 6-8 weeks to prepare physically for the journey.
Strength Training exercises that benefit Trekking
Trekking is an activity that demands a good level of strength.

Trekking is a demanding activity that requires good cardiovascular endurance, muscular strength, and overall fitness. To help you prepare for your trek, incorporating bodyweight exercises into your training routine can be an effective way to build strength, improve stability, and enhance endurance, all of which are crucial for a successful trek. In this regard, here’s a breakdown of body weight exercises categorized by the specific body parts they target and the benefits they offer during trekking.
1. Lower Body Exercises
Lower body exercises like squats and lunges are great for building lower body strength, essential for trekking.
a. Squats
Squats are an excellent exercise for building lower body strength, essential for trekking. They target the quadriceps, hamstrings, glutes, and calves. Solid quadriceps and glutes provide power for ascending and tackling uphill climbs, while vital hamstrings aid stability during descents. This is particularly helpful in navigating uneven terrain during trekking.
How to perform Squats Exercises:
- Stand with feet shoulder-width apart, toes pointing slightly outward.
- Lower your body by bending your knees and hips, keeping your back straight.
- Lower until your thighs are parallel to the ground or as low as comfortable.
- Push through your heels to return to the starting position.
b. Lunges
Lunges target the quadriceps, hamstrings, glutes, and calves. They improve lower body strength, balance, and stability, crucial for maintaining control on rocky trails and steep slopes. Additionally, they enhance flexibility, reducing the risk of injury while trekking.
How to Perform Lunge Exercises:
- Stand with feet hip-width apart, hands on hips or sides.
- Take a step forward with one foot, lowering your body until both knees are bent at 90-degree angles.
- Push through the heel of your front foot to return to the starting position.
- Repeat on the other side, alternating legs.
2. Upper Body Exercises
Upper body exercises such as push-ups and pull-ups effectively strengthen the upper body, especially the chest and shoulders, which are essential for carrying a backpack during treks.
a. Push-Ups
Targets: Chest, shoulders, triceps, and core.
Benefits for Trekking: Push-ups are an effective exercise to strengthen the upper body, especially the chest and shoulders, essential for carrying a backpack during treks. Improved upper body strength will also help maintain posture and stability while traversing challenging terrain.
How to Perform Push-Ups Exercises:
- Start in a plank position with hands shoulder-width apart and body in a straight line from head to heels.
- Lower your body by bending your elbows until your chest nearly touches the ground.
- Push through your palms to return to the starting position.
- Keep your core engaged throughout the movement.
b. Pull-Ups/Bodyweight Rows:
Targeting the back, biceps, and shoulders can significantly benefit trekking. You can strengthen these muscle groups by performing pull-ups or bodyweight rows and improve your posture and balance while carrying a backpack. Additionally, more muscular back muscles can help reduce the risk of back strain and fatigue during long treks, making your journey safer and more comfortable.
3. Core Exercises
Core exercises like planks and Russian twists can help strengthen the core muscles, which are crucial for maintaining stability and balance while trekking on uneven terrain.
a. Planks
Targets: Abdominals, obliques, and lower back.
Benefits for Trekking: Planks are an effective exercise that helps strengthen the core muscles. These muscles are crucial for maintaining stability and balance while trekking on uneven terrain. A strong core also helps improve posture, reducing the risk of back pain and fatigue during extended hikes.
How to Perform Planks Exercises:
- Start in a plank position with elbows directly under shoulders and body in a straight line from head to heels.
- Engage your core and hold the position, avoiding sagging or arching the back.
- Keep breathing steadily and hold for the desired duration.
b. Russian Twists
Targets: Obliques, abdominals, and lower back.
Benefits for Trekking: Russian twists engage the core muscles, particularly the obliques, improving rotational stability and balance. Enhanced core strength helps prevent injuries and improves overall performance during trekking.
How to Perform Russian Twist Exercises:
- Sit on the ground with knees bent and feet flat, leaning back slightly to engage the core.
- Clasp hands together and twist the torso to one side, bringing the hands towards the ground beside the hip.
- Return to the centre, then twist to the other side.
- Continue alternating sides for the desired number of repetitions.
4. Full Body/Cardiovascular Exercises
Full-body/cardiovascular exercises like burpees and mountain climbers are excellent for improving cardiovascular endurance, strength, and agility.
a.Burpees
Burpees are an excellent full-body exercise that targets your legs, chest, arms, and core. This exercise dramatically benefits trekking enthusiasts, improving cardiovascular endurance, strength, and agility. Regularly incorporating burpees into your workout routine can enhance your overall fitness level, which can help you endure long hikes and rugged terrains with ease.
How to Perform Burpees Exercises:
- Start in a standing position.
- Squat down and place hands on the ground.
- Jump feet back into a plank position.
- Perform a push-up.
- Jump feet back to the squat position.
- Explosively jump up into the air, reaching overhead.
- Land softly and repeat the sequence.
b. Mountain Climbers
Mountain climbers target the core, shoulders, chest, and legs. This dynamic, full-body exercise can significantly improve cardiovascular endurance and agility. It is an excellent functional workout for trekking preparation as it engages both the upper and lower body muscles while strengthening the core muscles.
How to Perform Mountain Climbers Exercises:
- Start in a plank position with hands shoulder-width apart and body in a straight line from head to heels.
- Drive one knee towards the chest, then quickly switch legs, alternating in a running motion.
- Keep the core engaged and the hips stable throughout the movement.
- Continue at a moderate to fast pace for the desired duration.
Incorporating bodyweight exercises into your training routine can help you build strength and endurance and prepare your body for the physical demands of trekking. Consistency and proper form are crucial to maximizing the benefits of these exercises and ensuring a safe and enjoyable trekking experience. Engaging your core muscles, including obliques, abdominals, and lower back, with Russian twists can improve your rotational stability and balance, preventing injuries and enhancing overall performance during trekking.
When incorporating strength training exercises into your workout routine, it’s essential to maintain proper form and technique to avoid injury. Start with lighter weights and gradually increase the intensity as you progress, focusing on compound exercises targeting multiple muscle groups simultaneously. Some examples of practical strength training exercises for trekking include squats, lunges, deadlifts, and pull-ups.
Remember to give your muscles time to recover between workouts, and remember to stretch before and after your workouts to prevent injury and improve flexibility. Combining strength training with jogging and proper stretching allows you to take your fitness to the next level and confidently tackle even the most challenging treks.
Our Trekkers Reviews And Expreinces


Food Provided by Us During Trek
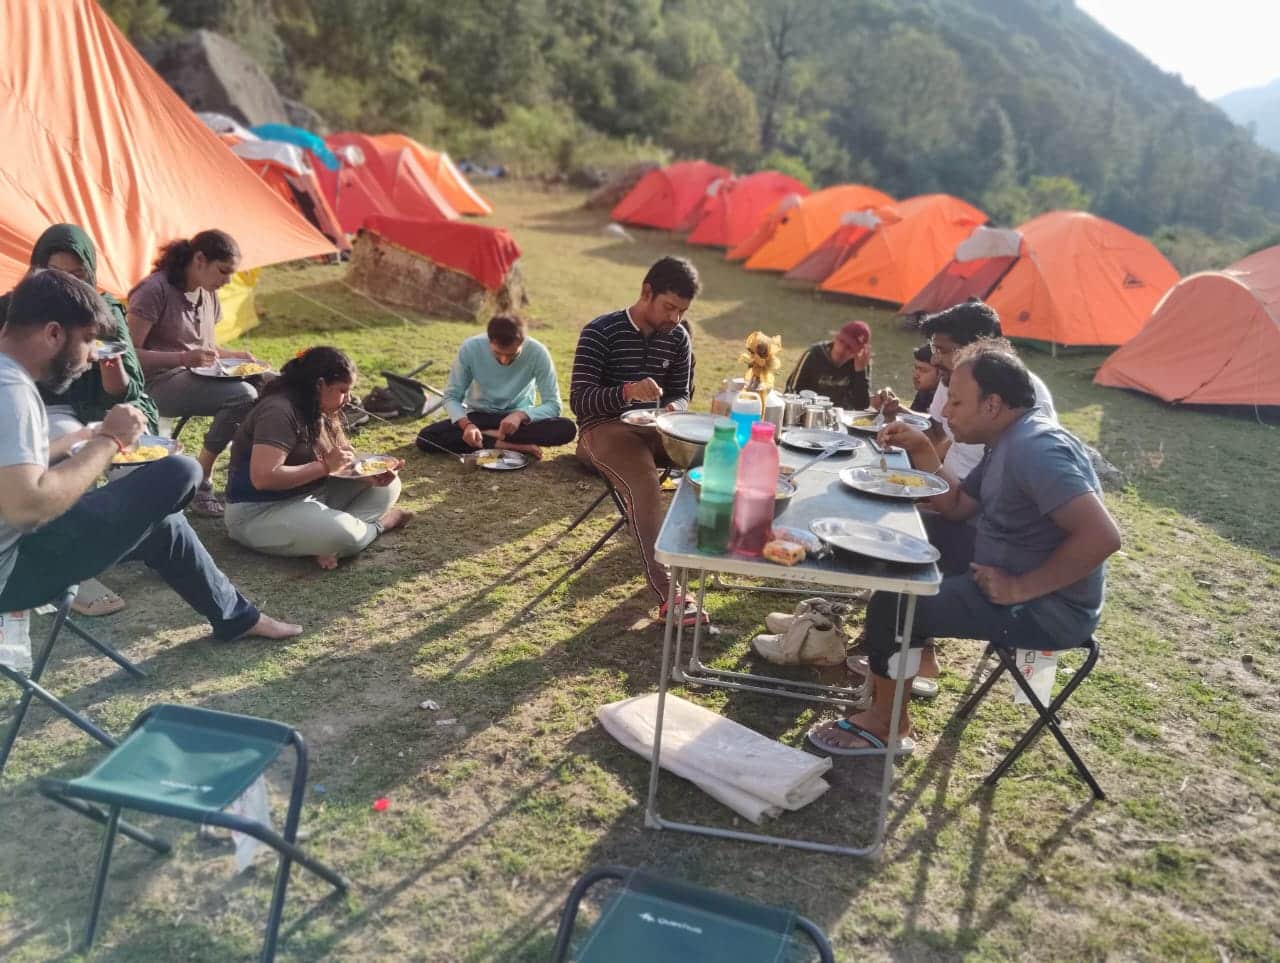
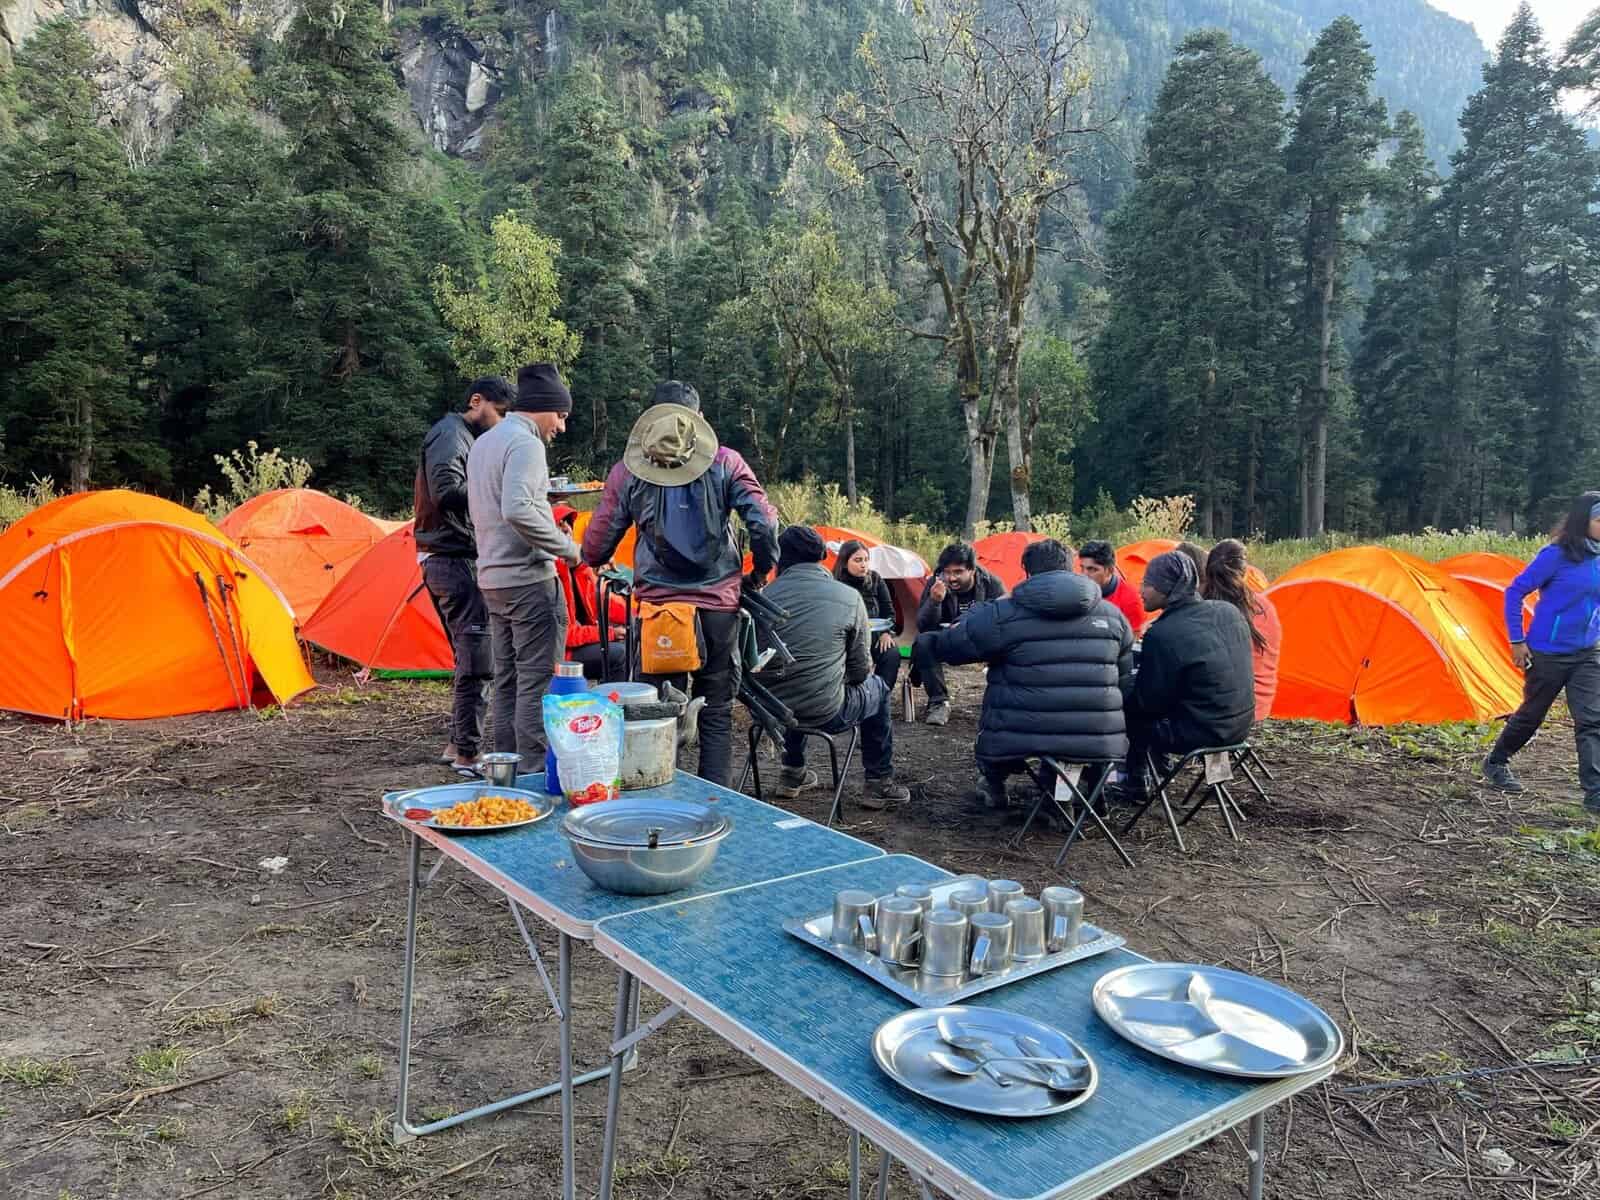
We provide only Indian vegetarian food, and your meal will mainly consist of Indian bread, vegetables, lentils, rice, and a delicious dessert. During your trek, we will serve three meals a day, including breakfast, lunch, and dinner. You will also be served tea, snacks, and lip-smacking soup in the evening before dinner. If it is a long day of trekking, you will be given a packed snack.
After extensive research on the trekkers’ nutritional requirements, we prepare the menu. Before putting all the meals together, we also consider the altitude and the weather.
The meal we serve during the trek is perfectly balanced with calories, carbohydrates, vitamins, protein, fibre, and minerals. You need to know that all our cooks have great expertise in cooking and have undergone thorough training. So, get ready to enjoy delectable and lip-smacking dishes during your trek. You will be served with lemon tea in the tent to start your day with a refreshed feeling. Before leaving the campsite for trekking, you will be given a hot finger-licking breakfast like upma, Aallu Prantha, Besan Chilla, Poha, Daliya, Corn flakes, and Maggie, along with tea or coffee.
If your trek is longer, we also offer some fresh local fruits such as apples and healthy drinks like Frootie or Maaza. In the afternoon, you will be served a simple & healthy lunch, while at around 04:00 pm, you will be given tea and a light evening breakfast. After you reach your campsite at night, you will be served a hot and delightful dinner.
After reading this, you must have understood the food we provided on the trek; you don’t need to worry about food. Many trekkers repeatedly trek with us because of the food we provide. Thus, we will give you unforgettable experiences.
Safety During Everest Base Camp Trek

Trekking with us for the Everest Base Camp Trek is entirely safe because we have a team of trek leaders qualified in Wilderness first-aid and complete information about the high-altitude glitches. During the trek, we carry a full first-aid kit that contains all the essential medicines. Before trekking with us, you must ensure that you are medically fit for the trek; for us, your medical fitness is more important than anything else.
Right from our establishment, we at Trekup India have been continuously introducing new safety practices into Indian trekking to ensure the safety of voyagers. Trekup India introduced microspikes and made emergency bottled oxygen mandatory for all treks. Our trek leaders take your daily Pulse oximeter reading. We at Trekup India introduced the radio walkie-talkie as a safety communication device.
How can we ensure that your trek is safe with us?
We have noticed that most trek-organizing organizations do not follow these systems, but with time, they are following us; several competing companies are adopting these practices and organizing great, safe treks.
We ensure complete technical safety in the mountain. Our company has a vast team of more than 100 guides and trek leaders who serve on Himalayan treks. One of the best things about our team is that all the members are trained professionally by the Nehru Institute of Mountaineering, Indian Mountaineering Foundation Delhi, and Hanifle Center Outdoor Education Mussoorie.
Explore our New Safety Protocols
To ensure a perfect Trek, we have introduced some new safety checks to ensure excellent safety for our trekkers.
Our On-trek safety checks include:
- Daily oxygen saturation, along with pulse readings
- Stretchers team appointed on every trek
- Radios
- Trained mountain staff and complete safety
- Additional oxygen cylinders
- Special medical kit for high-altitude treks
- Microspikes on all types of snow treks
- Experienced Trek leaders, as well as safety
- Technical team on all snowy slopes
For Us, Your Safety Is the Top Priority
At Trekup India, you will find a team with local knowledge and fluency in English and Hindi. This helps ensure that you have a fantastic trek. Not only this, but we also pay attention to your health and safety because this is something we cannot ignore. All the team leaders involved in trekking have already undergone several professional courses in first aid, portable altitude chamber training, CPR, environmental awareness training, and advanced wilderness emergency medicine.
We also carry a complete first aid medical kit on every trek and trip we organize. Apart from the medical kit, we take a portable altitude chamber (if needed) and medical oxygen for all high-altitude treks. Our company has significant expertise in organizing all sorts of group adventure holidays for family groups, school and college groups, and friend groups. We have many travel options that suit different fitness levels and travelling styles.
Regardless of the group size, we value each and every member of our trekking groups. Our commitment to personal attention ensures that your needs and safety are always our top priority.
Who we are?
Trekup India has been a stalwart in the Adventure Tourism industry for 30 years. Since our inception, we have been dedicated to providing top-notch treks, voyages, trekking programs, and high-altitude expeditions. Our extensive experience is a testament to our commitment to your adventure and safety.
We organize treks in Uttarakhand, Kashmir, Sikkim, and Himachal while being part of the trekking community; we feature more than 75 documented Himalayan treks. In addition to other outdoor activities, our company also organizes trips for schools, colleges, and families.
Therefore, we maintain the quality of services offered to our valuable customers.
Must Read These Information Of Everest Base Camp Trek
Why You Should Do Everest Base Camp Trek
As it is a once-in-a-lifetime opportunity, everyone must go on this trek. There are some stunning views of the Himalayas that you will not find anywhere else. Another reason for taking this trek is spirituality, as there are various beautiful monasteries like Tengboche Monastery. You have the opportunity to take a flight along the hills because the airport is located in Lukla. You get to enjoy the sightseeing experience of Sagarmatha National Park which is a UNESCO world heritage site. There you can see animals like snow leopards, Himalayan goats & eagles, and blue sheep.
Best time to do Everest Base Camp Trek
The most ideal time to do this trek is from Early March to Late June, and another is from September to Early November. These are the preferred times because the trail is most enjoyable during the pre- and post-monsoon seasons. Because it is neither too warm in summer nor too cold in winter, you can enjoy the sights, fresh air, blue and clear sky.
Frequently Asked Questions About Everest Base Camp Trek
How difficult is the Everest Base Camp Trek?
Everest Base Camp trek is moderately challenging. Though technical climbing abilities are not required, the trek requires walking far (5–8 hours per day) along irregular terrain at high altitudes. The two largest challenges are lower oxygen and possible altitude illness. With the right acclimatization, physical conditioning, and gradual walking pace, most individuals can attempt the trek.
Can a beginner climb up the Everest Base Camp?
Yes, an inexperienced person or a beginner or even somebody who has started trekking somewhat late in their lives can hike up to Everest Base Camp if he/she is fit and also well-prepared mentally. The beginners must prepare and train for the trek at least 2–3 months prior to the expedition with cardiovascular training, body strengthening, and trial hikes. Opting for a trek plan including acclimatization days is also vital as well as hiking with an organized trekking group to support him/her every step of the way.
How long does it take to trek to Everest Base Camp?
The trek to Everest Base Camp normally takes 12–14 days, with 8 days to the base camp and 3–4 days for the return trip. This also includes 1–2 acclimatization days so your body can get used to high altitude. The itinerary that Trekup India has designed for Everest Base Camp Trek is 14 days long to ensure that you are properly acclimatized to the high altitude and have ample rest days.
How much does it cost to trek Everest Base Camp?
At Trekup India, we charge $1500 which typically includes permits, guides, trek leader, porters, lodging, meals, and trekking gear.


